Make the mask of the
Basic Shape layer active in
Photoshop by clicking on it.
Select the Brush tool  and use a hard round brush with a size of 20 and an opacity of 100:

Make sure that your foreground color is black.
Click once beside the cowboy's shoulder, above the letter "D" in the word "REWARD". Since our mask is active, it will create a hole in our poster.
Select Photoshop's Pencil tool  and change the foreground color to white (painting with white on a mask means we're going to "unhide" some areas).
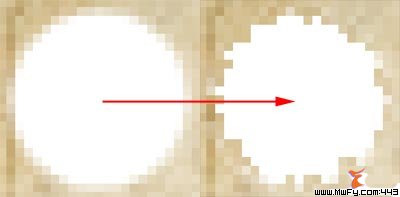
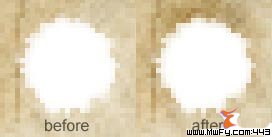
Zoom in on the bullet hole (make sure that the layer mask is still active) and paint on the inside of the edge to make it look rough (don't go overboard with it). The next screenshot shows the before/after image:
Select the Blur tool and in the option bar set its Strength to 20%. Move your mouse cursor in a circular motion 2 times over the edge of our bullet hole to slightly soften the edges.
Click on the top layer named Folds to make it the active layer.
Click on the Create a new layer icon in the layers palette to create a new layer and name it Global Dodge/Burn.
Clip this layer.
Go to the menu and select Edit / Fill... and in the new window that pops up, select 50% Gray in the box that reads Use: and click OK.
Set the blending mode of this layer to Soft Light.
Select the Burn tool  , select a soft brush with a size of 8, set the Range to Midtones and the Exposure to 100%.
Zoom in on the bullet hole and and burn the edges of the bullet hole, a little bit more at the top than the bottom:
Now continue with some smaller Burn brush to darken more of the edges of the poster and use some larger soft brushes in combination with Burn and Dodge  to improve other areas.
Ok, that was the last step of our tutorial. Let's have a look at the final layers palette before we look the final poster:
The final Image

Final Words
This brings us to another question; why so many layers? The advantage of these layers is that you can edit several elements without having the risk to affect those areas that shouldn't be affected. That's also the reason why several 50% gray layers were used to separate the different elements. We call this Non-Destructive Editing and you can read more about it in our Non-Destructive Editing tutorial.
Do understand that this Photoshop tutorial should server as guide, not as a solution. I mean by this that you should try to remember the approach and techniques, but not every single step or setting that was used. Once you understand how to tackle different problems, you'll be able to find your own solutions.
I hope that you enjoyed this Photoshop tutorial.


