Click in
Photoshop on the mask of the
Basic Shape layer to make it the active layer.
Select the Brush tool  and select a hard brush (Hardness is 100%) and use a size of 10 (the opacity and flow option should both have the value 100%)
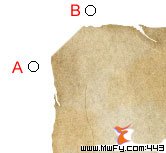
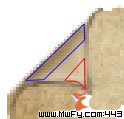
Now remove the upper left and bottom right corner and make sure that you end up with a straight edge under an angle of about 45 degrees:
Tip: to make it easier to get a straight edge, hold down the shift key, click at A, move the cursor to B and click again and release the shift key again. Continue to remove the leftovers.
Click on the top layer to make it the active layer and add a new layer by clicking on the Create a new layer icon at the bottom of the layers palette.
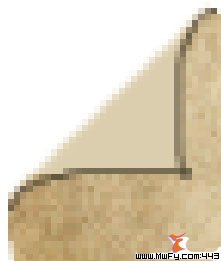
Clip this layer and rename it to Folds.
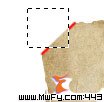
Go to the toolbar and select the Rectangular Marquee tool  an make a rectangular selection as shown in the next screenshot. Note that you should not cover the complete diagonal line, but leave the beginning and end untouched (marked here in red):
Set the foreground color to DBCEAD.
Select the Paint Bucket tool  and fill this selection with the current foreground color.
Go to the bottom right of the poster and use the same Photoshop technique on the other fold:

Set the foreground color to 8A7246 (darker brown).
Select the Brush tool and select a soft round brush (Hardness is 0%), use a size of 1 and an opacity flow100% and paint a brown, slightly curved(!) edge as shown in this screenshot (make sure you zoom in to about 500%):
Do the same with the other fold.
Continue by adding some shading to the fold to give it a 3D illusion (look at the next screenshot).
Use the Burn tool  with a soft brush, Size of 5, Range set to Midtones and Exposure set to 30%.
blue
Use the Dodge tool  with a soft brush, Size of 5, Range set to Midtones and Exposure set to 30%.
Now use the dodge tool to make make the area marked with red slightly lighter.
Finish off by selecting the Blur tool  with a size of 5 and a Strength setting of 20% and slightly blur the areas where you just used Dodge and Burn, but don't move over the edge of the fold. If the edge is too sharp in some areas then use the blur tool to go over this edge only once.
Use the same approach for the other fold.

Note: if the dark brown edge of the fold turns out to be too dark, then just select the Dodge tool with a soft brush, Size of 1, Range set to Midtones and Exposure set to 30% and move a few times over the edge to make it lighter.
Click on the Scratches layer to make it the active layer and add a new layer on top of this layer by clicking on the Create a new layer iconin the layers palette.
Rename this new layer to Fold Shadow.
Make sure the foreground color is still the dark brown color (8A7246) that we used to draw the edge of the fold.
Select the Brush tool and select a soft brush with a Size of 20.
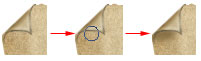
Click with the mouse button at the location marked in the center image of the next screenshot and while holding down the mouse button mouse the cursor to the left (once!) to draw the shadow:
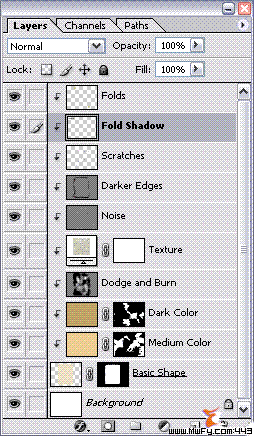
This is how our layers palette looks right now:
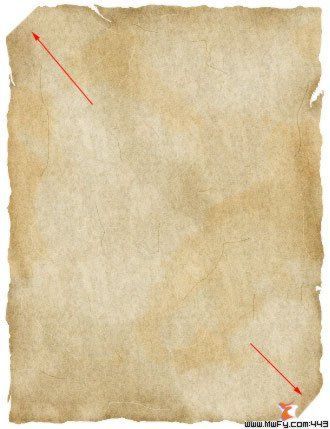
This is what the image looks like right now (yours doesn't have to be exactly the same of course):