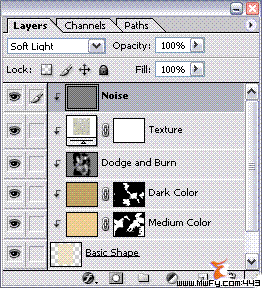
Click on the top layer in
Photoshop (
Dodge and Burn to make it the active layer.
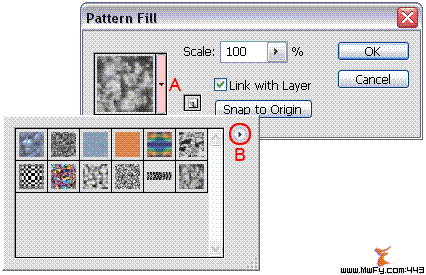
Click on the Create New fill or adjustment layer icon  in the layers palette and select Pattern...
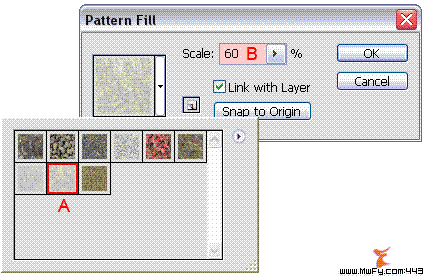
In the Pattern Fill window click on the button with the little black triangle (A) and then open the fly-out menu by clicking on the circular button marked with B:
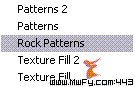
In the window that opens select Rock Patterns:
A new window will open asking you whether you want to replace the current patterns with the selected patterns:
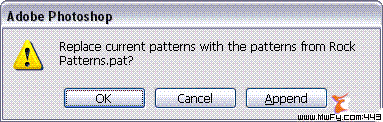
It's up to you whether you answer with OK or Append. I selected OK.
Note: by selecting OK you won't lose any default Adobe patterns, only the ones you added yourself.
After you answered the above question click once on the pattern marked with A in the next screenshot and enter a value of 60 for Scale B and click on OK:
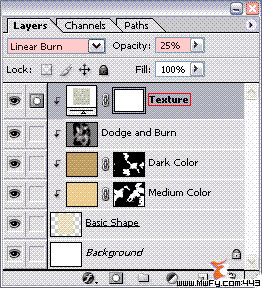
Continue by changing the blending mode of this layer to Linear Burn and the opacity to 25%.
Rename this layer to Texture by double clicking on its name and clip it by pressing Ctrl+G (command + G on the Mac) or Ctrl + Alt + G (Command + Option + G on the Mac) when you use Photoshop CS2:
Note: you can always go back and select a different pattern by clicking on the thumbnail of this layer in the layers palette.
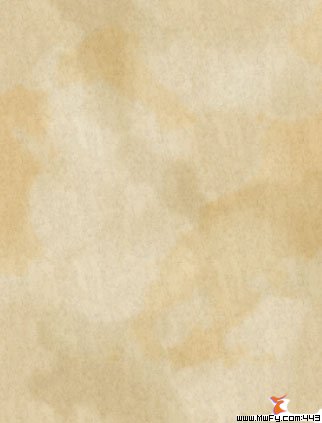
Result so far:
Make sure that the top layer is the active layer and click on the Create a new layer icon in the layers palette to add a new layer and rename it Noise by double clicking on its name.
Go to the menu and select Edit / Fill... and in the new window that pops up, select 50% Gray in the box that reads Use: and click OK like we did in one of the previous steps.
Set the blending mode of this layer to Soft Light.
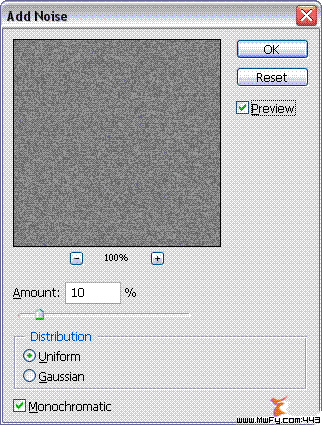
Go to the menu and select Filter / Noise / Add Noise... and enter an Amount of 10%, set Distribution to Uniform and check the box named Monochromatic and click OK:
Clip this layer also by pressing Ctrl+G (command + G on the Mac) or Ctrl + Alt + G (Command + Option + G on the Mac) when you use Photoshop CS2: