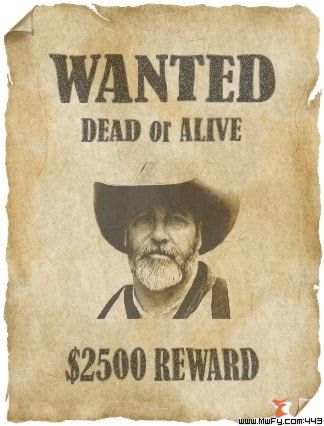
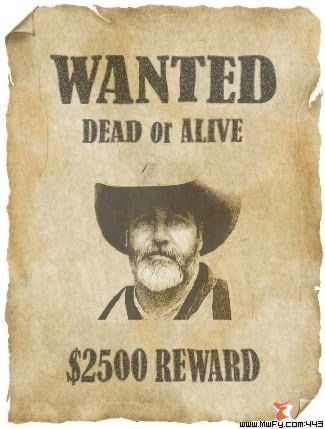
For this
Photoshop tutorial we're going to use a photograph of a modern day cowboy.
You can grab the original
Photoshop PSD file
here (
right click on the link and select
Save target as... ).
First make sure that Layer Set/Group named Text is our active layer.
Now open the file you've just downloaded and select the Move tool  in your tool bar and drag and drop this image in the file you're working on.
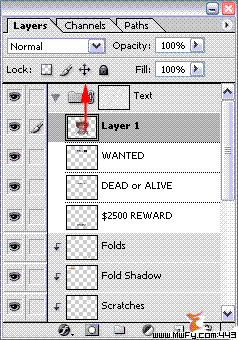
You'll notice when you check your file that the image of the cowboy ended up in your Layer Set/Group named Text. We have to move it out of there, so with the Move tool still active, click on the thumbnail of the layer with the cowboy and while holding down the left mouse button, move the cursor upwards as shown with the red arrow.
Once a dark line appears (the end of the arrow in our screenshot), release the mouse button and the layer will move out of the Layer Set/Group.
Rename this layer to Portrait.
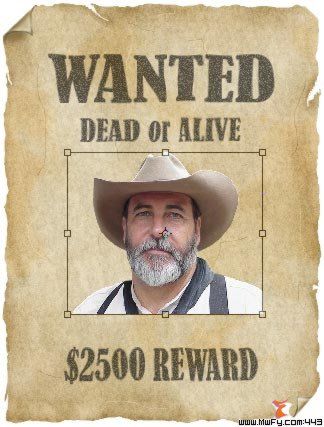
Press Ctrl T (Command + T on the Mac) to select the Free Transform tool.
Hold down the shift key and drag one of the corners inward to make the image smaller and release the shift key once you're happy with the size.
Note: by holding down the shift key we constrain the proportions (=aspect ratio) or in other words we avoid distorting the image.
Use the Move tool to align the image horizontally and vertically. Needless to say that at this point can still resize the image if you feel like, as long as you don't forget to hold down the shift key.
Tip: keep the top of his hat aligned with the word "or" that's part of the "DEAD or Alive" text.
When you're done, double click inside the free transform box to finalize the transformation.
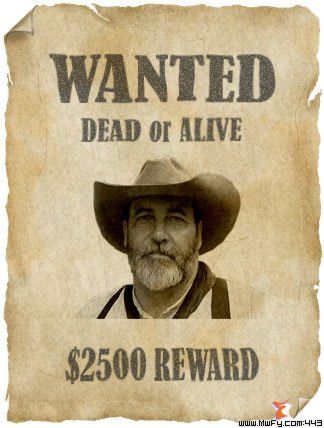
With the Portrait layer active, select in the menu Image / Adjustments / Desaturate.
Set the blending mode of this layer to Linear Burn:
Hold the Alt key (Option key on the Mac) and click on the New fill or adjustment layer icon at the bottom of your layers palette and in the window that opens select Levels... .
A New Layer window will open and that's because we held down the Alt key while adding a new layer, in our case an adjustment layer. This allows to do two things right now that we normally would have done after we created the layer;
- Rename the layer to Portrait Contrast (A) (normally we would rename the layer by double clicking on its name)
- Clip the layer with the previous layer by checking the appropriate box (B) (previously we used a shortcut)
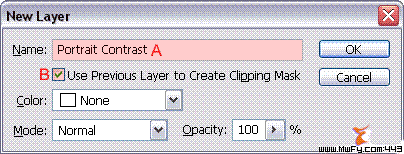
After entering the layer's name and checking the box, click on OK to open the Levels window.
Move the black slider to the right and the white slider to the left to increase the contrast of the portrait.
I've marked in the next screenshot which locations worked best for me:
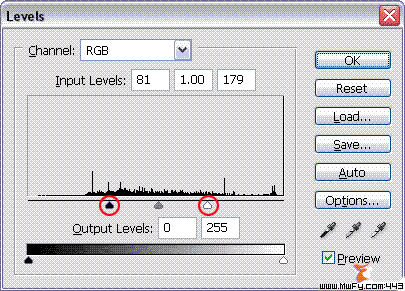
Feel free to use the gray slider too if you think that it can improve the image.
Why did we increase the contrast? Increasing the contrast is the same as lowering the number of number of tones, which imitates the lack of tones that were available in the early days.
Click OK and click on the thumbnail of the Portrait layer to make it active and lower its opacity to about 55%.
Click on the top layer to make it the active layer and add a new layer by clicking on the Create a new layer icon at the bottom of the layers palette.
Clip this layer and rename it to Portrait Cheeks .
Make sure that your foreground color is white.
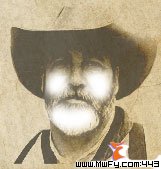
Select the Brush tool and select a soft round brush with a Size of 20and paint some white on his cheeks and bottom part of the beard (just keep it simple):
Set the blending mode of this layer to Overlay and the opacity to about 40%:
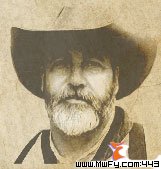
The result is that it makes our portrait pop out a little more on the poster. It also makes the photograph look more as if it was shot with one of the early cameras (decreased tonal values/low dynamic range).
Click once on the thumbnail of the Portrait Contrast layer to make it the active layer.
Hold down the Alt key (Option key on the Mac) and click on the Create a new layer icon in the layers palette.
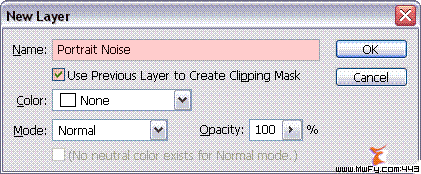
In the New Layer window enter for Name Portrait Noise, check the box 'Use Previous Layer to Create Clipping Mask' and click OK:
Go to the menu and select Edit / Fill... and in the new window that pops up, select 50% Gray in the box that reads Use: and click OK.
Set the blending mode of this layer to Soft Light.
Return to the menu and select Filter / Noise / Add Noise... and enter an Amount between 30-40%, set Distribution to Uniform, check the box Monochromatic and click OK:
Let's continue by adding a soft edge to the bottom of the portrait.
Make the Portrait layer the active layer by clicking on its thumbnail in the layers palette.
Click in on the Add Layer Mask  icon in the layers palette to add a mask to this layer.
Make sure that the foreground color is black.
Select the Brush tool  and select a soft brush with a size of about 30 and set its opacity to 30%:

Make sure that the Layer Mask is active (it will have a double border) and paint a soft edge as shown in the next screenshot.
Go to the menu after you're done and select Filter / Noise / Add Noise... and enter an Amount of 10%, set Distribution to Uniform, check the box Monochromatic and click OK:
That last bit of noise was needed to increase the noise in the shadows.


