Click on the
Folds layer in
Photoshop to make it the active layer.
Add a Layer Set by clicking on the Create a new set icon  in the layers palette.
 Note: In Photoshop CS2 a Layer Set is called a Layer Group.
Rename the Layer Set to Text by clicking on its name in the layers palette.
Click on the Create a new layer icon in the layers palette to add a new layer. That layer is now part of the layer set/group.
Horizontal TypeDblack
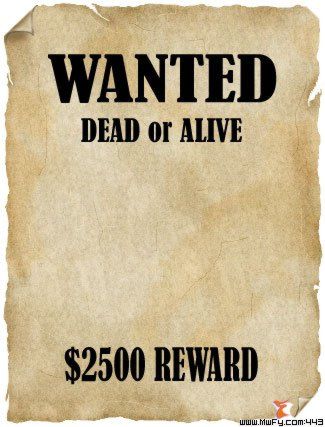
Select a thick font (I used Bernard MT Condensed) and type with capital letters: $2500 REWARD.
Click on the Create a new layer iconin the layers palette to add a new layerDEAD or ALIVE
Click on the Create a new layer iconin the layers palette to add a new layerWANTED
Change the size of the text and align up the 3 lines of text until it looks a little like this:
When you're 100% sure that you're happy with the font, size and alignment of your text, right click (Control + click on the Mac) on the thumbnail of each text layer and select Rasterize Layer in the window that opens up.
Warning: after this the text wont be editable using the regular Horizontal Type tool.
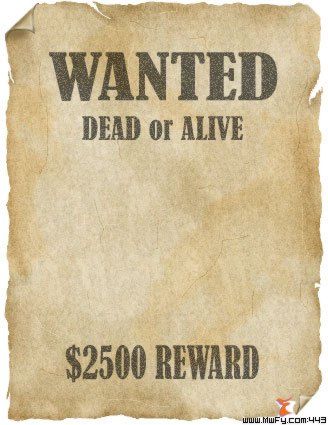
Click once on the thumbnail of the Layer Set/Group in your layers palette to make it active and change its opacity to 60% to make the text look faded.
Click on the Add layer mask icon in the layers palette to add a layer mask to the layer set/group.
Go to the menu and select Filter / Noise / Add Noise... and enter an Amount of 40%, set Distribution to Uniform and check the box named Monochromatic and click OK:
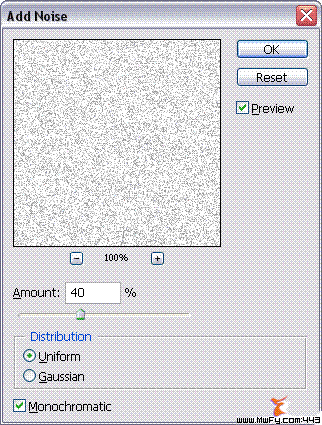
This gives the text a look as if the ink didn't saturate the paper for 100% (old equipment):
Save your work first before you continue.
Note: By placing all text in a Layer Set/Group, we only needed a single adjustment to affect 3 layers at the same time.
We only needed to add one noise mask (3 if we hadn't used a Layer Set) and we only needed to chance the opacity once (3 times if we hadn't used a Layer Set). So this is a good example of some of the advantages of grouping layers in Photoshop.
The text still looks a bit too perfect. Click on the $2500 REWARD layer to make it the active layer.
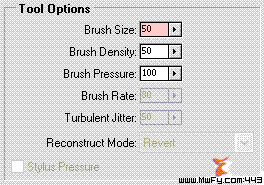
Select in the menu Filter / Liquify and select the Forward Warp tool  and enter on the right side of the Liquify window a value of 50 for Brush Size (make sure that the other 2 values are the same as the ones in the screenshot):
Now slowly move parts of the text up, down, left or right. Only make small changes to avoid that you go overboard with your corrections (use the next screenshot as a guideline). Use the same Photoshop technique for the two other layers that contain text:


 in the tool bar and press the letter


