In the following steps we're going to repeat the whole process for a second
Photoshop layer.
With the top layer active, click on the Create a new layer icon in the layers palette to add a new layer and rename it Dark Color by double clicking on its name.
Change the foreground color again like we did previously but his time use a value of C1A467.
Select the Paint Bucket tool  and fill the layer with our current foreground color.
Clip this layer by pressing Ctrl+G (command + G on the Mac).
 Note: If you use Photoshop CS2 you have to press Ctrl + Alt + G (Command + Option + G on the Mac) instead.
Add a mask to this layer by clicking on the Add layer mask icon  in the layers palette.
Press the letter D on your keyboard to make sure that the fore- and background color or white and black.
Go to the menu and select Filter / Render / Clouds:
Go to the menu and select Image / Adjustments / Levels...OK
Note: if you don't like the random result of the clouds filter, then return to the menu (with the proper mask active) and select Filter / Render / Clouds Levels
Change the opacity of the Dark Color layer to 15% and the opacity of the Medium Color layer to 35%:
The result should look something like this:

Click on the top layer to make it active and click on the Create a new layer icon in the layers palette to add a new layer and rename it Dodge and Burn by double clicking on its name.
Go to the menu and select Edit / Fill... and in the new window that pops up, select 50% Gray in the box that reads Use: and click OK:
Clip this layer by pressing Ctrl+G (command + G on the Mac) or Ctrl + Alt + G (Command + Option + G on the Mac) if you use Photoshop CS2.
Set the blending mode of this layer to Soft Light:
Select the Burn tool  in the tool bar.
Select a medium soft brush with a size of about 70 and set the range to Shadows. Exposure should stay at 100%:

Note: at this stage I only used a 70 brush. You can of course select a smaller brush or only select a smaller one at a later stage, it's all up to you.
Now move your cursor over some areas that you want to be darker. Make sure that you burn the edge more than the rest of the poster (edges of old documents are often darker, because that's where the hand grabs the paper). Don't burn the complete edge, but ignore some areas.
When you're happy with the result, select the Dodge tool  in the tool bar.
Use the same settings in the option bar that you used for the Burn tool.
Move your cursor over those areas that you want to be lighter.
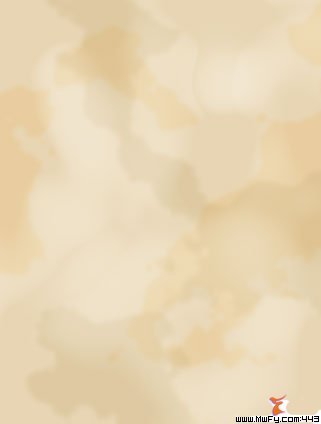
A quick look as how your image might look after you're done:
Continue by changing the opacity of this layer to 40%:
Now let's make the borders of the colored areas in layers Dark Color and Medium Color slightly softer using the following steps.
Click on the layer mask of the Dark Color layer to make it active.
In the menu select Filter / Blur / Gaussian Blur... and enter a value of 2 pixels for the Radius and click OK.
Click on the layer mask of the Medium Color layer to make it active.
In the menu select Filter / Blur / Gaussian Blur... and enter a value of 2 pixels for the Radius and click OK.
This is what your image might look like right now: