Introduction
In this Photoshop tutorial we're going to create an old poster. The main purpose of this tutorial is to show you many different Photoshop techniques and a non-destructive approach by using many separate layers.
The photograph that was used can be replaced by any other photograph, so you might even think about using this Photoshop tutorial for posters or cards with friends or family involved.
The tutorial contains 11 different sections
- Create the basic shape
- Create stains
- Add texture
- Create a rough edge
- Add rips
- Darken edges
- Add some scratches
- Add folds
- Add text
- Add a portrait
- Add a bullet hole
We will make use of many clipped layers (I will explain their function at a later stage).
Several Photoshop techniques will be used to create things like texture, a rough edge, rips, folds, dirt, scratches, etc.
There is little painting involved using the brush, but only in restricted areas, since most will be done with effects.
You don't have to be an experienced painter to achieve descent results with this tutorial and the few moments that you have to use a brush I will show you with screenshots what the result should look like.
Important: some of the steps require some freehand random movements with the mouse (painting, burning, dodging). This will also mean that your results will never be exactly the same as mine. However if you use the images mainly as a guideline then you can't go wrong, at least that was my experience after testing the finished tutorial.
Open a new file,
800x600 pixels.
Click on the Create a new layer icon  in the layers palette to add a new layer and rename it Basic Shape by double clicking on its name.
Select the Rectangular Marquee tool  and draw a rectangle like this:
Double click on the foreground color in the tool bar marked with red in this screenshot:

In the Color Picker window that opens enter the value EEE0C5 (beige) in the area marked with red.
Note: to save you time and to avoid mistakes, just copy/paste the number.
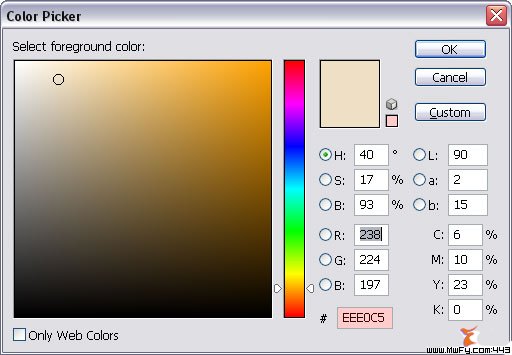
Click OK
Select the Paint Bucket tool  and fill the rectangular selection with the current foreground color:
Select in the menu Select / Deselect to remove the current rectangular selection.
In this section we're going to use
Photoshop to add two random stains to our poster. You can paint them by hand using a brush, but I will show you that you can also use the clouds filter instead.
Change the foreground color again like we did previously but his time use a value of EECE93.
Click on the Create a new layer icon in the layers palette to add a new layer and rename it Medium Color by double clicking on its name.
Select the Paint Bucket tool and fill the layer with the current foreground color.
Clip this layer with the previous layer by pressing Ctrl+G (command + G on the Mac).
 Note: If you use Photoshop CS2 you have to press Ctrl + Alt + G (Command + Option + G on the Mac) instead.
Note: a layer that is clipped will only affect the pixels of the layer to which it's clipped (attached) and transparent areas will be ignored.
Add a mask to this layer by clicking on the Add layer mask icon in the layers palette.
Press the letter D on your keyboard to make your fore- and background color white and black.
Go to the menu and select Filter / Render / Clouds:
Return to the menu and select Image / Adjustments / Levels...
...to the same location below the histogram (the sliders should overlap):

It depends on your personal preference and the result of the clouds filter where you want that location to be.
Keep an eye on your document window to figure out which location gives you the preferred result. In my case I was happy with the following:

Click OK.
This is how our layers palette looks at this stage:
Continue on the next page.


