Add a new layer in
Photoshop by clicking on the
Create a new layer icon

.
Go to the menu and select Edit / Fill...
Select 50% Gray (make sure the other settings are the same) and click OK.
Clip this layer with the Clouds Merged layer by pressing Ctrl + G (Command + G on the Mac) or or Ctrl + Alt + G (Command + Option + G on the Mac) if you use Photoshop CS2.
Continue by setting the blending mode of this layer to Overlay:

Select the Burn tool  in the tool bar (might be hiding under the Dodge
  or Sponge
  tool)
tool)
Check the option bar. Click on the button marked with A to bring up the Brush Preset picker and select a regular round brush. Select a Master Diameter of 65 px (A) and a Hardness of 0% (C):
Click on A again to close the Brush Preset picker window.
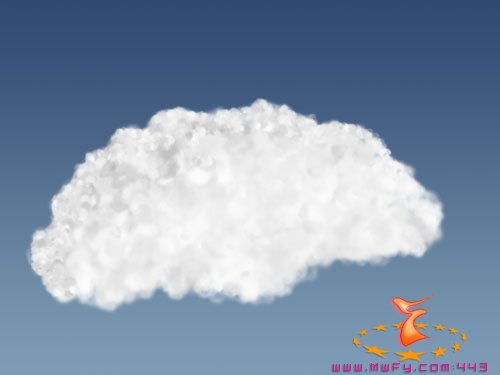
With Layer 4 still selected, paint over the clouds with the burn tool to bring out the contrast.
Move your mouse cursor over the image to see where I used the burn tool:

Select the
foreground color 
and enter a value of
304971 (darker blue)) and click
OK.
Click on the Create new fill or adjustment layer icon  at the bottom of the layers palette and select Gradient... in the window that opens. A new window will open:
Use the same settings as shown in this screenshot but don't click OK yet, wait until I tell you to do so.
Make sure that you select the proper gradient. You can select the gradient by clicking on the button marked with A.
A window will pop up in which you have to double-click on the gradient marked with the red arrow (the one that goes from blue, our current foreground color, to transparent):
Why did I tell you not to click on the OK button yet? Because before we click OK, we should position our gradient in the document window. Move your mouse cursor over to your document window and you'll notice that the cursor has switched to the following cursor  , indicating that we're now able to move the gradient.
Move your gradient in the document window by holding down your mouse button until you have something like this:
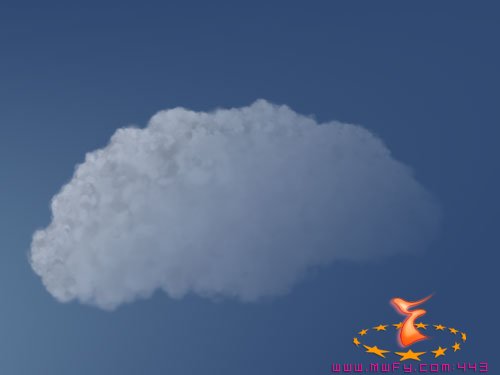
Don't make the right bottom side of the cloud too dark or too light, just follow the example.
When you're done, return to the Gradient Fill window and click OK.
Clip this layer with the layer underneath (Layer 4) by pressing Ctrl + G (Command + G on the Mac) or or Ctrl + Alt + G (Command + Option + G on the Mac) if you use Photoshop CS2. :
This is how your layers palette should look like right now:
Marked with red is the mask that's part of the adjustment layer. Click on it once to make sure it's active: it will have a double border if it's active and when you have Photoshop CS or earlier a mask icon  will appear in front of the layer.
Press the letter D on your keyboard to set the foreground color to black and the background color to white.
If they're switched, just press X. Just make sure that the bottom of your tool bar looks like this: 
Go to the tool bar and select the Brush Tool  . Select a round brush with a Master Diameter of 35 px (A) and a Hardness of 0% (C) (check previous steps for screenshots if needed).
Check the other settings in the options bar and make sure yours are the same, especially the 20% opacity:

Now start painting on the mask with black to mask those areas that need to be brighter, like the left side of the cloud and the top. Try to paint randomly to avoid that the border of the shadow becomes a straight line. Use a lower or higher opacity if you feel the need or a different size brush. Remember, if you make a mistake then just press Ctrl+Z (Command+Z on the Mac) to undo your last brush stroke. You can also correct your mask by painting with white instead by pressing the letter X on your keyboard and pressing X again to continue with black.
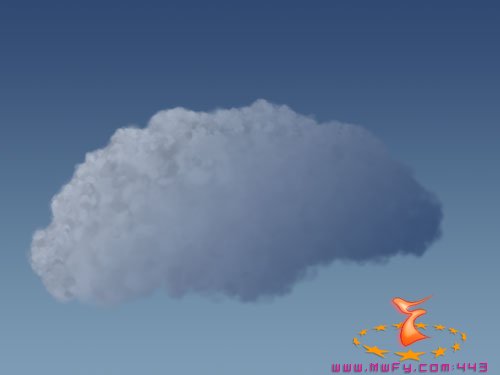
Move your mouse cursor over the image to see where I painted my mask with black or gray tones:

If you feel that the transition between shadows and brighter areas isn't smooth, then consider to use the Blur tool  , the Gaussian blur filter (Filter / Blur / Gaussian Blur... ) or a brush with a lower opacity to make the transition smoother. Don't make it too smooth or the clouds might look too flat. Make sure that you remove most traces of the gradient on the left side and top of the clouds (those areas have to be almost pure white) by painting mostly pure black in those areas of your mask. Again, move your mouse cursor over


