In this step we will create the clouds brush that is needed to paint our clouds.
Note: Jump to step 2 (where you can download a clouds brush) if you're not interested in how the brush was made.
Start by creating a new document: File / New... and select the preset 640 x 480 and click OK:
Press the letter D on your keyboard to set the foreground color to black and the background color to white: 
Go to the menu and select Filter / Render / Clouds
Select the Lasso Tool  in the tool bar and make a selection similar to the shape of an egg (or at least close to it).
Make sure that you cover an area that is not just plain medium gray; make sure that you include some light gray and darker gray:
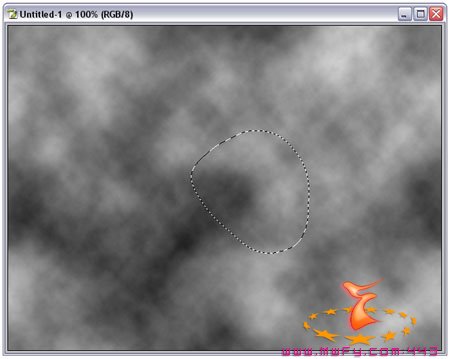
The size of the selection doesn't matter so much. In this example I have a selection with a height that is about 1/3 of the original height of the document. The angle of the shape is not important.
Go to the menu and choose Select / Feather... and select a Feather Radius of 10 and click OK:
This will soften the edge of the area that we're going to copy.
Go to the menu and select Edit / Copy (or Ctrl + C in Windows or Command + C on the Mac) to copy the content of our selection to your clipboard.
Create a new layer by clicking on the Create a new layer icon  in the layers palette.
Return to the menu and select Edit / Paste (or Ctrl + V in Windows or Command + V on the Mac) to paste the current content of our clipboard on this new layer.
Make the Background layer invisible (the bottom layer) by clicking on the eye icon  in front of it.
In the menu select Image / Trim and use the following (default) settings and click OK:
Trim removes all excessive areas that contain no pixels (100% transparent):
At this point you can always select in the menu Image / Adjustments / Brightness/Contrast... to adjust the brightness or contrast of your brush, but quite often this is not necessary when you've selected the proper area.
In the menu select Edit / Define Brush Preset...
Name your new brush Clouds Original and click OK.
Go to the tool bar and select the Brush Tool  (important step, because if you don't select the brush tool, then all areas in the following Window, the Brushes Palette, will be grayed out).
Now let's open the Brushes Palette. You can open the brushes palette in 3 ways;
- Pressing F5 on your keyboard
- Using the menu: Window / Brushes
- By clicking on the Brushes Palette tab (A):
Click on the area that reads Brush Tip Shape (B). Select the clouds brush that you just made (C).
Tip: Hover with your mouse cursor over any brush and Photoshop will show the name of the brush (like in this example with the Wet Sponge brush):
Continue by checking the settings in the area marked with D, because they have to be the identical. Ignore the bottom preview of the brush, yours probably looks slightly different.
Now click on the section that reads Shape Dynamics and make sure all settings are the same (especially the values 100% for Size Jitter and Angle Jitterare important):
Continue by clicking on the section that reads Color Dynamics and make sure all settings are the same (note the value 10% 10% for Brightness Jitter):

Notice that we've only changed the Shape Dynamics and Color Dynamics settings. Make sure that the all the other settings are disabled, like Scattering, Texture, Dual Brush, Smoothing, etc:
Click with the mouse of the area named Brush Presets (A):
At the bottom of that same window, click on the Create new Brush icon  .
.
Name your new brush Clouds and click OK:
Look up the old brush named Clouds Original. Again, hover with your cursor over the brush to check the name to avoid that you delete the wrong brush.
Right click (control + click on the Mac) once you've selected the brush named Clouds Original:
Select Delete Brush and click OK. Of course, if you want to keep the brush, that's fine with me, but be aware that it can cause confusion later on.
We have now created the brush that we are going to use to paint clouds.
We can save this brush for later use by going to the menu and selecting Edit / Preset Manager...
- Select the Preset Type named Brushes (A)
- Click on the thumbnail of the Clouds brush we made earlier (B)
- Click on the Save Set... button (C)
- Give the brush a proper name and click on Save
- After the brush is saved, leave this menu by clicking on Done (D).
Make sure you save the Photoshop file with our original brush, because you might want to make some small adjustments later on.
It's up to you if you want to skip this step and jump to
step 3 if you just made your own brush. However if you don't have any experience in downloading/installing brushes then might want to read what I have to say in this step 2.
You can download a ready-made brush for our tutorial (the same one that I will be using) here (right click and select Save Target As...)
Look at the following screenshot:
Once we have the Brush Tool selected, we can click on the button in our options bar marked with A, in the window that opens click on the button with the little black triangle(B) and then select Load Brushes... or Replace Brushes... (C)
| Load Brushes: |
add the new brushes to the existing brushes in Photoshop |
| Replace Brushes: |
replace the existing brushes in Photoshop |
Which option to use is all up to you, but my advice is to select Load Brushes...
Activate the brush by selecting it in the Brush Preset picker window that opens


