Fun photo frames are all around us. They exist literally everywhere and are lots of fun to create. In this tutorial, I'm going to show you how to take an image with interesting edges and place a photo inside of it. The trick lies in using the Threshold adjustment to make it black and white, thus turning it into the perfect frame.
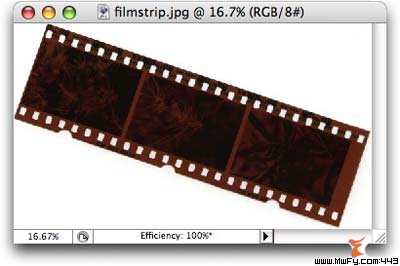
I recently had a reader request a tutorial for creating a film strip edge. This is easily done just by scanning a negative, though what if you don't have a scanner? No worries. Trot over to istockphoto.com and do a search for film strip. For just 2 credits ($1 = 1 credit), I downloaded this high-resolution little jewel:
Preparing the frame
In order to place a photo inside a shape we're going to use a layer mask. The most important thing to remember about layer masks is that black hides and white reveals. Always. This is a true constant of the Photoshop Universe. This means we need to turn this film strip negative into a layer mask-worthy, black and white image. The simplest way to do that is by using the Threshold adjustment.
NOTE: Preparing the frame in this example takes nine steps. You may or may not have this much prep time when performing the technique on your own. With this particular film strip graphic, I need to snip a portion of it out, get rid of the white background, straighten it, and *then* make it black and white. Never fear; it doesn't take that long and you might pick up a trick or two along the way ;)
Step 1: Open a Soon To Be A Festive Frame image and duplicate the Background layer by pressing Command + J (PC: Ctrl + J). This protects our original image in case we screw up. Since I'm not going to use the Background layer except in an emergency, I turned its visibility off by pressing the little eyeball to its left.
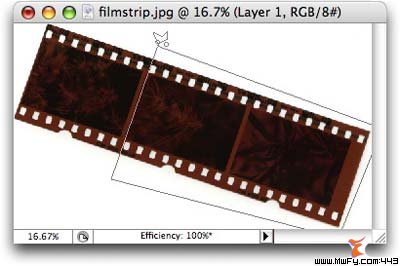
Step 2: I only want to use a piece of this negative so I shall use the Magnetic Lasso tool to select the unwanted portion, then press the delete key.
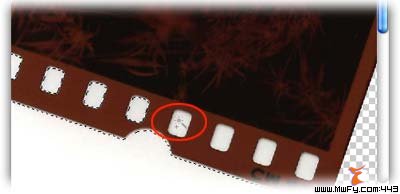
Step 3: Zap the remaining white background bits with the Magic Wand tool (the Magic Wand is *perfect* for selecting color). Click on an area of white once, then press and hold the Shift key to select even more white bits. Zoom in to select the little holes by pressing Command + (PC: Ctrl +). Press delete to send the white packing.
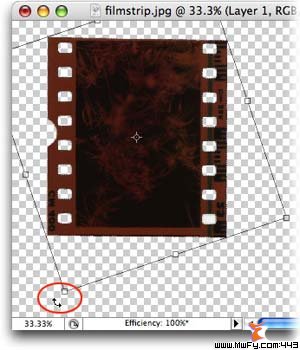
Step 4: Press Command + T (PC: Ctrl + T) to bring up Free Transform to straighten the negative. Position your cursor a tiny bit away from any corner, then click and drag to rotate the image. Press return to accept the transform.
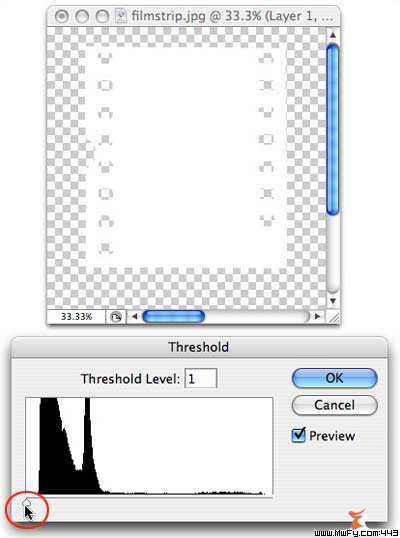
Step 5: Now we're ready to make the negative black and white. Choose Image > Adjustments > Threshold. When the dialog box first arrives on the scene the negative will be completely black. Since the black areas will *hide* our photo -- the opposite of what we want -- we need to make the negative white. Therefore, drag the Threshold slider all the way to the left.
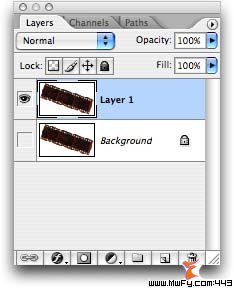
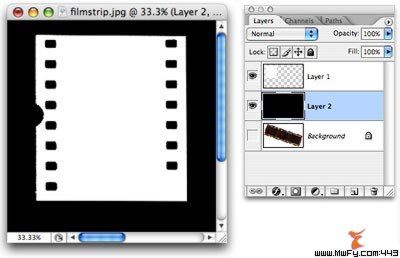
Step 6: Create a new layer and fill it with black. Press Command + Shift + N (PC: Ctrl + Shift + N) to create a new layer, then drag it beneath the newly whitened negative. With the top color chip set to black, fill the new layer with black by pressing Option + Delete (PC: Alt + Delete). Your document and layers palette should look like this:
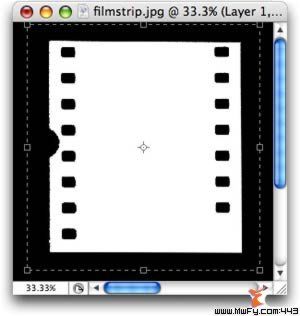
Step 7: Press C to select the Crop tool. Draw a box around the negative and press return to accept the Crop.
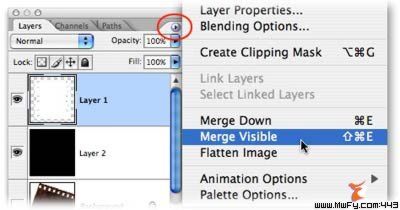
Step 8: Choose Merge Visible from the layers palette pop-up window. This will merge the black layer with the white negative layer so we can copy and paste it in a moment.
Step 9: At this point our frame is complete. Select all by pressing Command + A (PC: Ctrl + A) and copy it by pressing Command + C (PC: Ctrl + C). We'll paste it into our photo document in a minute.