David Pogue called me the other day and needed some graphics for his keynote presentation at PhotoPlus. He was speaking about the future of digital cameras and wanted some funny graphics representing a futuristic vision of cameras built into unlikely objects, such as, well, a belly ring.
There are three very cool things which occurred during this project, henceforth why I'm sharing it with you.
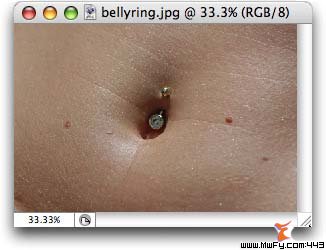
- First, I needed to find photos for this project, such as that of a belly ring on a reasonably attractive belly. I trotted over to istockphoto.com and did a search for "belly ring." Kapow! I was immediately presented with pages and pages of options, and selected the little jewel below. Since the graphics were only going to be displayed onscreen, I got away with downloading the low-res option, setting me back an entire dollar. Sweet.
- Second, I turned a silver-rimmed camera lens into gold to match the belly ring.
- Third, I added and changed the color of a drop shadow in order to get a more realistic tone matching the existing shadows in the photo.
Getting started
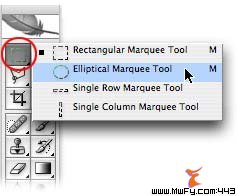
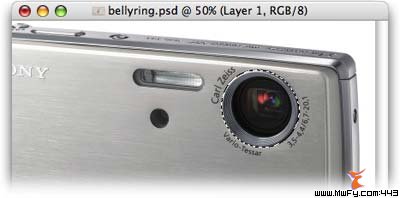
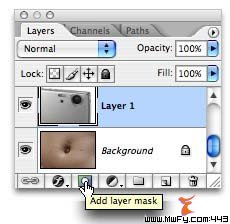
Once I had the perfect belly ring photo, I popped it open in Photoshop and added a Sony camera image that I already had. This particular camera had a very nice-sized round lens, so all I needed to do was select the lens, then use a layer mask to hide the rest it. I began by using the Elliptical Marquee Tool, which lives inside the Marquee tools as shown below.
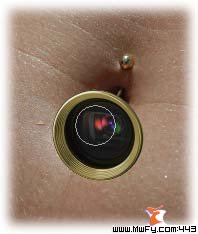
Step 1: Draw a perfect circle around the lens by holding the Shift key while you drag. TIP: To draw a circle from the center outward, hold down the Option (PC: Alt) key.
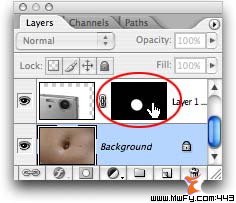
Step 2: Add a layer mask by clicking the circle within a square icon at the bottom of the layers palette.
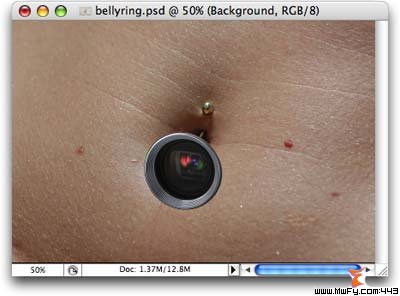
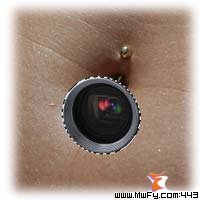
Step 3: Use the Move tool (just press V) to move the camera lens into the proper position in the photo.
Turning silver into gold
With the lens is in place, we need to turn the silver rim into gold to match the belly ring. This is easily done with a Hue/Saturation adjustment layer.
Step 4: Command click (PC: Ctrl click) the layer mask created above in Step 3 to select the lens bit only.
A little circle of marching ants should appear around the camera lens, like so:
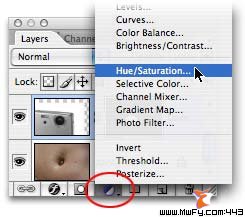
Step 5: Create an adjustment layer by choosing the half black/half white circle at the bottom of your layers palette, and choose Hue/Saturation.
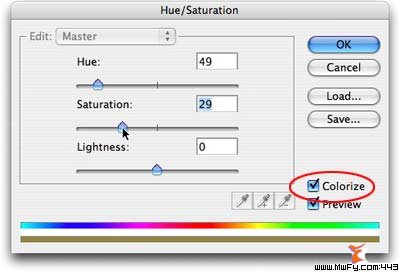
Step 6: Click the Colorize checkbox at the bottom right of the resulting dialog box, then tweak the Hue and Saturation sliders until the lens rim turns a nice shade of gold.
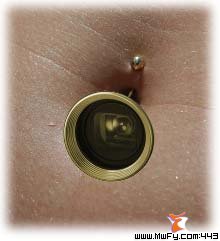
Step 7: Our lens is gold, but so is the inner bit of the lens. This is bad.
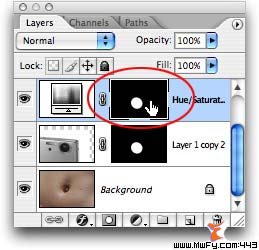
To fix it, select the layer mask in the Hue/Saturation adjustment layer in the layers palette. NOTE: The Hue/Saturation adjustment layer has a mask because we created it with an active selection: the lens.
Step 8: Choose the Brush tool (press B), pick a hard-edged brush and paint the center area of the lens with black. You'll see the original lens color begin to show through.
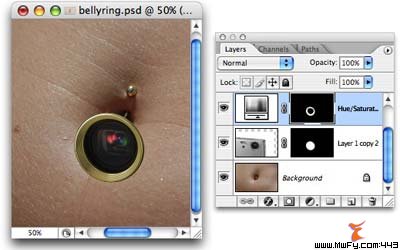
Here's how my document and layers palette look now: