 |
|
Here's how I made the mouse in the Nocturnal Creations logo. Thank you Scott for letting me put this tutorial online :)
First I created a new document, 230 x 300 pixels, white background.
Then I selected the Rounded Rectangle tool  to draw the shape of the mouse. Call this layer MOUSE. to draw the shape of the mouse. Call this layer MOUSE.
Set #595959 as your foreground color and drag out the selection with these settings. I named this layer MOUSE.
Your image should now look like the image shown in step 1. |
 |
|
Then activate the Direct Selection tool  . .
Click the center of your shape to highlight the path, and then click along the path so that you can see the anchor points.
|
 |
|
Then activate the Add Anchor Point tool found by right clicking on the pen tool in the toolbar  . .
Then add a new anchor point like shown in step 3. |
 |
|
Now move the cursor slightly to the right of the new anchor point. That will make it turn into the Direct Selection tool () and drag the anchor point to the right like shown in step 4. |
 |
|
Then do the same to the anhor point just above and below the new anchor point so that your image look like the image shown in step 5. |
 |
|
Now select the Convert Point tool  . .
We have to adjust the anchor points above and below the new anchor point a little bit to make the curve nice and smooth.
Experiment a bit by draging the handles until you think the curves look the way you want them. |
 |
 |
Your mouse shape should now look something like the image shown in step 7 :) |
 |
 |
Ok - time to add some basic layer styles to the mouse.
I added some drop shadow with these settings.
Some inner glow with these settings.
Anf some bevel and emboss with these settings. |
 |
 |
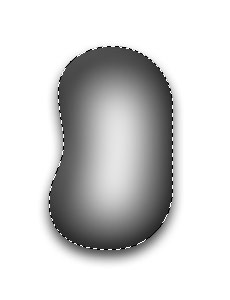
Ok - time to make some highlight on the mouse.
Create a new layer above the MOUSE layer and call it HIGHLIGHT.
I painted the highlight using the Paint Brush tool  . .
I used a soft 65 pixel brush having white as the foreground color. Just click and drag the brush until your image look similar to mine. |
 |
 |
Still at the HIGHLIGHT layer Ctrl + click the MOUSE layer to load its transparency. |
 |
 |
Now go to Filter - Blur - Gaussian blur - 15 pixels.
Deselect (Ctrl + D). |
 |
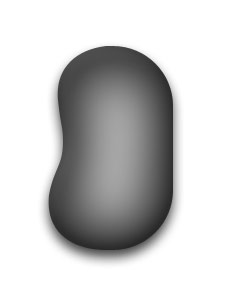 |
Then drag the opacity down to about 54 %.
Your image should now look like the fig. in step 12.
Ok - now it's time to add some details to the mouse.
Read on |


