Alrighty, welcome to the walktrough of creating "Thinking Egg Broken" by Domen Lombergar. This is one of my later work done for a battle and took about an hour to make. It should give you a pretty good insight on how I create my artwork, even though it's not the most complex example to date. Of course this is not a beginner tutorial and will cover some more advanced features in photoshop. Our photoshop tutorial section is filled with articles that show you uses of particular tools more in-depth. Anyways, let's begin...
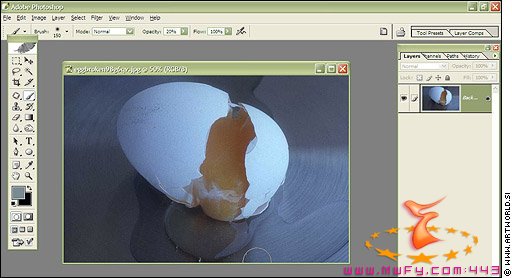
This is the image I got fr0m the battle. It's a photo of a broken egg shot with a fairly bad digital camera (image is filled with high-level noise and jpeg compression artifacts). At this point it's obvious that I wont be able to create a print fr0m this, but as a tutorial it'll do nicely. Did i mention the photo is underexposed and has a weird blue cast? Well, now I did <!--emo&:)-->

<!--endemo-->
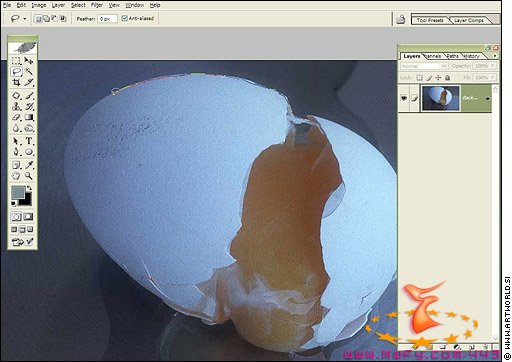
First of all well cut the egg out. Since this is a battle image we won't need pixel precision (like we would in a print mind you) so we can cut it out with the lasoo tool (the tool selected). be precise as much as you can.

Now the egg is selected and we can cut it out fr0m the background. You could do it with different techniques really - you could inverse the selection and then cut that, you could copy the selection to a new layer and then paint the original with a color ... or you could do it with layer masks as I did.
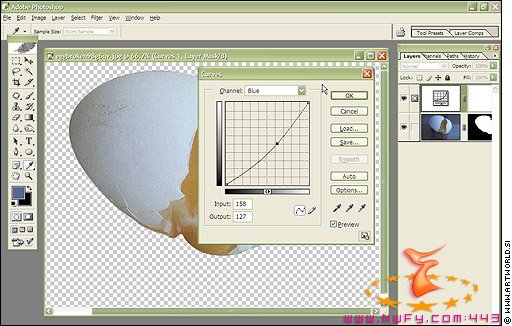
In this image I am correcting the color cast of the original whoto. I am bending the blue curve thus adding yellow tones into the image. As these two are opposite in the rgb wheel you are canceling out blue and making a normal color photo.
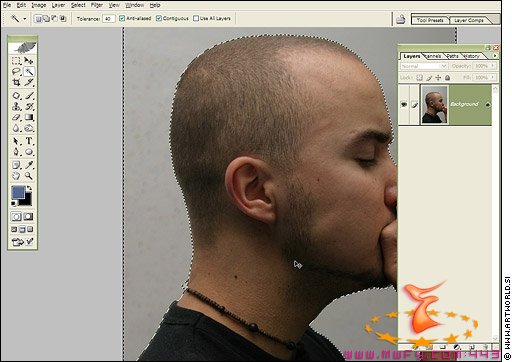
Next comes the model. I shot this image in a photoshoot of the rock group Anavrin, this is their lead singer Damir. You might notice that the image is underexposed by aboun one F-stop. This was done deliberately here to keep more detail in the face. Due to the fact that this is an image for a battle and not for a print there is no need to be pixel accurate and do individual hairs so I did a magic wand selection with about 40 tolerance. The selection came out nice since he's shot against a greyish background.
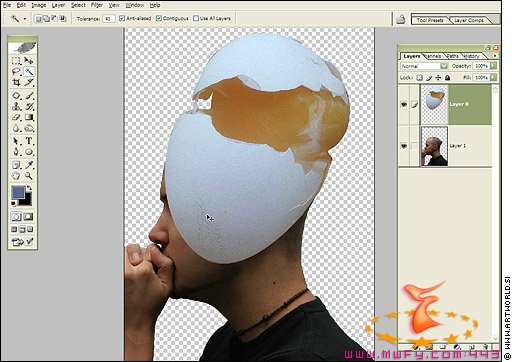
Now comes the basic compositing. I moved the egg layer to the image and transformed it so it fits normally as a head "attachment". I also deformed a part of the skull to better fit the egg.
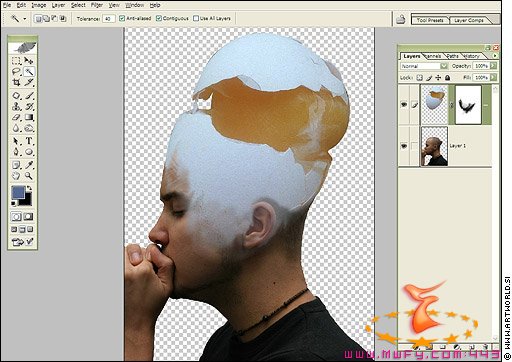
Now comes the masking part ... no real fancy stuff here, just give extra attention to detail and watch out that you are creating aa smooth and failry natural looking blend between one object and another.
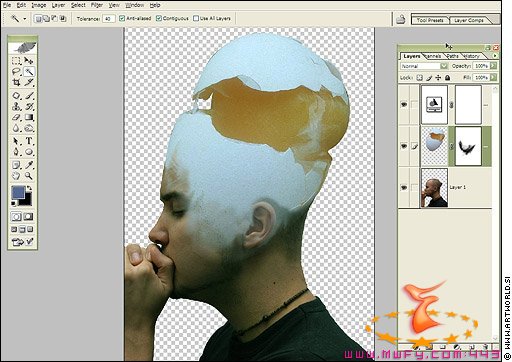
Next comes a slight color balance correction. This is of course nondestructive and can be changed at any time in the process.
≡★ 免 责 声 明 ★≡
除本站原创外,本站所提供的所有教程均收集整理自网络,其版权归该教程直原始作者或原始出处所有!
除特别声明外,您可以在保持教程的完整和注明来源的前提下免费复制、转贴本站所提供的所有教程;但是,不可以盗链本站的图片!
除特别声明外,在未经许可的情况下您不得将本站所提供的任何教程(包括资源)用于商业用途;
如果确有需要,请自行与该教程的原始所有权者(即:原始作者或出处)联系,本站不提供相关服务;否则,由此而引发的一切后果由您自负!


