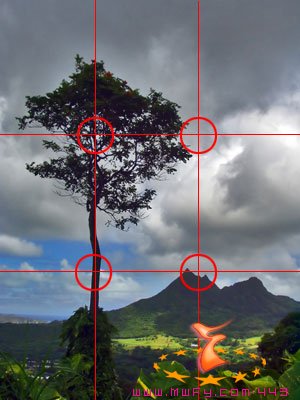
The Rule of Thirds divides an image vertically and horizontally in 3 parts. The intersections of these imaginary lines suggest four options for placing the center of interest for good composition.
Also placing some of the main elements on one of these lines can improve an image:
Often we would like to correct an existing image by cropping it in such a way that the composition improves by taking the rules of thirds in account, yet our crop tool only shows a single rectangle. This means that it's often a case of trial and error to get the right crop.
With a bit of effort it's possible to create a shape that can serve as some kind of "Rule of Thirds" overlay.
In this tutorial I will show you how to create the shape and how to use it. Those who are impatient can skip the first step, download the original custom shape here (right click on the link, select Save target as... (in windows)) and continue with step 2 - Cropping with Rule of Thirds .
Go to the
menu and select
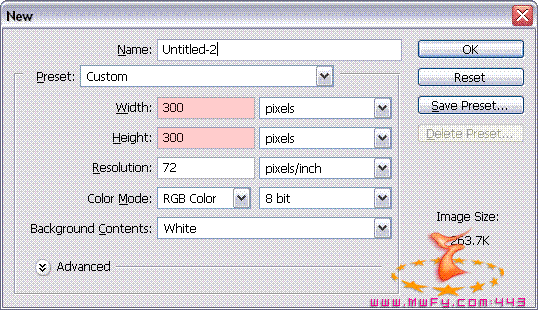
File / New... and enter
300 for
Width and
Height and click
OK:
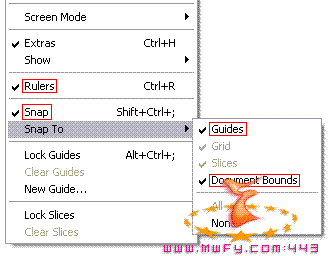
In the menu select View and make sure Rulers, Snap, Guides and Document Bounds are all selected (they will have a  in front of them):
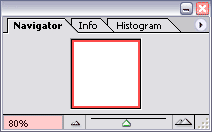
In the Navigator palette select a zoom factor of 80%:
Note: if you can't find the navigator palette, then you probably have to activate it first; in the menu select Window / Navigator (it will then have a in front of it).
Now move your mouse cursor until it's inside the vertical ruler, hold down the mouse button...
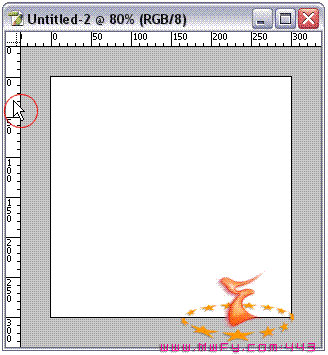
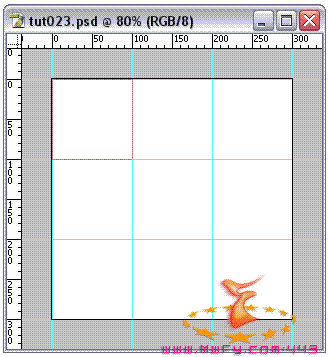
.... and pull out the first horizontal guide that you place at 0:
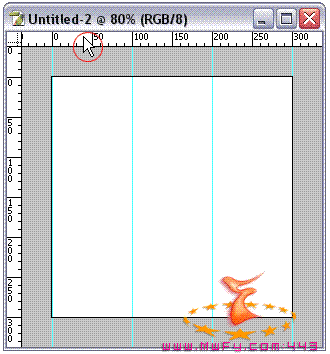
Continue to pull out 3 more guides. Place them at 100, 200 and 300.
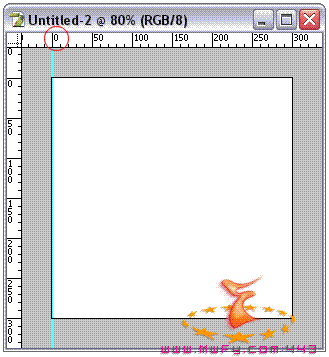
When you're done, move your mouse cursor until it's inside the horizontal ruler, hold down the mouse button...
... and pull out the first horizontal guide that you place at 0:
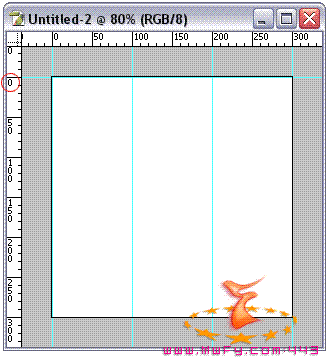
Continue to pull out 3 more guides. Place them at 100, 200 and 300.
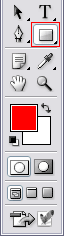
Select the Rectangle Tool  in the tool bar:
Check the option bar; make sure that Paths ![<a]() Paths src="/UpLoadFiles/Article/2006-7/060320073866684.gif" width=18 align=middle> and Intersect path areas
Paths src="/UpLoadFiles/Article/2006-7/060320073866684.gif" width=18 align=middle> and Intersect path areas  are both selected:

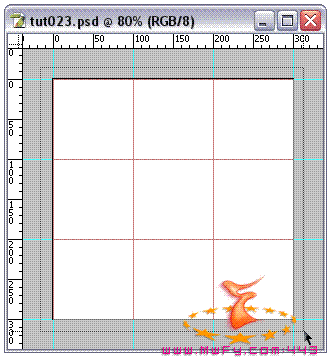
Draw a rectangle in the first square that is surrounded by 4 guides:
Make sure that the edges of the rectangle snap to the guides. If you make a mistake, then press Ctrl + Z or Command + Z on the Mac to undo that step.
Fill the other 8 squares with a rectangle.
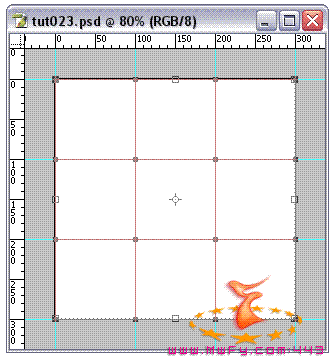
Select the Path Selection tool  in the tool bar, click in the top/left corner outside the canvas, hold down the mouse button and move the cursor to the lower/right corner (aslo outside the canvas) to select all 9 rectangles:
Go to the option bar and click on the Exclude overlapping shape areas icon  and the Combine button:

Your 9 rectangles are now converted to a single path:
Let's convert this path to a shape.
With the path still active, go to the menu and select: Edit / Define Custom Shape ...
In the window that opens up, give the shape a name. I name it Thirds. Click OK:
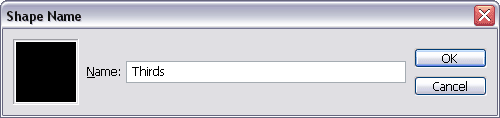
Notice we can't see the shape in the preview in this same window, just a plain black square.
Don't you worry, the shape is there, it's just not visible.
Let's save the shape on our hard drive (for backup purposes) by going to the menu and selecting Edit / Preset Manager...
In the new window select Custom Shapes (A), select the custom shape that we've just created (B) (it will have a black border around it when we click on it) and click on the button that reads Save Set... (C):
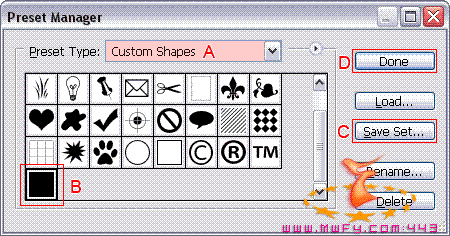
Next give the shape a name (I named it thirds.csh) and click on the Save button.
Click on the Done (D) button to close the preset manager window.
You can download the file here (right click on the link, select Save target as... (in windows))
Let me now show you how you can load this custom shape in Photoshop (In the example it's not loaded yet)..
In the menu select Edit / Preset Manager...
In the window that opened select Custom Shapes (A), click on the button that reads Load... (B), select the shape and click on the Load button and the new shape will appear in our window (C).
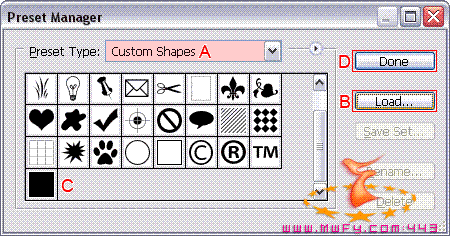
Click on the Done (D) button to close the preset manager window.
Return to the menu and select View / Snap to turn off snap ( the in front of snap will be gone).
Return to the menu and select View / Rulers to turn off the rulers.
Save and close the current file.
Continue with the next step on page 2.


