Download the Psd HERE (16mb)
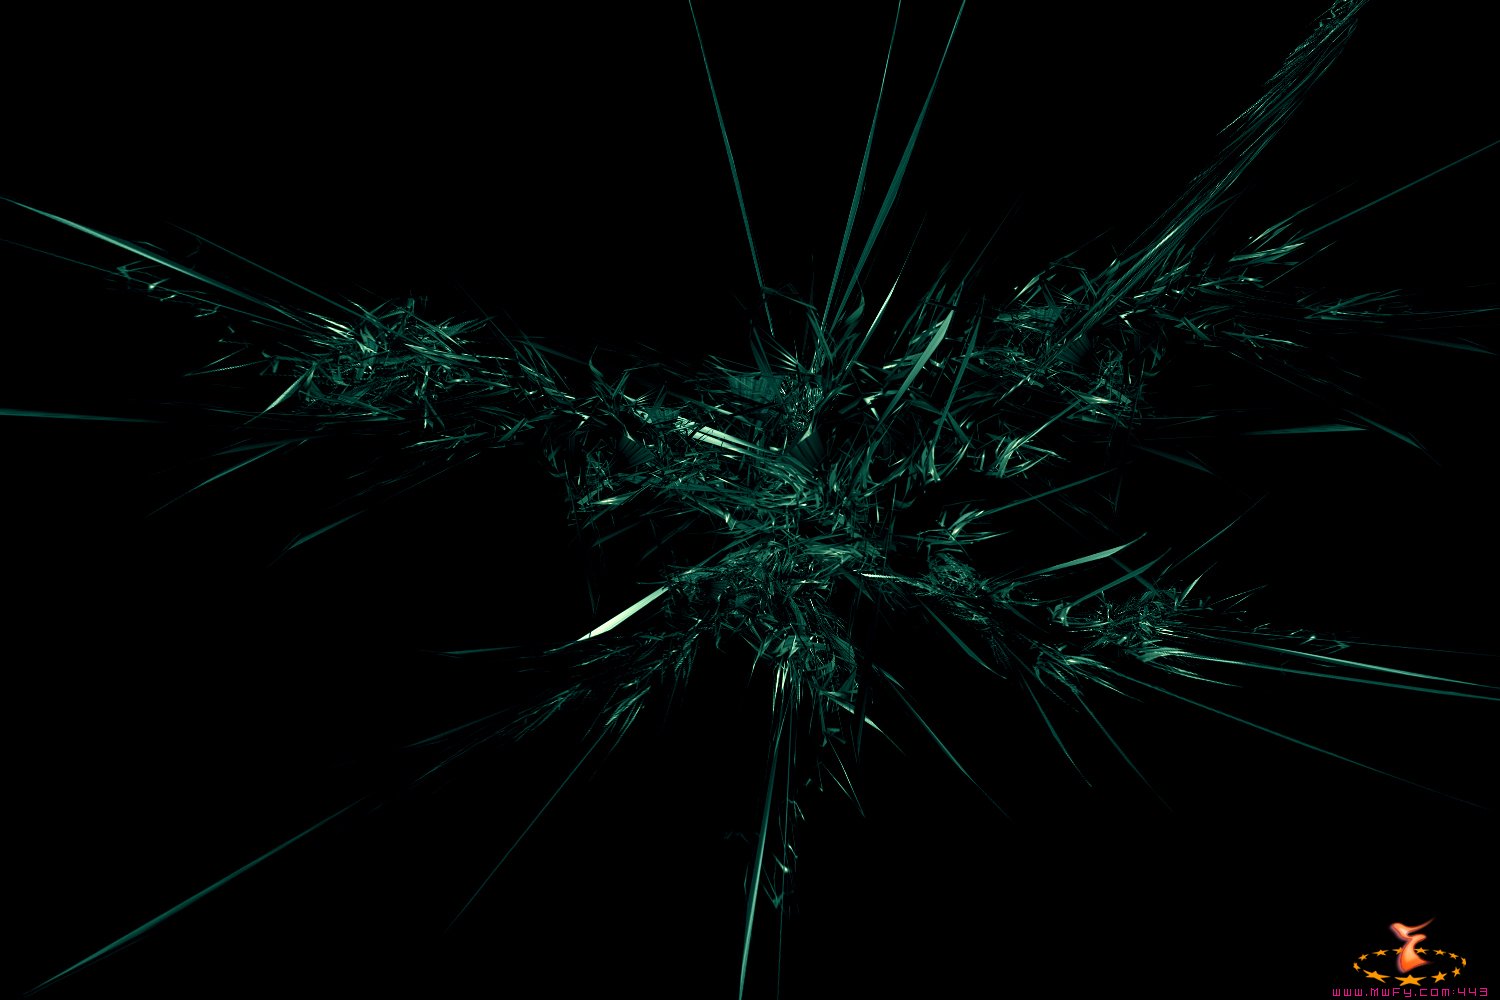
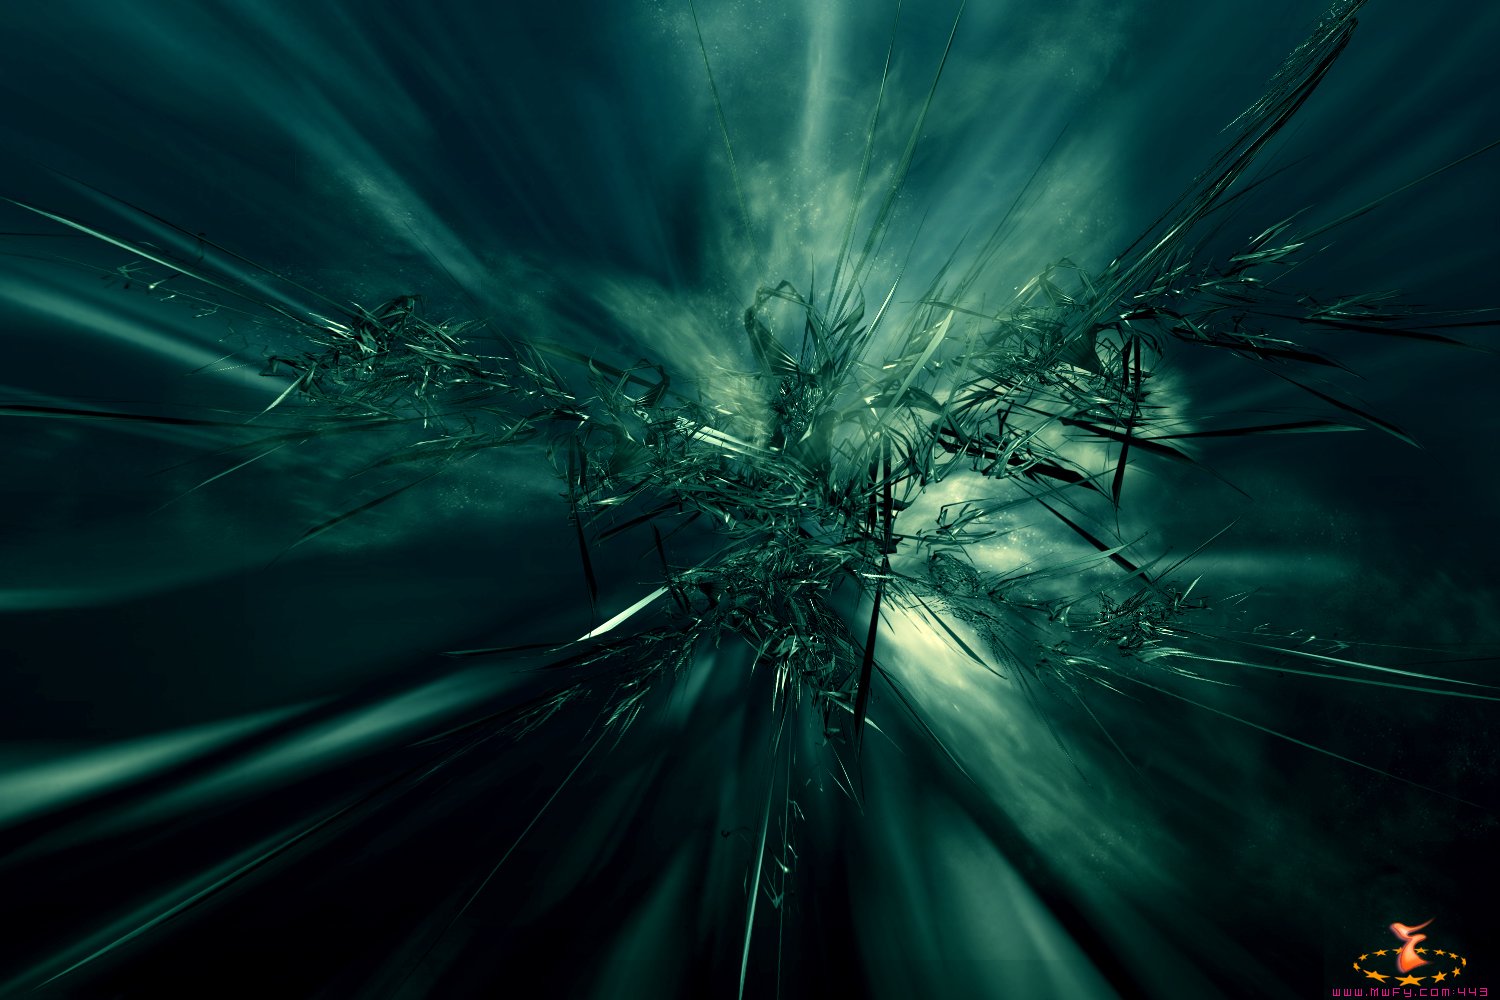
1. First you have to have renders, you can make these in any 3d program, such as 3d Studio Max, Cinema 4d, and Bryce. The tutorial starts after the renders are made, but to learn the 3d techniques, here are some tutorials at Shiver7: Cinema 4d & 3d Studio Max & Bryce. So we start with some 3d on a black canvas and a Color Balance layer giving the 3d color.
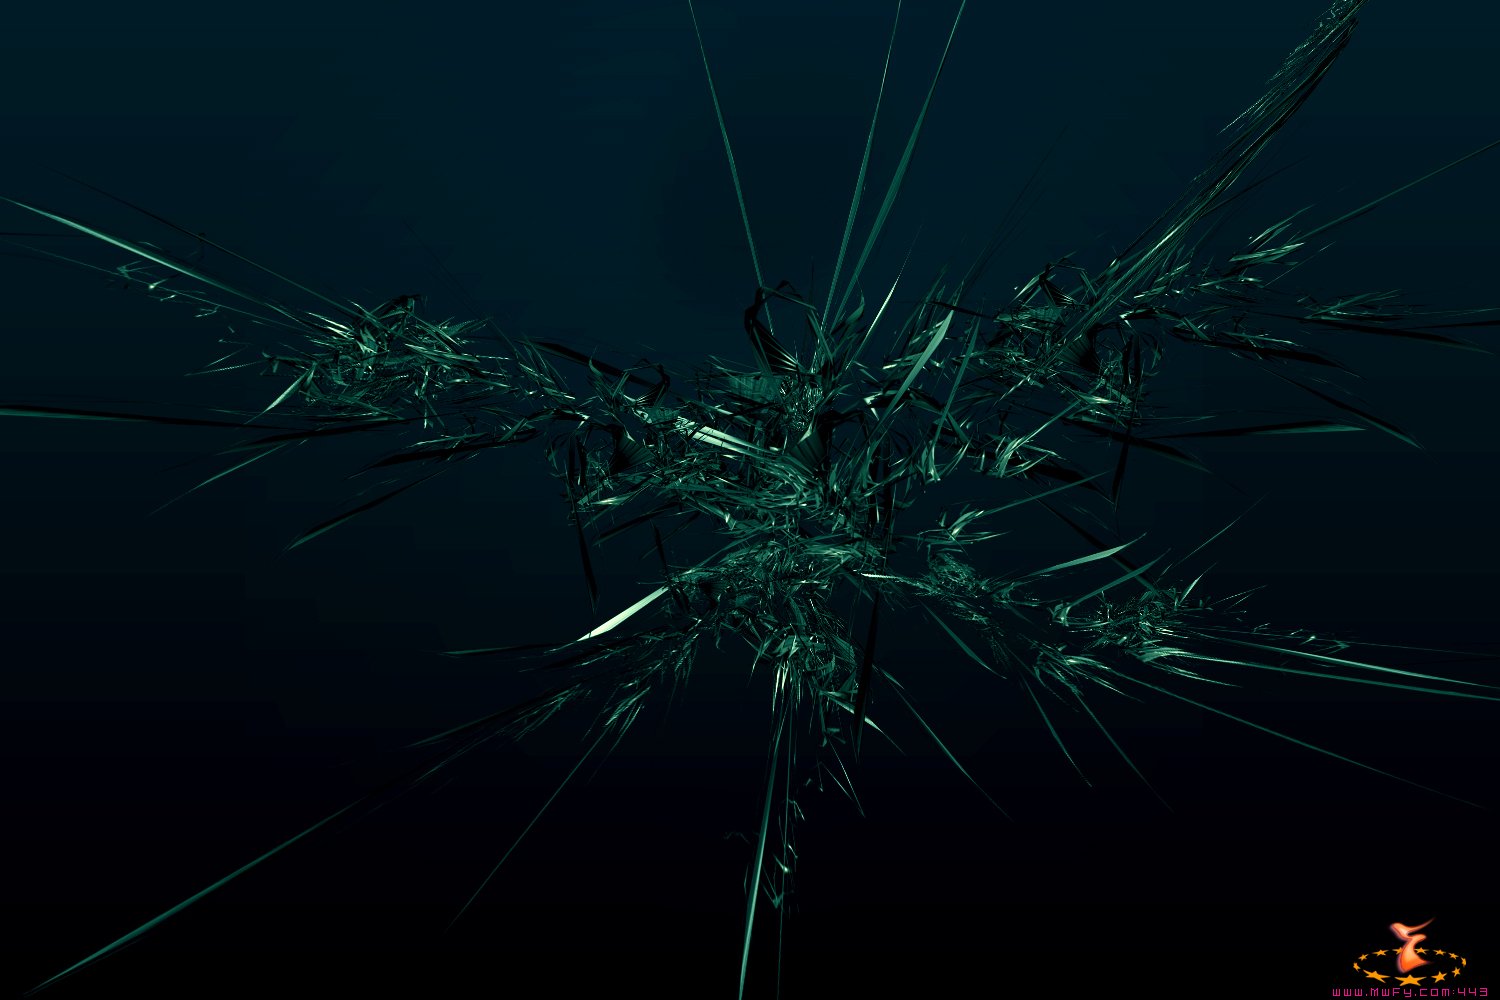
2. I then make the background a gradient by double clicking on the background and changing the Gradient Overlay. This can be good for having a more realistic atmosphere.
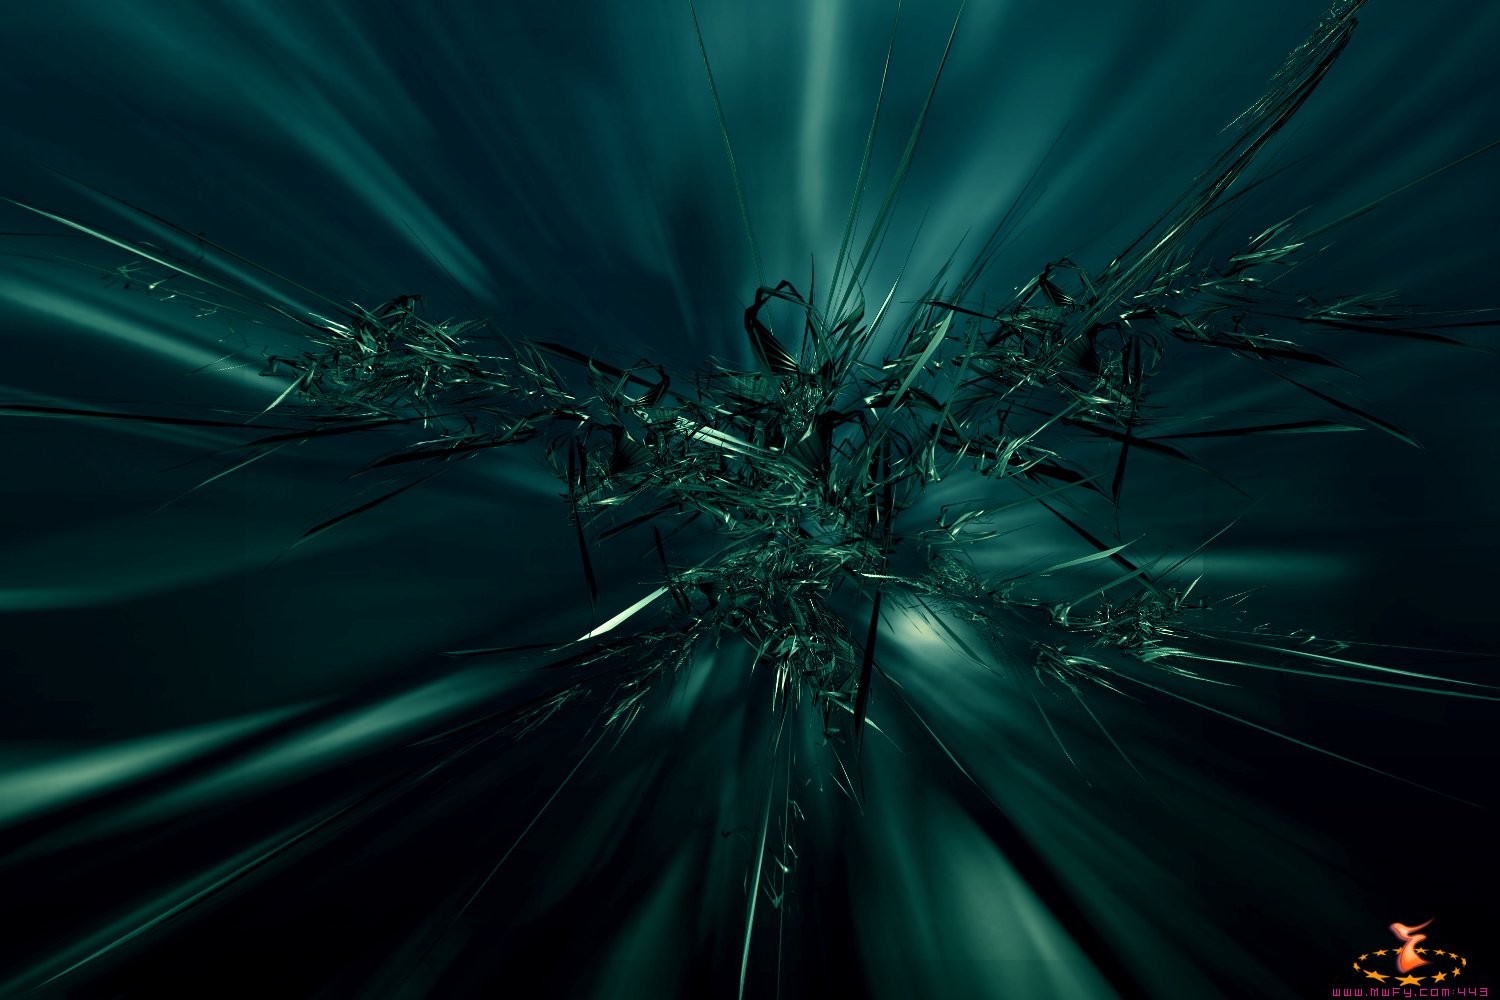
3. I added a zooming effect in the background by taking another one of my images and doing a Radial Blur (Filters >> Blur >> Radial Blur (zoom))
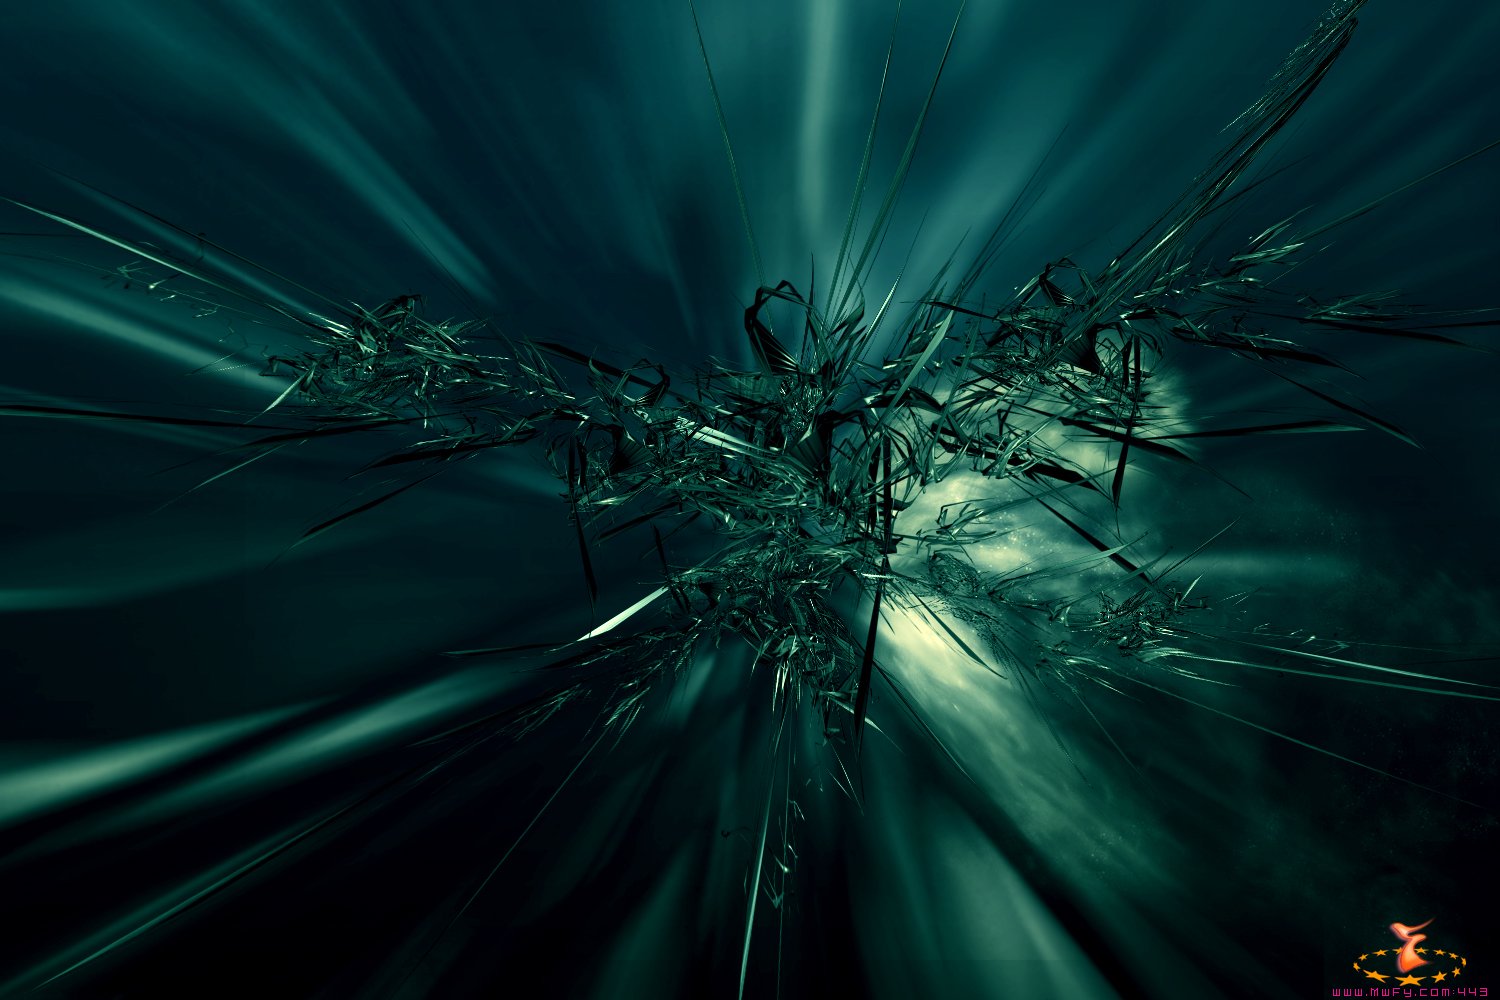
4. Now I start adding non detailed brushing just for the background and lighting effects. I used the airbrush tool along with a rough edged smudge tool and a very low opacity erasor on grunge to add texture. You can find an awesome tutorial on how to make these type of effects: Clouds by Ndey.
5. Just keep brushing it out on top of the render here to add some depth to the image. For some of the brushing, I used previously created cloud scenes to save time since they already look good.
6. More brushing. As you go along, keep checking for any cut off lines you may have and get rid of them, they can ruin the image.
7. As you can see I am brushing alot, and if i were to do this all by hand it would take forever. The trick is to make 2 or 3 different brushing layers and duplacate them. You dont want to have redundant brushing so you can just distort them (Edit >> Transform >> Distort/Skew/Perspective)
|
≡★ 免 责 声 明 ★≡
除本站原创外,本站所提供的所有教程均收集整理自网络,其版权归该教程直原始作者或原始出处所有!
除特别声明外,您可以在保持教程的完整和注明来源的前提下免费复制、转贴本站所提供的所有教程;但是,不可以盗链本站的图片!
除特别声明外,在未经许可的情况下您不得将本站所提供的任何教程(包括资源)用于商业用途;
如果确有需要,请自行与该教程的原始所有权者(即:原始作者或出处)联系,本站不提供相关服务;否则,由此而引发的一切后果由您自负!
|