More and more I see the following question appear on various Photoshop forums: How do I create a fade? Some folks want to fade out a line at one end, some want to fade a photo into a background, and the list goes on. No matter what element you want to fade into another, the secret to creating truly fabulous fades is to use a gradient layer mask.
Let's start off by defining the word "gradient."
What's a gradient?
Simply put, a gradient means to blend one color into another. Photoshop comes with several gradient options built-in, though the one I use the most is Linear. Using some simple Thanksgiving-ish color bars, here are some examples of linear fades:
Left or right fade
Top or bottom fade
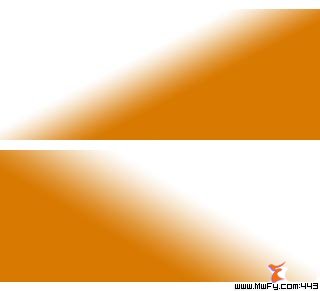
Left or right angle fade
Here are some things to remember when playing with the Gradient tool:
- The direction of the fade depends upon the *direction* you drag the Gradient tool across an image.
- The size of the blended area depends upon how *far* you drag the Gradient tool across an image.
- The starting point of the fade depends upon *where* you start dragging in the image.
Pair the power of the Gradient tool with a layer mask, which allows you to hide bits of an image or shape without deleting any pixels, and you can begin to see how incredibly useful a gradient mask can be. By using this method to create fades, you can control how the photo, shape, or graphic fades in or out without harming any pixels. And you can keep playing with a gradient mask to get just the right fade effect until your eyes bleed.
Fading color bars as a design element
Let's say I need to build an ad for the Save Our Turkeys coalition. I might get a picture of a turkey and, for visual interest, put some powerful words behind a bar of solid color at the bottom.
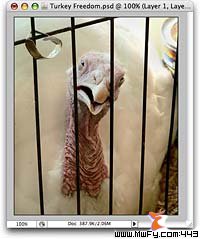
Step 1: Pop open a sad turkey photo in Photoshop. This one from iStockphoto.com certainly fits the beak, er, bill ;)
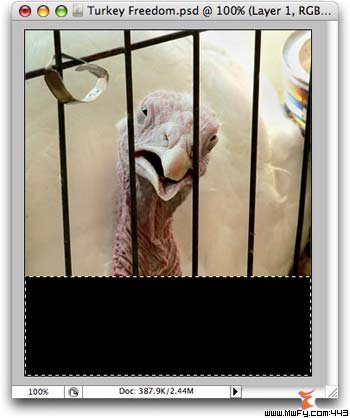
Step 2: Add a new layer, grab the Marquee selection tool and draw a rectanglular selection at the bottom of the document. Press D to make sure the color chips are set to the Default of black and white, and press X until black is perched on top. Press Option + Delete (PC: Alt + Delete) to fill the selection with black.
TIP: Press Command + D (PC: Ctrl + D) to deselect and send the marching ants packing.
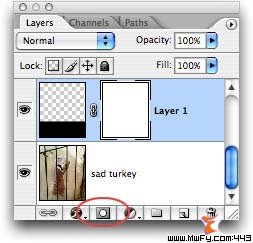
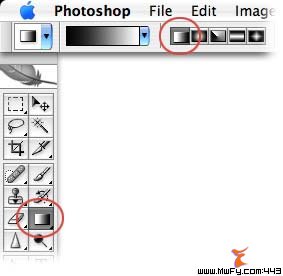
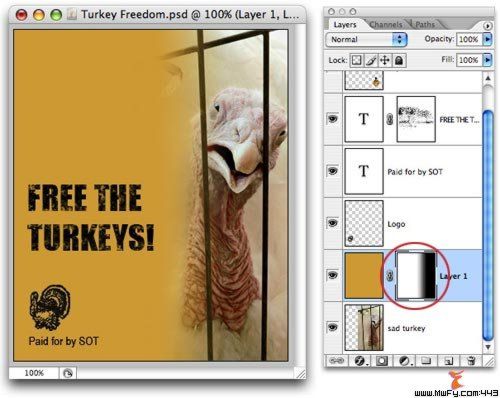
Step 3: Create a layer mask by pressing the circle within a square icon at the bottom of your layers palette (circled below in red). This is the mask onto which we're about to apply a gradient to get a fade. This is what my layers palette looks like now:
Step 4: Select the Gradient Tool by pressing G and choose Linear in the options toolbar at the top of your screen.
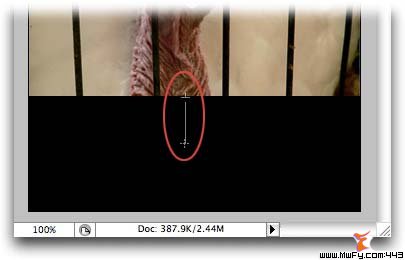
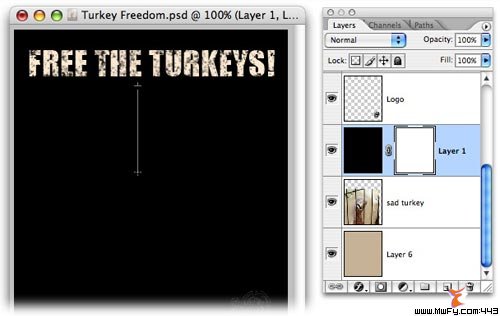
Step 5: Make sure the layer mask is still selected in your Layers Palette (it will have a hairline border around it, as shown above in the screen shot for Step 3). Mouse over to your document and with the Gradient tool crosshair, drag from the top of the black bit downward about half an inch, and release the mouse button.
TIP: Hold the Shift key while you drag to lock the gradient into a perfectly straight line.
Spend some time experimenting with the length of the drag and the starting point. Just keep dragging and dragging until you get the fade you want; the mask will update each time you drag with the Gradient tool. Flexibility is king, baby!
Here's my document and layers palette after setting some type. I've circled the gradient mask in red:
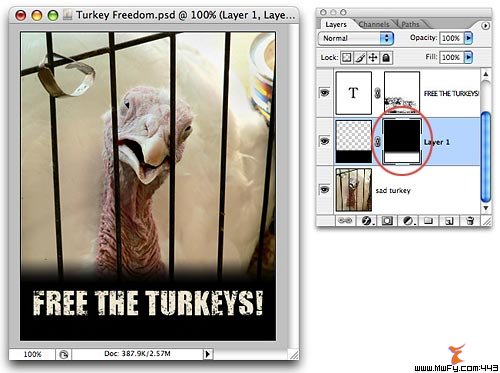
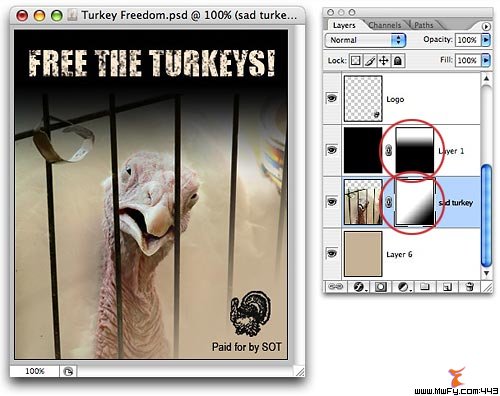
If the Save Our Turkey coalition wanted to add their logo to the piece, I might do something like this:
The gradient mask is circled in red above so you can understand how I created the fade.
Zap the mask and start again!
Layer Masks make our collective Photoshop lives so much easier because we can trash them and begin again. With this particular fade technique, we're not trashing any pixels at all; we're simply hiding them instead.
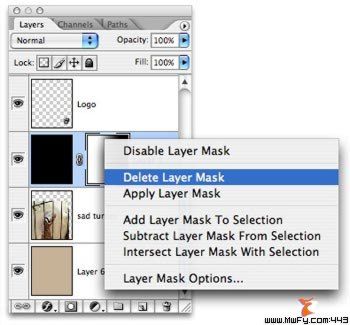
To start over and delete a layer mask completely, Control click (PC: Right click) the layer mask in the Layers Palette and choose Delete Layer Mask, as shown below. Click the circle within a square icon at the bottom of your Layers Palette to add a new layer mask and start over. Whee!
Diagonal and horizontal fade
Okay, here's one more example for you. This time I filled an entire layer with black and I'm going to make the fade begin further down into the document. Since I'm going for a more gradual fade, I'll drag downward a bit farther. You can see where my drag started and stopped below:
Next, I added a layer mask to the sad turkey layer and with the Gradient tool I dragged at an angle from the beak to the logo at the bottom right. This makes the SOT logo more visible because the right corner of the turkey photo is being hidden by the gradient mask. Note the differences in the two masks circled below in red.
I hope this tutorial has given you some ideas for creative fades of your own. As you can see, there are hours and hours of fun to be had playing with gradient layer masks. Enjoy!