Interface Orbs
[ 作者来源:spoono
编辑整理:
PhotoShop资源网
更新时间: 2006-07-18
录入: 黄叶飞扬 ]
Shiny glass orbs have been popular fixtures for web interfaces and application skins for quite some time. In this tutorial, we will be going over a technique for making a standard interface orb.
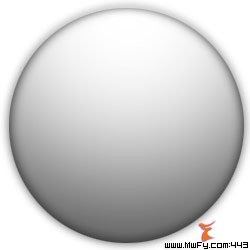
1. Open a new document (250x250 pixels was used in this example) and choose the Circular Marquee Tool. We need to first make a metallic background object, so hold
Shift and create a circle.
Create a new layer named
One and fill your circle with dark gray (such as #333333). Keep your selection and make a new layer named
Two above it. Go
Select>Modify>Contract 2 pixels, then go
Select>Modify>Feather 5 pixels. Select a middle gray (such as #666666) as your foreground color. Fill your selection by hitting
Alt+Backspace (Mac: Option+Delete).
Create a third layer above named
Three while keeping your selection. Choose white as your foreground color and select the Linear Gradient Tool. Make sure the Foreground to Transparent setting is selected. Click and drag from the top to the bottom of the selection (holding
Shift) to fill in the gradient. Last, to brighten it up a little more, duplicate
Three by going
Layer>Duplicate Layer, then hit
Ctrl+E (Command+E) to merge the layer down. Phew, now that we have some metal, we can begin.
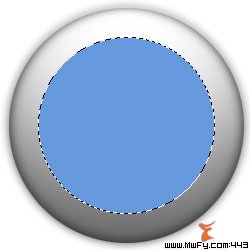
2.
Create a new layer above what you have so far named
Four. Use the Circular Marquee Tool to create a smaller circle (holding
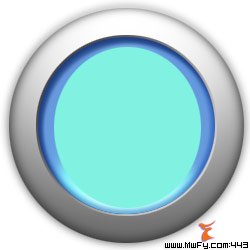
Shift). Fill the circle with a blue (such as #6699dd).
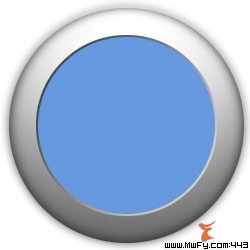
3. old
Ctrl (Command) and click the new layer button to create a new layer below
Four. Name this one
SubFour. Go
Select>Modify>Expand 2 pixels. Now click on and choose Gradient Fill. Use a black to white gradient with
these settings. Turn the opacity of
SubFour down to 80%.
4. Next, go back to layer
Four, right-click it and apply a Blending Options Inner Glow with
these settings. Then, apply an Inner Shadow with
these settings. Now comes a rather experimental part.
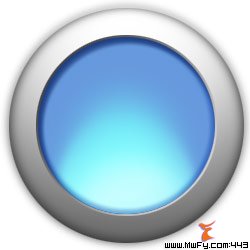
Create a new layer above
Four called
Dodge set the Blending Mode to Linear Dodge. Choose the Brush Tool with a 100 pixel brush with 10% Hardness and Flow of 40%. Hold
Ctrl (Command) and click layer
Four to load it as a selection. Choose a turquoise color (such as #2d8e97) and fill in this layer until you get a nice dodge effect. To do this, you will likely need to use some lighter colors as well for the bottom area. If needed, turn down the layer's opacity to around 80%. After you are satisfied, hit
Ctrl+E to merge this layer into
Four.
5.
Create a new layer on top called
Five. Hold
Ctrl (Command) and click on
Four to load it as a selection. Fill this area with white. Hit
Ctrl+D (Command+D) to deselect. Set the Blending Mode to Overlay. Hit
Ctrl+T to bring up the Free Transform box. Hold
Shift and shrink the selection from a bottom corner to look like the sample to the left. Go
Filter>Blur>Gaussian Blur width a radius of 2.8 pixels. Decrease the layer's opacity to 40% or as necessary.
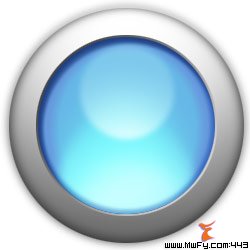
6. Next, create a new layer on top called
Six. Hold
Ctrl (Command) and click
Four to load it as a selection. Fill the selection with a light teal (such as #80f2e1). Hit
Ctrl+D (Command+D). Hit
Ctrl+T (Command+T) to pull up Free Transform and contract the shape to look like the picture to the left. Go
Filter>Blur>Boxed Blur with a 5 pixel radius (if you have an older version of
Photoshop, a Gaussian blur as done above will work). Set the Blending Mode of the layer to Soft Light and the opacity to 75%.
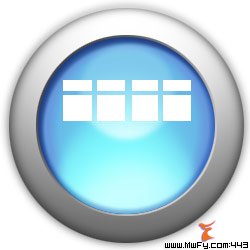
7.
Create a new layer named
Seven. Use the Rectangular Marquee Tool to create a rectangular box. Fill it with white by selecting white as the foreground color and hitting
Alt+Backspace (Option+Delete). Then, use the Rectangular Marquee to select a narrow rectangle in the middle and hit
Delete to clear the area. Do the same with a thin horizontal rectangle until you have four boxes like the left.
8. To spherize the white boxes, open up Liquify by hitting Shift+Ctrl+X (Shift+Command+X). Make sure the Show Backdrop box is selected in the bottom right. This is difficult to explain, and I encourage you to experiment with Liquify to come up with a result you like. I started by selecting a 400 radius brush and using Pucker by clicking above and directly in the middle of the boxes and dragging up a little. Then I selected a brush with radius 172, and clicked on the middle of the boxes with Bloat to inflate them a bit. Then, I moved the brush to enclose all of the blue area and clicked a bunch to move the boxes up and bend them. When I was finally done, I also created a layer above Seven, loaded the selection from Seven and filled it with a Foreground to Transparent gradient using white as the foreground color. I set the opacity of this layer to 90%. Then, I deleted the original layer Seven.
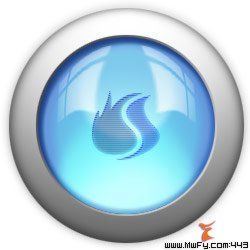
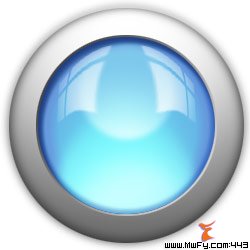
9. That's it! I added a Spoono logo on top for fun. You may click the image to the left to download the
Photoshop file I created in this example. I hope you orb-sorbed everything this tutorial had to offer.


