One of the best ways to accentuate part of a photograph is to use partial color. That is, make a portion of the photograph color and the rest of it black and white (or rather, grayscale). A festive way to employ this technique is to capture the focal point of an image in color with a polaroid-ish border, and turn the remainder of the photo black and white.
By using a couple of adjustment layers and well-placed layer styles, you can make a very creative piece of art. As a bonus, you'll be able to move the color snapshot bit around *anywhere* on the photo, illuminating just that area with color. It's really quite magical. Let's get started!
Create a snapshot shape
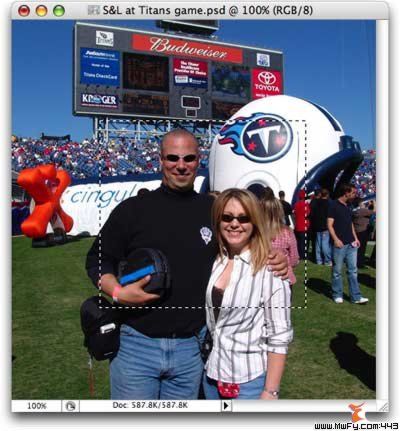
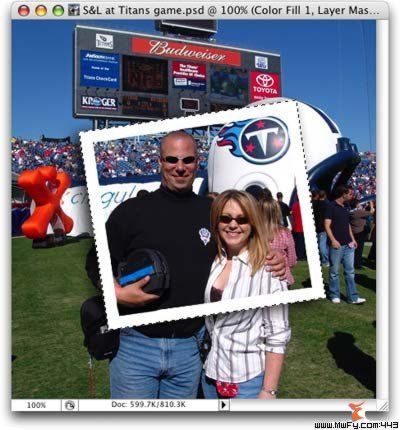
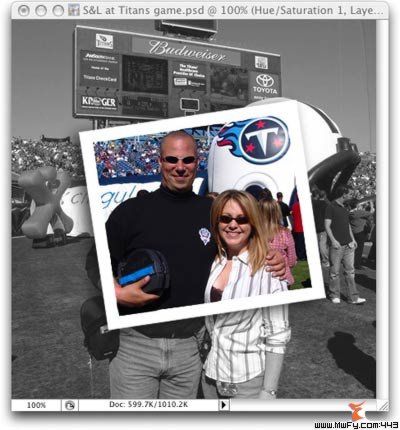
Step 1: Pop open a Soon To Be Very Creative Piece of Art in Photoshop. I'm going to use a photo taken last month on the sidelines of a Tennessee Titans football game. Sure I could crop and print it out as is, but that wouldn't be much fun. This snapshot effect will make it way more visually interesting, as you'll soon see.
Step 2: Press M to grab the Rectangular Marquee tool, and draw a selection around the focal point in the photo, like so:
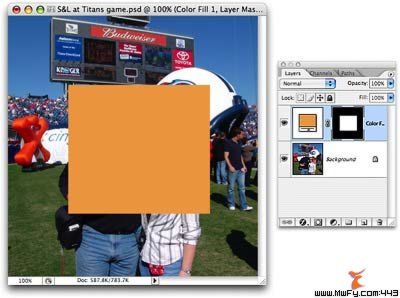
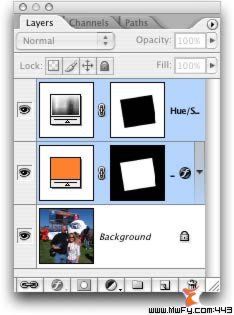
Step 3: Create an adjustment layer by clicking the half black/half white circle at the bottom of your layers palette. Choose Solid Color from the pop-up menu, and pick any color. NOTE: This color is for reference in building the snapshot shape only, so don't fret over it. It'll be gone in a second :)
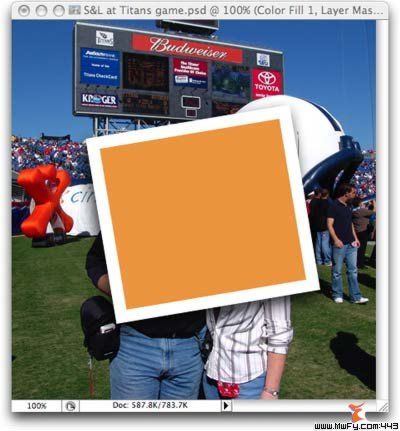
This is what my document and layers palette look like now:
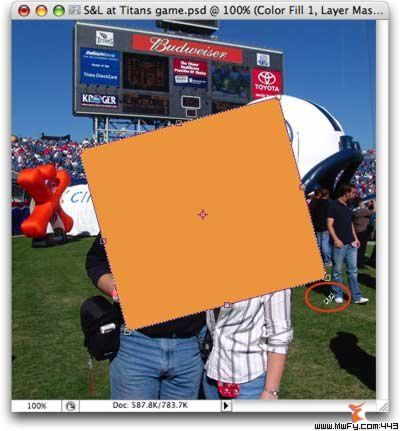
Step 4: While the adjustment layer is still selected in your layers palette, rotate the snapshot shape by pressing Command + T (PC: Ctrl + T) to bring up Free Transform. Click just below the bottom right handle and drag slightly upward (or downward, depending upon the angle you desire). Press Return to accept the Transform.
Frame it!
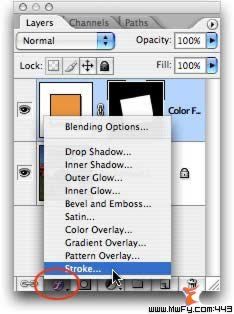
Layer styles are perfect for giving the snapshot a polaroid look.
Step 5: Press the tiny cursive "f" at the bottom of the layers palette and choose Stroke.
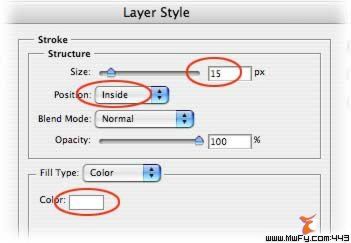
Step 6: In the Layer Style dialog box, enter 15 for size, select Inside from the Position pop-up menu, and choose white fom the color well. Don't close the Layer Style dialog box yet though, we need to add a drop shadow first.
TIP: Choosing a position of inside creates straight edges, whereas Outside yields rounded edges.
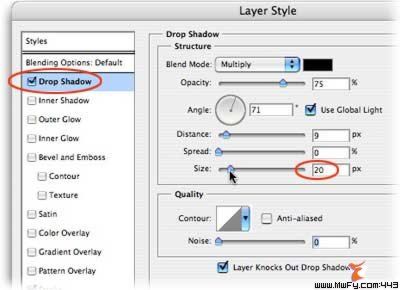
Step 7: In the Layer Style dialog box, add a Drop Shadow by selecting it in the lefthand menu. Adjust the sliders to get a nice soft shadow, then press OK.
TIP: Mouse over to your document to move the shadow around by hand.
NOTE: I made my drop shadow rather large (20 pixels) so that it's visible all the way around the frame, enabling the frame itself to be visible against the white of the Titan's helmet.
This is what we have so far:
Zap the color
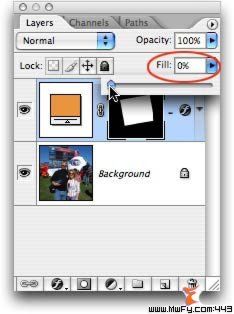
Step 8: Zap the orange of the snapshot shape by reducing the fill of the adjustment layer to 0, as shown below.
Step 9: Command click (PC: Ctrl click) the adjustment layer to select it. You should see marching ants appear around the snapshot shape.
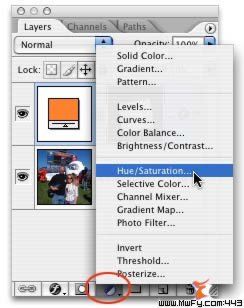
Step 10: Create another adjustment layer by clicking the half black/half white circle at the bottom of your layers palette. Choose Hue/Saturation from the pop-up menu.
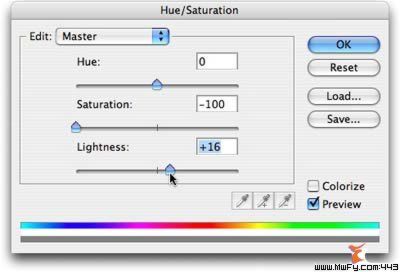
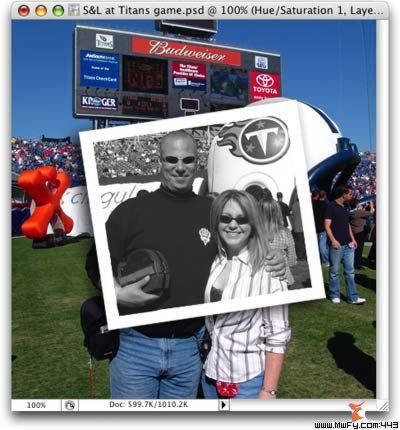
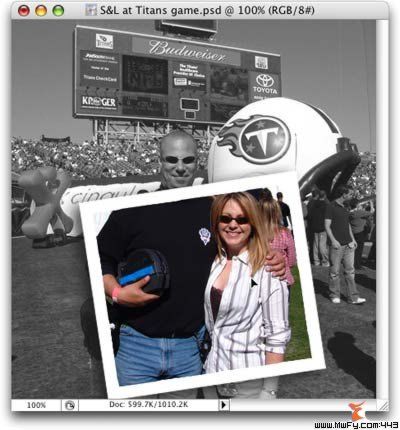
Step 11: In the resulting dialog box, drag the Saturation slider all the way to the left. The snapshot area itself will go grayscale, which is the exact opposite of what we want (don't panic because we'll swap this in the next step). Depending upon the contrast of your image, you may want to increase the Lightness just a touch by dragging its slider to the right. Click OK when finished.
Here's where we are now; a neat effect, but not what we're after today:
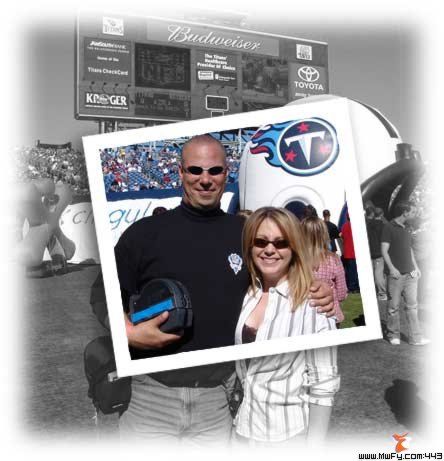
Step 12: Invert the grayscale by pressing Command + I (PC: Ctrl + I). Now the snapshot area should be color, and the rest grayscale. Whee! Ain't that purdy?!
Move it around
Here's the magical part: Because we used adjustment layers to create this effect, we can *move* the snapshot area around to just the right spot, and the color will follow. Oh yes. Several minutes of fun right here (it reminds me of those HP commercials). Here's how:
Step 13: Shift click both adjustment layers in the layers palette so they are both highlighted.
Step 14: Press V to grab the Move tool, and mouse back over to your document and drag the snapshot area around. Notice how the color moves with it? Is that cool or what?!
If I were going to put it on the web, I'd feather the edges of the grayscale bit. Just double-click the background layer to make it editable, draw a rectangular selection about .25 inches in from the edge and feather it by 10 pixels. Lastly, add a layer mask to hide the edges and then save it for the web.
This is a great way to spice up a photo to either print out, or to use in making custom holiday iCards to email friends and family. Hope you enjoy the effect!