Simple Logo
[ 作者来源:akpro.net
编辑整理:
PhotoShop资源网
更新时间: 2006-08-03
录入: 黄叶飞扬 ]
Step 1 - make a 500x500px white background image.
Step 2 - Grab your Rectangular Marquee tool and then set your foreground colour to #434343. Press Alt + BACKSPACE . this should make your canvas go darkish grey. THEN CREATE A NEW LAYER
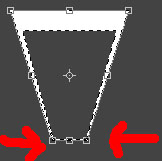
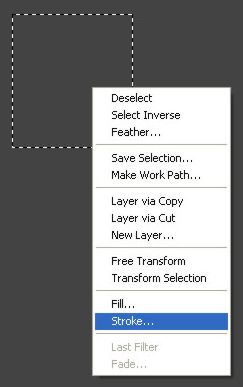
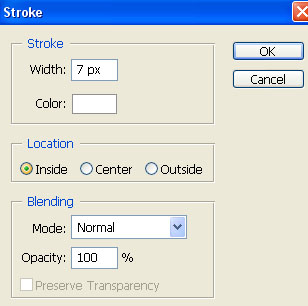
Step 3 - On this new layer, Using your rectangular marquee tool, make a squared shape, right click and press Stroke. Use the settings shown below. (7px, white, inside)
Step 4 - Edit > Transform > Perspective Then move the bottom right near the middle like so \/. Press Enter.
Step 5 - Duplicate this layer THREE TIMES. (CTRL + J). You should now have 4 of the same shapes. For the third layer: edit>transform>rotate 90 degrees CW
For the Fourth layer: edit>transform>rotate 90 degrees CWW
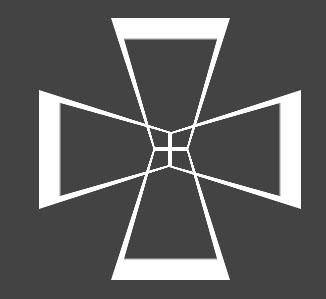
and for the last layer: edit>transform>flip vertical. you should have something like this:

Step 6 - Using the Move tool, put each of the shapes into this position, then merge the layers (click the top layer, CTRL + E until they are in one. (Background and layer 1)
Step 7 - This ones a bit hard to get at first. Go to Edit . Transform > Perspective and then drag the top left corner towards the middle. Then drag the bottom right corner DOWN then press ENTER. It should look something like this:
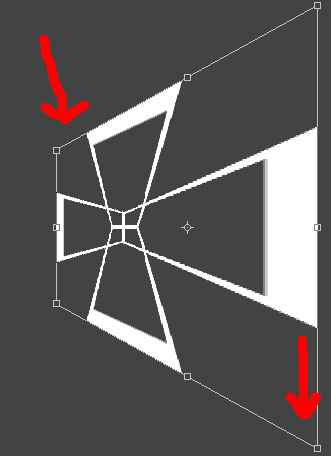
Step 8 - Edit > Transform > Rotate and move it round to look like this... Press Enter.

Step 9 - Go to Edit > Transform > Scale And hold SHIFT then use diagonal movements to scale it without it losing its shape.
Finished Product: Added text. Both have the layer style: Drop Shadow (default), Outer Glow (White), Outer Bevel (1 size & 2 soften)
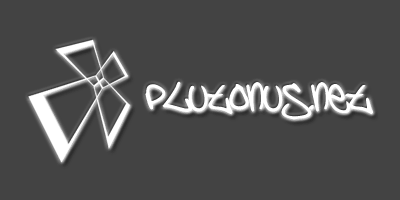
I used a font called Brooklyn Kid
(DOWNLOAD HERE)
≡★ 免 责 声 明 ★≡
除本站原创外,本站所提供的所有教程均收集整理自网络,其版权归该教程直原始作者或原始出处所有!
除特别声明外,您可以在保持教程的完整和注明来源的前提下免费复制、转贴本站所提供的所有教程;但是,不可以盗链本站的图片!
除特别声明外,在未经许可的情况下您不得将本站所提供的任何教程(包括资源)用于商业用途;
如果确有需要,请自行与该教程的原始所有权者(即:原始作者或出处)联系,本站不提供相关服务;否则,由此而引发的一切后果由您自负!


