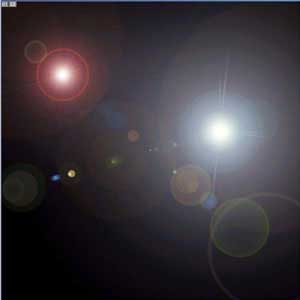
Step 1.
Create a new 300X300 pixels document with a black background. Apply Filter > Render > Lens Flare with the following settings: Lens Type->50-300mm Zoom, Brightness->100%, and place it in the top left corner. Apply Filter > Render > Lens Flare with the following settings: Lens Type->105mm Prime, Brightness->130%, and place it in the right side.
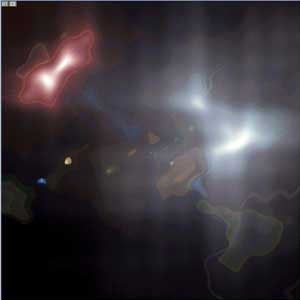
Step 2.
Now apply Filter > Distort > Wave with the standart settings:
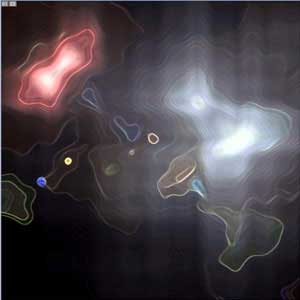
Step 3.
Now apply Filter > Brush Strokes > Accented Edges with the following settings: Edge Width->2, Edge Brightness->50, Smoothness->10.
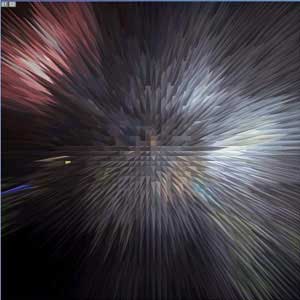
Step 4.
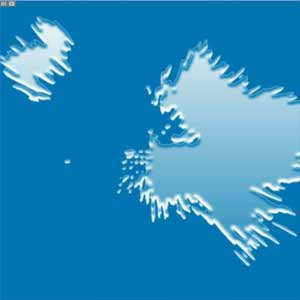
Duplicate main layer and apply Filter > Stylize > Extrude with the following settings: Size->10, Depth->80, Mode->Pyramides.
Step 5.
Then duplicate a curent layer and apply Filter > Sketch > Plaster with the following settings: Image Balance->20, Smoothness->10, Light Direction->Top. And now apply Image > Adjustments > Hue/Saturation like shown in the picture below.
Step 6.
Change the blending mode of the "Duplicate 1" and "Duplicate 2" layers on OVERLAY. And then you have to create a text. And that's it.


