Introduction to levels
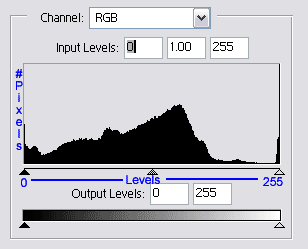
Levels are Photoshop's method for streching the contrast of an image.The RGB levels are a measure of how light or dark a pixel is, additionally the Red, Green, Blue, channels seperately have their own levels of how red green or blue a pixel is. The graph that is displayed when adjustmenting levels shows the number of pixels in the image relative to the level.Adjusting levels can change higher saturation and more contrast
Fixing the image
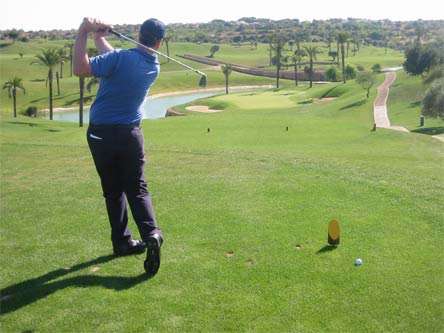
Before fixing a image, its best to critically analyse an image to see what's wrong. Looking at this golf image, two things become obvious
- Its has a great compostion
- Not enough contrast or saturation
The first step towards fixing the image is to use photoshop's automated image correction.
Goto: Image > Adjustments > Autolevels or use the shortcut and press shift+ctrl+l
9/10 times you will find that the image will look a lot better with just this one step alone.In this case however, while autolevels was a slight improvement, it wasn't enough.
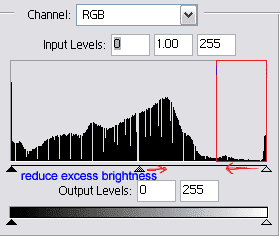
To manually adjust levels goto Image > Adjustments > Levels
From graph that is displayed we can see that some of the lighter levels are empty, so to strch the colors we can them. After this if the image is too light or dark adjust the middle handle to change the midlevels.


