|
Some Theory
I'll tell about creating glassy effects in raster... Of course, will take Photoshop as a sample software.
The principle of every glassy effect lies in lighting of an object. A sourse of light gives a highlighted area and shadowed area to almost everything in this world, especially when object's material is glass or plastic. I know sounds stupidly, but it's all the theory you should know :) All the following are the methods to bring this theory to your digital 2D creations.
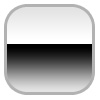
The basic principle of creating glassy effect in Photoshop lies in bright and dark gradients begin one out of another like on the following object scheme.
Lesson 1 - The Simplest Glassy Effect
We'll learn creating simplest glassy effect. |

Step 1
Create a shape. Anything you want. |

Step 2
Create a new layer. Add a bright gradient to it (light). |

Step 3
Create another layer. Add a dark gradient (shadow). |
Step 4
Cut the rest of the gradients out the range of the shape by using Magic Wand Tool and Cut command (ctrl+x). |

Step 5
Tune gradients, changing fill and opacity levels of its layers. Wheehhaa! You have the simplest glassy effect!
Use ex1.psd from examples to catch everything better. | |
|
Lesson 2 - Advanced Glassy Effect
Now, when we've learnt how to create the simplest glassy effect, we can continue in more advaced way to update our sample object and give more realistic look to it.
|
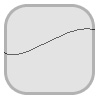
Step 1
Create a new shape. You need a curve to make your glassy effect more realistic. May use Freeform Pen Tool to create the right path. |
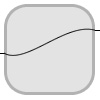
Step 2
Make your Brush's master diameter size 1px and stroke this path. Take Pencil and extend the curve you have to the borders of the canvas. |
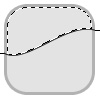
Step 3
Use Magic Wand tool to select an area in the way like the picture shows. Create a new layer. Fill it with light gradient.
Important! Hide or remove the layer with your curve and invert the selection. Cut the rest gradient out of the shape. | |

Step 4
Create a new layer and fill the selection you have now with a dark gradient. And you have a little more advanced glassy effect.
Did you noticed, that some alternative steps were done, if compare with ex.1? I'd like you to experiment during the process. This is the only way to learn how to do it more quality and more professional! |

Step 5
Now we gonna tune our object playing with Photoshop Effects. Select the layer with the main shape. Add Gradient Overlay, Inner Glow and Beavel And Emboss effects to it.
I won't tell more about it, as I'm sure, you will understand everything by exploration of ex2-1.psd in the examples folder. |

Step 6
We need to add a custom shape to our object. Please, do the following. Choose the shape layer, right click on its Effects bullet and Create Layers. Create a new layer above the overlaying one (Gradient Overlay or Color Overlay). Now paste anything you wish. Your glassy object completely done!
May play with the Effects layers you have to make it more perfect like in ex2-2.psd. | |
|
Lesson 3 - Glassy Effect on Rounded Shapes - Creating 2D Spheric Objects
Now we'll learn how to add 2D glassy effect to a rounded shape, it has some features. I will take a circle as a sample shape. |

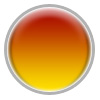
Step 1
Create a circle shape with Stroke (inner) effect. |
Step 2
May copy effects from the previous lesson, but add Satin one. Add it to the circle. Explore ex3-1.psd from examples to catch it. |
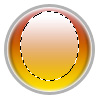
Step 3
Use Elliptical Marquee Tool to create a light gradient, like the picture shows. |
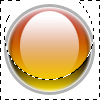
Step 4
Create the circle's Layers, like in the step 6 of the previous lesson. Add a new layer above the Overlay effects and add a new shadow gradient, like on this picture shown. Tune the gradient layer's opacity or fill. |
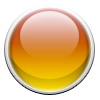
Step 5
Now play for some with what u have now, add effeects or whatewher you want. May see this example ex3-2.psd in the examples folder.
And at last! The sphere is wonderful and shiny :) | |
That's all you should know about 2D glassy effects in raster. The rest is up to you to create and moderate. Play, have fun with it! Hope, this tutorial was useful, best regards and good luck to you!
In the end I'll tell about one cool trick. |

Raindrop
Combine the knowledge from the two first lessons and add Zig Zag filter to the merged gradients layer. You have Raindrop glassy effect! | |


