首页

PS教程

PSD素材

PS素材

背景图片

高清图片

字体下载

矢量素材

PS资源

PS作品

会员专区
注册 / 登录
收藏
入门教程照片处理抠图教程调色教程文字特效经典合成鼠绘教程滤镜特效非 主 流GIF 动画签名溶图创意设计
 您当前的位置: PhotoShop资源网 >> PS教程 >> PS教程 >> 创意设计 >> 正文

Da Vinci's notes

[ 作者来源:readandforget 编辑整理:PhotoShop资源网 更新时间: 2006-08-02 录入: 黄叶飞扬 ]


Step one:
  • Create a #F6EDE0 rectangle in a new layer.

    按此在新窗口浏览图片
    Step two:
  • Add the following layer-styles:
    Inner Glow
    StructureBlend Mode: Color Burn
    Opacity: 84
    Noise: 24
    Color: #000000

    ElementsTechnique: Softer
    Source: Edge
    Choke: 0
    Size: 0

    QualityContour: Default
    Anti-aliased: Uncheck
    Range: 50
    Jitter: 11
    Pattern Overlay
    PatternBlend Mode: Hard Light
    Opacity: 11
    Pattern: Picture below
    Scale: 39

    按此在新窗口浏览图片

    按此在新窗口浏览图片
    Step three:
  • Grab the eraser tool with a hard tip, small is better to work with.
  • Randomly erase the edges of the rectangle, we want to make it look some what crumble and random so make sure each erase is different than the rest. Remember to not over do when erasing, we just want the rectangle to not look like a perfect rectangle.

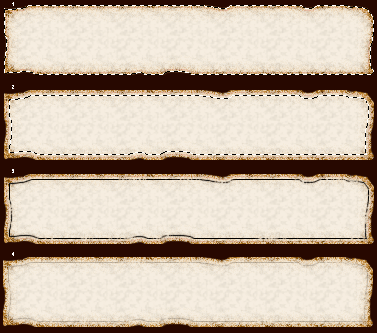
    按此在新窗口浏览图片
    Step four:
  • Go to Select > Load selecttion > Default to select the entire piece.
  • Create a new layer.
  • While the entire piece is selected go to Select > Modify > Contract > 5 px.
  • Now add a 1 #00000 stroke by going to Edit > Stroke > Location: Inside.
  • Set the opacity level 21%.

    按此在新窗口浏览图片
  • Step five:
  • Were going to add anothe inside stroke but this time contracted by only 2 px.
  • Go to Select > Load selecttion > Default to select the entire piece.
  • Create a new layer.
  • While the entire piece is selected go to Select > Modify > Contract > 2 px.
  • Now add a 1 #5E2601 stroke by going to Edit > Stroke > Location: Inside.
  • Set the blending mode to Color Burn and opacity level to 16%.

    按此在新窗口浏览图片
    Step six:
  • The little folding effect found on the top left and bottom right can be achieve by stroking a #000000 line.
  • To add a line were going to use Pen tool, first create a new layer and set your brush tool to a soft edge 3 px brush. We need to set the brush settings before we stroke because PS will not let you set it in that option..
  • Draw your line from the top to the left side.
  • Right click on your mouse to access the Pen tool sub menu. Choose Stroke path.
  • Add a pattern overlay layer-style.
  • Set the blending mode to Color Burn and opacity level of 29%.

    Pattern Overlay
    PatternBlend Mode: Normal
    Opacity: 100
    Pattern: Picture below
    Scale: 19

    按此在新窗口浏览图片


    按此在新窗口浏览图片
  • Step seven:
  • It's up to you if you want to add more folding effect, the more the better but don't over do it.

    按此在新窗口浏览图片
    Finale:
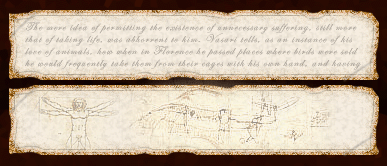
  • Now to add the notes, If your wondering what it says on the final preview, it's listed below.
  • The paragraph is written in Edwardian Script ITC, 12 pt, Sharp, #000000 and layer opacity level of 28 %.

    "The mere idea of permitting the existence of unnecessary suffering, still more that of taking life, was abhorrent to him. Vasari tells, as an instance of his love of animals, how when in Florence he passed places where birds were sold he would frequently take them from their cages with his own hand, and having paid the sellers the price that was asked would let them fly away in the air, thus giving them back their liberty."

    按此在新窗口浏览图片


  • ≡★ 免 责 声 明 ★≡

    除本站原创外,本站所提供的所有教程均收集整理自网络,其版权归该教程直原始作者或原始出处所有!

    除特别声明外,您可以在保持教程的完整和注明来源的前提下免费复制、转贴本站所提供的所有教程;但是,不可以盗链本站的图片!

    除特别声明外,在未经许可的情况下您不得将本站所提供的任何教程(包括资源)用于商业用途;

    如果确有需要,请自行与该教程的原始所有权者(即:原始作者或出处)联系,本站不提供相关服务;否则,由此而引发的一切后果由您自负!