| Start by creating a ellipse in a new file. |
|
|
| Press Ctrl+T. Rotate anti clockwise. |
|
|
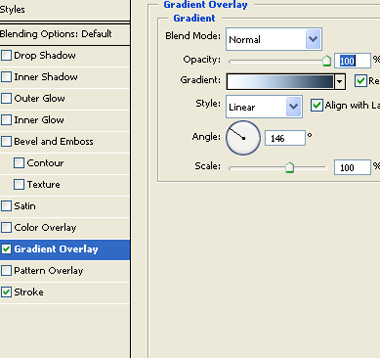
| Apply layer styles as shown. |
|
|
|
|
|
|
| Duplicate the ellipse and remove the effects. |
|
|
| Press Ctrl+T. Scale down this ellipse slightly. Ctrl click to get the selection. From Select menu click modify>>contract. Contract the selection by 3 pixels. Press delete to remove the inner area of the ellipse. |
|
|
| Erase the bottom right side using eraser tool with feathered brush settings. |
|
|
| Duplicate this layer. Flip horizontally and rotate clockwise. Scale it down. Enable lock transparency and fill with a darker color. |
|
|
| Create a duplicate of the bottom ellipse. Remove effects and scale down. |
|
|
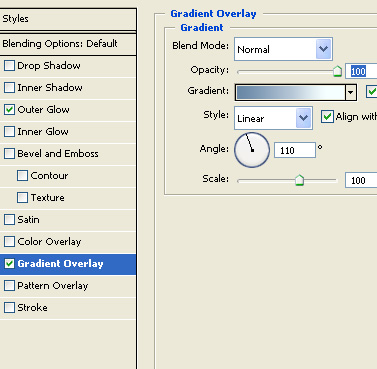
| Apply layer style as shown. |
|
|
|
|
|
|
| Duplicate this layer remove the effects. Fill it with a darker color. |
|
|
| Rasterize this layer. Erase the top right edges using eraser tool with feathered brush settings. |
|
|
| Create a dome shape using pen tool. Move it below all layers. |
|
|
|
|
| Apply same layer settings as we used for the first big ellipse. |
|
|
| Create an ellipse for the magnate. |
|
|
| Fill it with yellow color. |
|
|
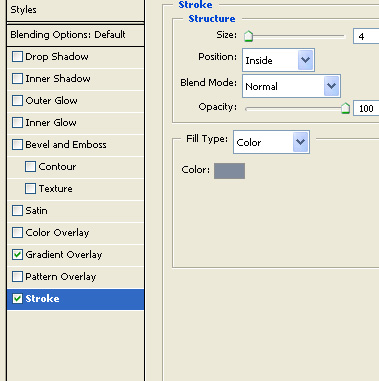
| Apply stroke to this shape. |
|
|
| Duplicate this layer and fill it with white color. Remove stroke from this layer. |
|
|
| Erase the bottom right edges using eraser tool with feathered brush settings. |
|
|
| Merge all layers. Scale down to an icon size. |
|
|
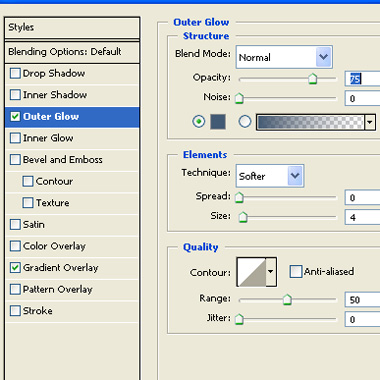
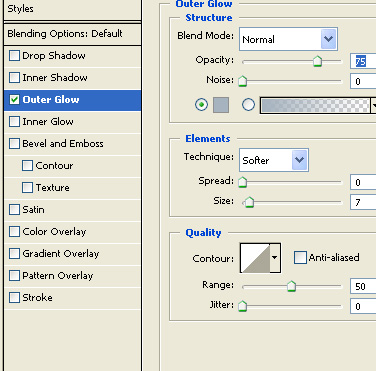
| Apply outer glow to this icon using following settings. |
|
|
|
|


