 This tutorial will teach you the secret of making blood effects on creatures/people. Read on and follow the instructions :)
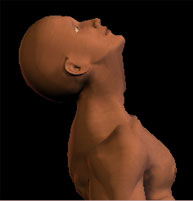
Start with a picture of a poser figure or any human/cartoon/creature.
For my tutorial i made poser figure.(fig.1)

fig.1
 Next (as always) make a new layer. You probably know by now how important the use of layers are :)
Pick a dark red color like R=100 G=0 B=0. Paint a dot like fig.2 ontop of where you want one of the cuts on the caracter to be with the airbrush or the paintbrush tool.
Then pick the Smudge Tool (fig.3). I used pressure = 84 on the tool when i made this tutorial, so you can do the same. To customize this, double click the tool to show the options for it.
With the Smudge Tool click and hold in the center of the dot u made, and drag in the direction of the arrow in fig.4
Repeat this in several directions untill you have anything like fig.5


fig.2 fig.3 fig.4 fig.5
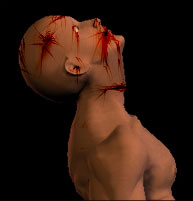
 Now, set the mode on this layer to Color Burn, and place it on the caracter where you want the cut to be. To easier shape the blood, you can set the layer to color burn before you start on making the blood stains. Then make the cut as you want and it might look more real.
I.e. if you want to slice the throat on a man, you should't make a blood stain like the one i showed you, but rather make it more horizontal if you know what i mean =)
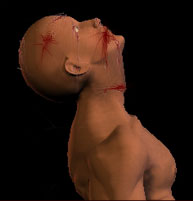
In fig. 6 you'll see my cuts.
If you DON'T set the layer to color burn, the effect of the blood won't look as realistic as with.
Fig.7 is without the color burn


fig.6 fig.7
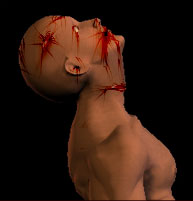
 Fig.8 shows you the same man only i used COLOR BURN on the blood layer. See the different? :) You should also add some bones and stuff inside the wounds. To do this make a new layer on the top, and paint carefully with a white/gray color in the middle. You can see the effect of this in the crack in the skull on fig.9.
You should do this on the rest of the body too, so use lots and lots of layers :)
PS! This effect works on interfaces, textures and text as well - Experiment!!:)
That's pretty much it... Good luck :)
 fig.8
fig.8
 fig.9
fig.9


 This tutorial will teach you the secret of making blood effects on creatures/people. Read on and follow the instructions :)

 Next (as always) make a new layer. You probably know by now how important the use of layers are :)


 Now, set the mode on this layer to Color Burn, and place it on the caracter where you want the cut to be. To easier shape the blood, you can set the layer to color burn before you start on making the blood stains. Then make the cut as you want and it might look more real.


 Fig.8 shows you the same man only i used COLOR BURN on the blood layer. See the different? :) You should also add some bones and stuff inside the wounds. To do this make a new layer on the top, and paint carefully with a white/gray color in the middle. You can see the effect of this in the crack in the skull on fig.9.
 fig.8
fig.8  fig.9
fig.9 


