By Rich Harris
By combining pinpoint control over transparency with an easy way to fix mistakes, Photoshop's layer masks are the perfect tool for blending two or more photographs together. In this example, we'll use layer masks to help create old wood siding, and then find out how a layer mask and the Render Fibers filter can give a brand-new fruit label that comfortable worn and faded look.
Create the wood background
Step 1 Render fibers
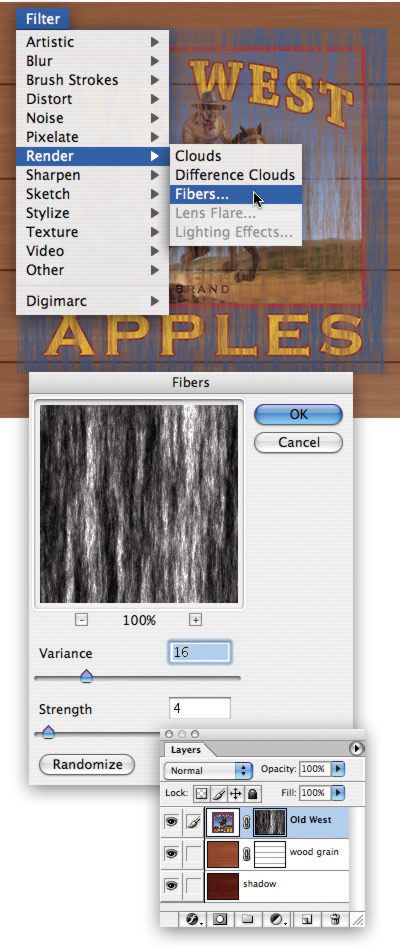
Select a dark brown and a light brown as your foreground and background colors. Go to Filter > Render > Fibers... and play with the fiber controls for a little bit to check out the different variations you can produce. The Variance slider will determine how long and varied your strands are- low for long and similar, high for short and varied. Strength is how spread out the fibers are- low for long, spread out fibers; high for short, stringy fibers. Hit the Randomize button until you find a wood grain you like.

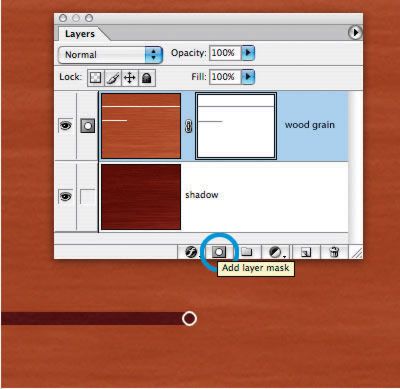
Step 2 Rotate and layer mask
Rotate the wood grain layer 90º. Duplicate the layer (Layer > Duplicate Layer...), and darken the lower layer with Image > Adjustments > Levels by pulling the center Levels slider to the right. Select the top layer, and add a layer mask by tapping on the Add layer mask icon. Create the spaces between the slats by painting with black, using the Hard Round 9 pixel with no Brush Dynamics settings. Hold the Shift key down as you stroke for a perfectly straight and level line.
Age the fruit label
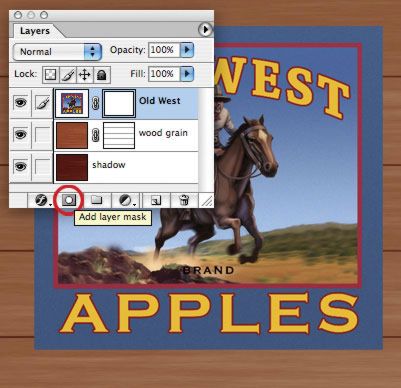
Step 3 Paste and layer mask
Open the Old West fruit label, select all (Command- or cntrl-A), copy and paste into your Wood Grain image. Add a layer mask to the Old West layer by tapping on the Add layer mask icon.
Step 4 Render fibers Select the Old West layer mask, and go to Filter > Render > Fibers. Use the same settings as you did for the wood grain fibers- since a layer mask is a citizen of the grayscale world, your color palette automatically changes to black and white.
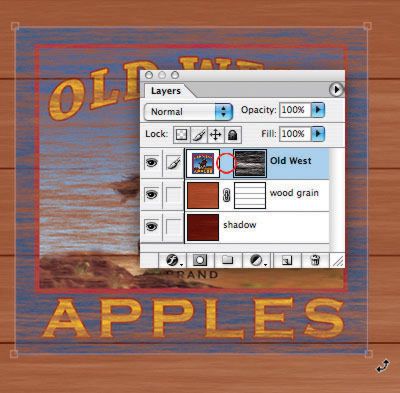
Step 5 Rotate the layer mask Unlink the layer mask from the Old West image by tapping on the little chain icon in between the two in the Layers palette- this allows you to rotate the mask without rotating the artwork as well. Select the mask, and go to Edit > Transform > Rotate. Click and drag outside the mask border to rotate the mask. Hold down the Shift key as you rotate to get an exact 90º rotation.
Step 6 Create slats in the Old West
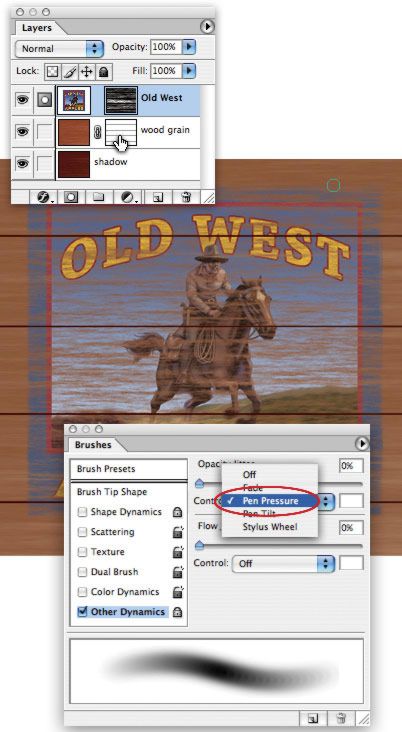
Select the Old West layer mask, and then tap on the top wood grain layer mask while holding down the command/cntrl key to select the unmasked portions of the top wood grain layer. Invert the selection (Select > Inverse), and fill with black to knock out the Old West image where it goes over the spaces between the slats. To add a little worn area to the edges of the Old West, choose the Soft Round 35 pixels brush, set it to react to pressure with opacity with the Brushes palette, and gently paint in the layer mask around the edge of the label to create a subtle fade.
Step 7 Adding shadows and highlights
To add a thin shadow at the bottom of each slat, create a new layer on top of the Old West layer, and set the Blend mode to Multiply. Paint a small stripe at 30% opacity with the Hard Round 9 pixel brush. Hold down the Shift key again for a nice straight line. Add another layer to the top, set it to Screen, and paint a highlight at the top of each slat with 30% white.
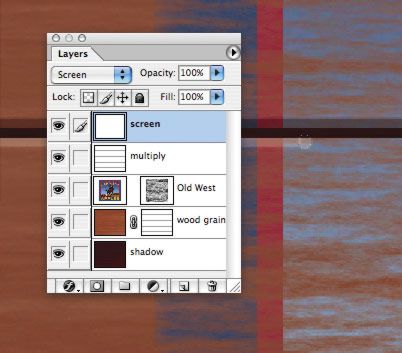
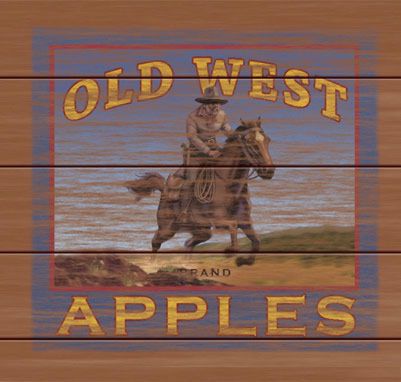
Step 8 And you're done- from a bright new label to a weathered sign in just ten minutes.