Al Ward, http://actionfx.com
First off, Happy New Year everyone! 2001 has passed at long last, and it is my sincere hope that 2002 will be a bit less tragic for all of us.
To start the year off right, I thought we would go through an effect that still has some people puzzled but really shouldn't. Once you get the idea down that most of this can be completed in a single Layer Style, you will be etching metal in no time. Especially if you remember to save the style… something I'm prone to forget on occasion, much to my dismay.
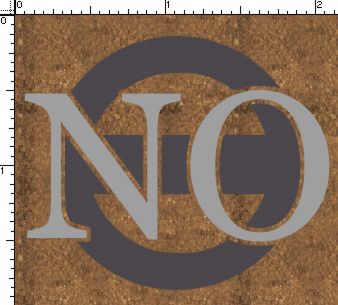
To start, create a new image and fill the background with a pattern. Try using a rusty metal or some such, but make sure it is seamless and saved in the loaded pattern set. If not, define the pattern before you continue. Here's one you can use (I'll be using it through this tutorial):

Create a new layer and either create a logo/image/shape with the tools available to you or paste one into the new layer.
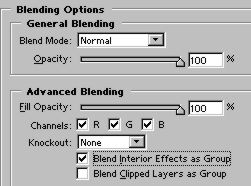
Open the Layer Styles for this layer by clicking the 'Add a Layer Style' icon at the bottom of the layers palette. Choose the Advanced Blending Options and uncheck 'Blend Clipped Layers As Group'. Check 'Blend Interior Effects As Group'.
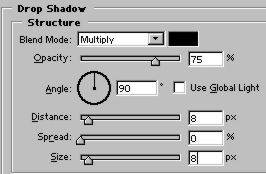
Go to Pattern Overlay and apply the rusty pattern to the shape layer. Then apply a drop shadow. Here are my settings:

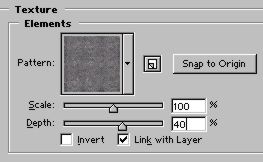
Move on to Bevel and Emboss. We are going to chisel this image hard!
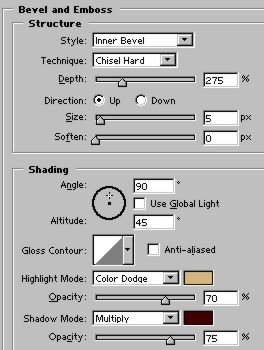

Still in the Bevel and Emboss options, apply a texture. Use the same pattern that you used on the image. Adjust the settings, decreasing the depth to 40% or 50%.
Now is a great time to SAVE THE LAYER STYLE!
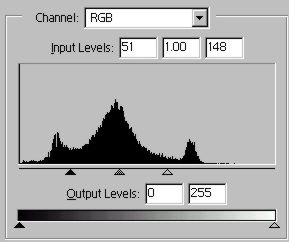
Create a new layer beneath the image. Select the image layer in the Layers Palette and Command/CTRL+E to merge down. Go to Image>Adjust>Desaturate.
Go to Image>Adust>Levels and move the arrows together until you are satisfied with the shine on your image.

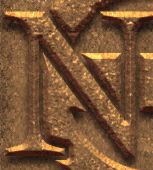
I hope this shed some light on this great effect. If you remembered to save the style, you can quickly apply this same technique in just a couple minutes to basically anything. Here are a couple of variations.