Let's talk about masking this week. Layer masking is really a great thing to play around with and it can be extremely powerful. One of the things that it is really great for is blending layers together to create a montage. It's really very simple to do in the most basic sense. Once you get a large number of layers, the blending gets more difficult, but the overall concept is basically the same.
Ok, let's start with two photos.
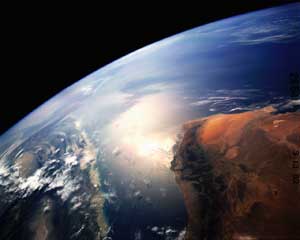

I want to create a blend with these two photos that are freebies I got from Corbis Images. Thank you Corbis Images. In order to do this, the first step is simply to bring both photos into Photoshop each on its own layer. I have the road on the bottom layer and the earth on the top. My background layer is white. What I want to do is to create a layer mask above the top image first. So I create a layer mask either by pushing the layer mask button at the bottom of the layers palette, or by using Layer ->Add Layer Mask. I chose the former.
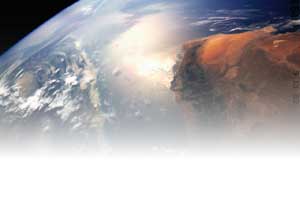
Using my linear gradient tool with white as my foreground and black as my background colors, I am going to swipe a foreground to background gradient from the top down. What I came up with is below. I turned off the other layer, so you could get a good look.
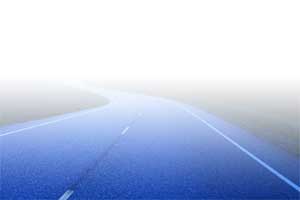
Now I am going to do the same thing, but with the road layer, and from the bottom up this time. So I now have 2 layers and 2 layer masks. I was not satisfied right away, so I played with how far my gradient went into the image area, and decided that I liked it best to stop the gradient on the bottom layer a little before I got completely to the top of the image.
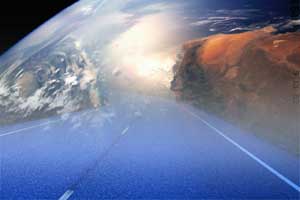
I then turned on all the layers to see how it looked and I fiddled around a bit more. It doesn't hurt to try and try again. In fact, that's one of the benefits of the digital medium. You don't have to pay for new canvas when you make a terrible piece. You just wipe it clean and start over. I love that! One thing you should definitely try as you do this is changing the opacity and the layer blending mode to suit the work. You can come up with some really great stuff using photos of your family and some landscape shots etc...
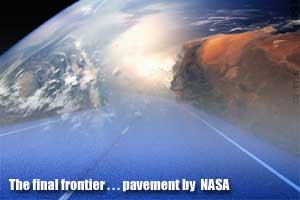
Just to top off this little piece I added some text and a cheesy ad slogan that I know I won't get paid for. That's OK I guess. You certainly don't have to do this, but I think you can see that a simple ad can be done pretty quickly. Now whether or not the client likes it is another story.