Last week we took a look at a quick way to embed stones into a background. Another fantastic effect seen on game interfaces and some high-end graphic art websites is what I call aged steel. There are a number of ways to achieve this illusion, and for this example we will be using a few tricks to generate our metal.
I've been a fan of fantasy novels since my early teens, and the artwork of Frazetta astounds me. Let's create an ancient axe that could have been used by warriors of yore. (Look Ma, I found an excuse to use 'yore' in a sentence!)
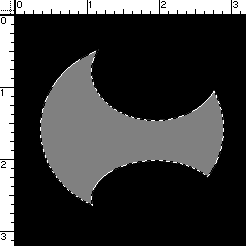
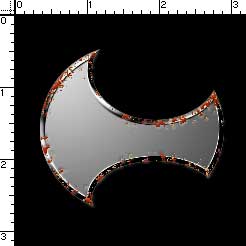
To begin with let's set up the image. I am going to work on the blade of an axe, so I need a good battleaxe shape. With the circular marquee I am making my selection, then I'm subtracting from the selection along the top and bottom. Once my selection looks relatively axe shaped, in a new layer I'll fill the selection with gray. Here's where we stand thus far:
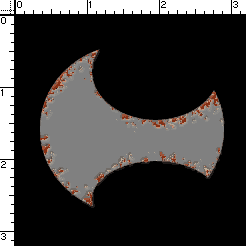
Let's duplicate that layer. I'm going to do something that may appear like I'm getting ahead of the project, but trust me, it will work out in the end! Select a dark red/brown for the foreground color, and a lighter tan/ reddish tint to the background. Now apply the Spatter filter twice, changing the foreground color for each application of the filter. Go to Select>Color Range, click in the gray area, and delete the gray from the spattered layer.
Are you here yet?

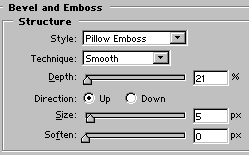
On the spattered layer, let's apply a bit of pillow embossing to the 'corruption' on the blade. Here's my settings and the result:
Go back and duplicate Layer 1. Select the Magic Wand and Command/Control>Click the layer to bring up your original selection. Select a light gray foreground and dark gray background. With the radial gradient tool, fill the selection starting at the top left and going to the bottom right of the selection.
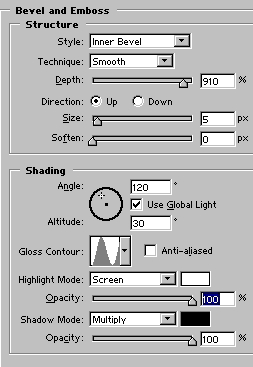
Here comes my favorite part! We are going to give an edge to the blade. Select the Layer Styles, and go to the Bevel/Emboss commands. Enter these settings:
You may also apply a cit more edge by adding a contour. Here's mine with just the bevel/emboss applied.
Now let's make our axe look as though it was hand worked. Simply apply the crystallize filter with a cell size of about 14.
You can play with aging the metal, adding more texture, etc. by swapping filters. Give it a try and see what works or appeals to you! After a bit of playing, here is my blade:
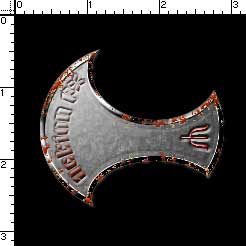
Now it is all ready for a handle. This effect would look great on text as well… again, I encourage you to play around with different ways of applying. Practice and interest are, after all, the foundations of learning.
Until next time, take care!


