[ 作者来源:photoshopsupport.
编辑整理:
Cross-processing is developing color print or slide film in the wrong chemicals ― for example, color negative film in slide chemicals ("C-41 as E-6") or slide film by the color negative process ("E-6 as C-41"). Not surprisingly, this causes wild color and contrast shifts and requires lots of trial and error. But for a period in the 1980s and 1990s, cross-processed images were very much the vogue, with Nick Knight's fashion and studio work being arguably the most influential.
With many possible permutations of film stock and processing technique, there is no single, identifiable, cross-processed appearance. The most common combination is C-41 as E-6, in which slide chemistry is used to process color negative film, and it's a quick job to imitate it in
Photoshop. Image contrast is usually high with blown-out highlights, while the shadows tend toward dense shades of blue. Reds tend to be magenta, lips almost purple, and highlights normally have a yellow-green color cast.
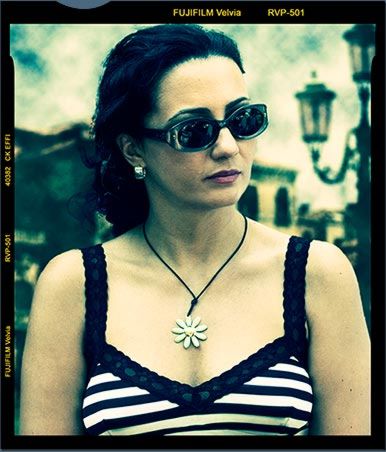
As for subject matter, try fashion or portraiture, but there's no need to restrict your imagination. I chose an elegant outdoor portrait shot ― the skin tones and red lipstick look especially striking in cross-processed images.
STEP 1
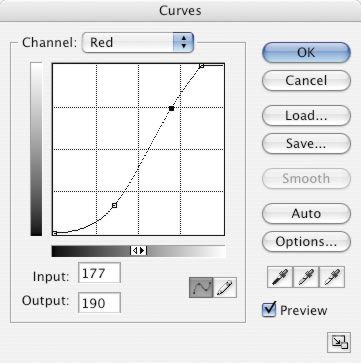
With the original image open, click the "Create new fill or new adjustment layer" icon in the Layers palette and select Curves. From the Channel drop-down box, select the Red channel and drag the top right of the curve a little to the left. Then drag a couple of points on the curve so that it forms a very gentle S ― darkening the shadows and brightening the Red channel's highlights.
TIP
To save your curve to a file on your hard drive, just click the Save button. Applying the same cross-processing adjustment to other images is a simple matter of loading it with the Load button in the Curves dialog box.
STEP 2
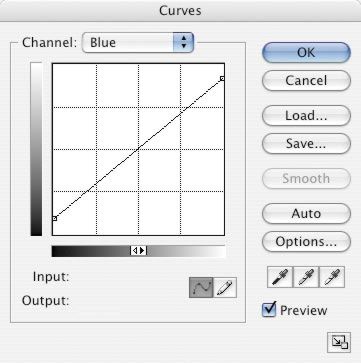
Select the Blue channel and drag the curve's top-right point downward. It doesn't need to be much ― just enough to take some blue out of the highlights. Then drag the curve's bottom-right point up a little, blocking up the Blue channel in the shadows.
STEP 3
In the Green channel, add another gentle S curve ― increasing the contrast, especially in the highlights.
STEP 4
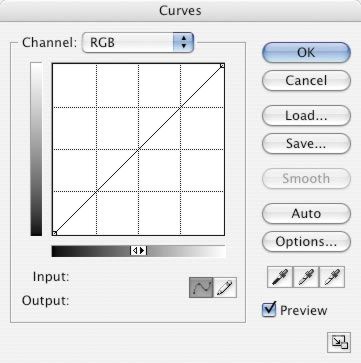
Fine-tune the channel curves to suit your image, but leave the combined RGB curve untouched. Focus on the color balance rather than the contrast, which you can fix later, in step 6.
STEP 5
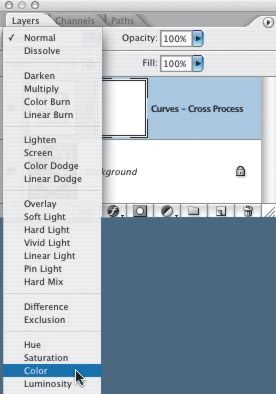
Blown highlights are a common ― if not always welcome ― characteristic of C-41 as E-6 cross-processing. They should result from the contrast-increasing curves used in steps 1?C3, but in Photoshop it's possible to eliminate them if you wish. Try changing the Curves adjustment layer's blending mode to Color and the image will combine the color shifts with the image's original luminosity.
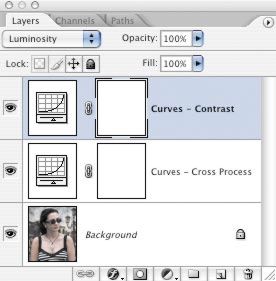
STEP 6
If you need to fine-tune the image contrast, add a Curves adjustment layer and set its blending mode to Luminosity so it doesn't cause any further color shifts.
STEP 7
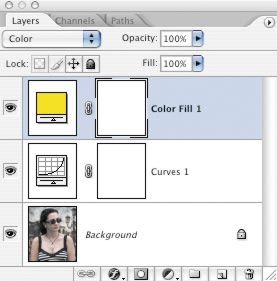
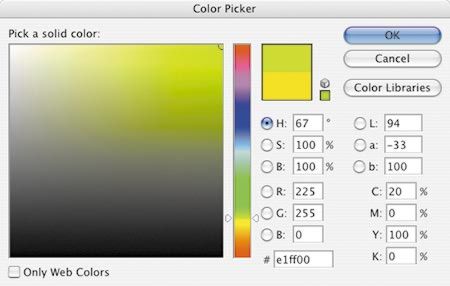
Another optional final step is to add a yellow color cast to the picture. In the Layers palette, click the "Create new fill or new adjustment layer" icon and choose Solid Color. Select a yellow-green and click OK, then reduce the new layer's opacity ― 10% is as much as you'll need.
FINAL IMAGE
This image was digitally captured and had daylight white balance. In Photoshop you can simulate 1980s-style cross-processing and add the film rebate (border) ― another typical affectation of the era.