Here's a few simple steps to simulate ocean or water texture using Photoshop CS 'Fibers' filter.
First, start a new document, I used an equal size preset of 450x450.
Create a new empty Layer (Shift + Ctrl + N (Mac: Shift + Command + N), just above the default document background Layer.
Next, set the Foreground Color to a variant of blue (I used #4372AA) and set the Background Color to Black #000000.
Next, go to 'Filter/Render/Clouds' to that your first effect is similar to what I have captured below.
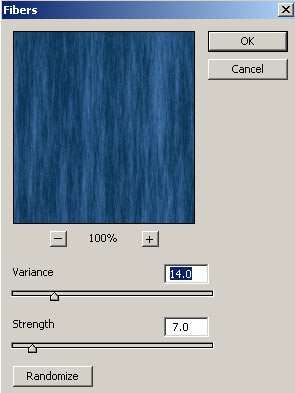
Next, go to 'Filter/Render/Fibers' and select a setting that your comfortable with, so that you can see (though in vertical direction) varying crests of waves within the render. (My settings are captured below)
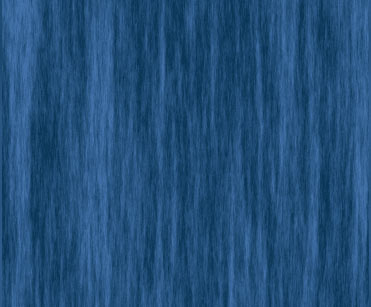
Your document preview should look like the below. (Ultimately, adjusting the 'Fibers' Variance' level is up to you)
Here is what the Layers Palette should look like!
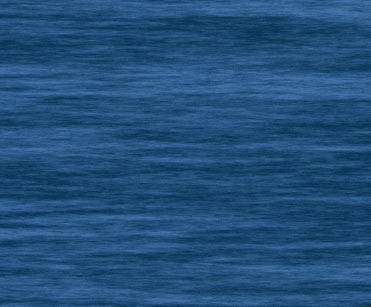
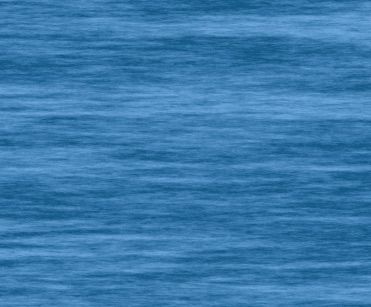
Next, we need to revert the direction of the water to a horizontal position. So, simply, go to 'Image/Rotate Canvas. 90 CW' to position the image as I have captured below. (This is why I used an equal size preset so that there would be no further resizing or positioning!)
Looking good so far! From here it's simply a matter of adjusting varying color. Though, there are many ways to achieve this, I will simply apply a Blending Mode to a duplicate Layer.
So, duplicate the water Layer, and change the 'Blending Mode' to 'Screen', and bump down the 'Opacity' level to one that you are comfortable with.
Here is the Layers Palette thus far.
And here is the improved water texture.
As a added bonus effect. Select the 'Gradient Tool (G)' on the Toolbar, and from the 'Gradient Preset Picker' select the Original 'Chrome' preset.
Click on it (encased in red above) to Edit the Preset, and within the Gradient Editor delete the #906A00 'Color Stop' at 'Location' 52 and adjust the 'Color Stop' thats at 'Location' 64 to a brighter Color (I used #F9E2A3, but ultimately, you choose.) and slide it to a new position. (I used Location 78).
Select the 'Linear Gradient Tool'  and change the 'Blending Mode' to 'Difference'. and change the 'Blending Mode' to 'Difference'.
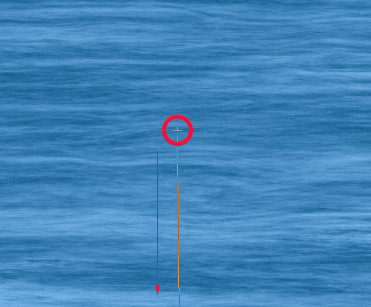
With 'Layer 1 copy' active and the 'Gradient Tool (G)' still selected, click and drag the just beyond the midway area of your water texture (red circle).
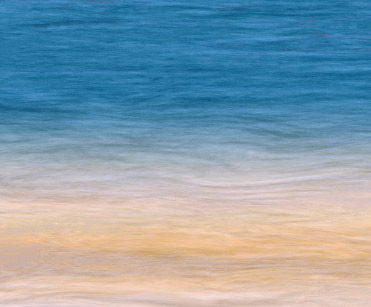
And this is the result. Water meets a sandy beach.
|