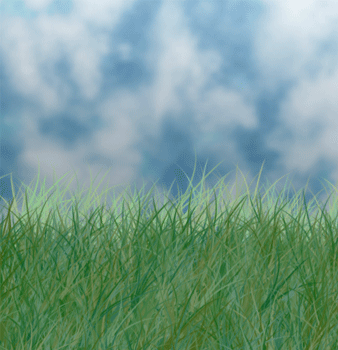
I first began with a 500x500 size document preset.
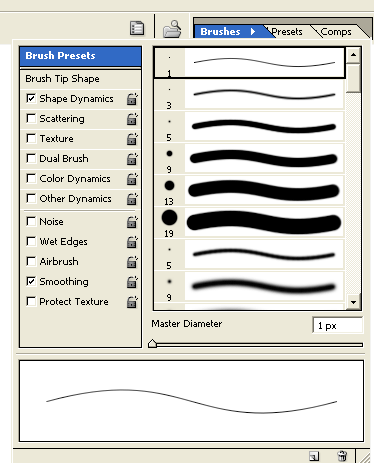
Next, follow along with the below 'Brush Preset' configurations.
If you haven't used the 'Brush Preset' palette before, it should be by default located in the upper right 'Docking Well'. (Along with the docked 'Layer Comp' & 'Tool Presets' palettes).
Select the 'Brush Tool (B)'  on the Toolbar and then hit the F5 key on your keyboard to toggle its visibility. on the Toolbar and then hit the F5 key on your keyboard to toggle its visibility.
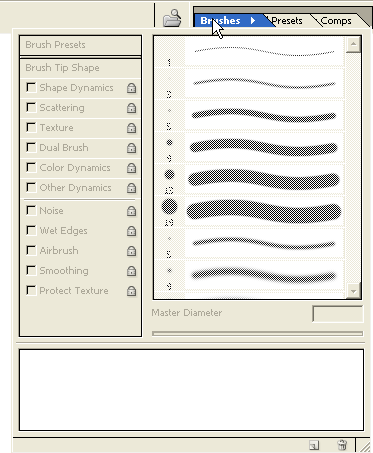
Note: Not selecting the Brush Tool (B) first and accessing the 'Brush Preset' manager reveals all items in disabled mode, as I have captured below.
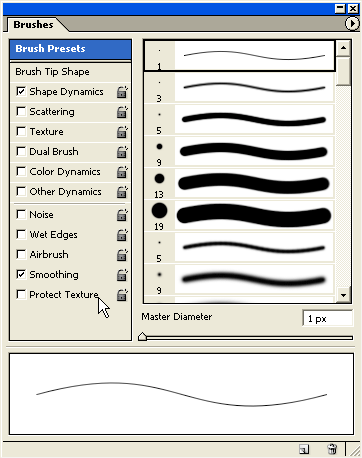
Note: Also, drag the 'Brushes' tab from the 'Docking Well' to have it as a free floating pallette, as captured below.
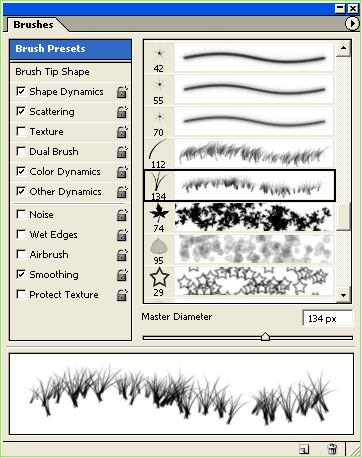
So, lets begin the grass effect brush preset, by simply selecting the left pane 'Brush Presets' (hightlighted in blue) and scrolling within the right window view pane to the 'Grass' brush.
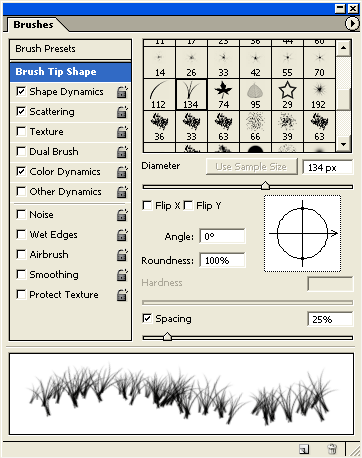
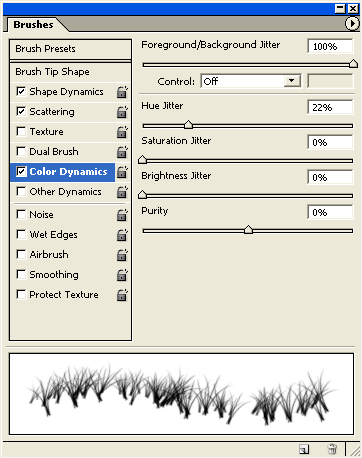
Then set the following parameters for this preset, starting with the 'Brush Tip Shape'.
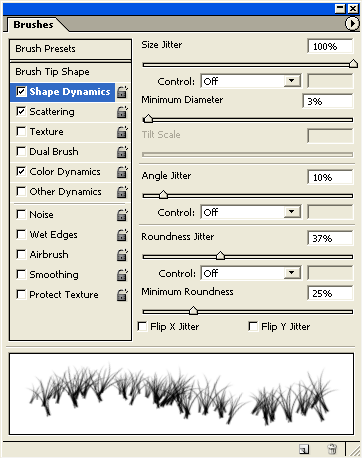
'Shape Dynamics'.
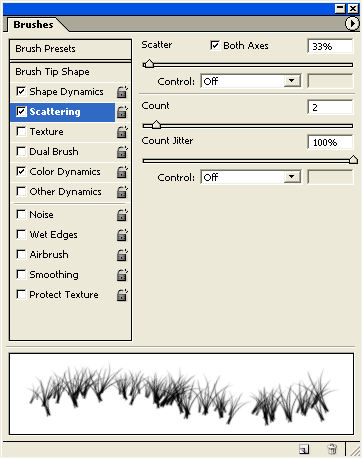
'Scattering'.
'Color Dynamics'.
Note: After testing this Grass Preset and your content with the parameter edits, hit the 'Create New Brush'  button at the bottom of the pallette window to save as a Custom Brush for future use. button at the bottom of the pallette window to save as a Custom Brush for future use.
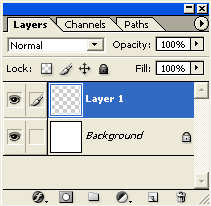
Now, the brush preset is ready, create a new empty Layer (Shift + Ctrl + N (Mac: Shift + Command + N), just above the default document background Layer.
Activate that new empty Layer by selecting it in the Layers Palette.
Next, set the 'Foreground Color' to a light color green (I used #90E04F) and a Background Color with a darker green (I used #145D0E).
Ultimately, you choose your colors, but this is where the above 'Color Dynamics' parameters come to use.
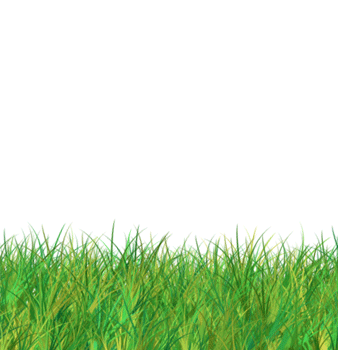
Next, with 'Layer 1' in the Layers Palette active, as well as, the 'Brush Tool (B)', click and drag from left to right at the lower area of the document window, until the whole area is filled in, as I have captured below..
Next, select the default 'Background Layer', and at the bottom of the 'Layers Palette choose the 'New Color Fill' layer icon  and from the list choose the third option 'Pattern'. and from the list choose the third option 'Pattern'.
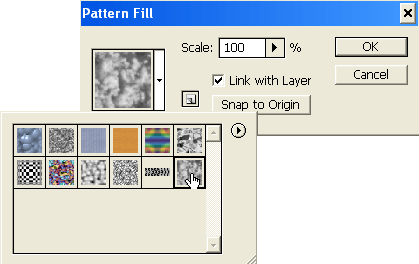
At the next prompt, click the Pattern thumbnail to load the Pattern Preset Picker and from the list choose 'Clouds'.
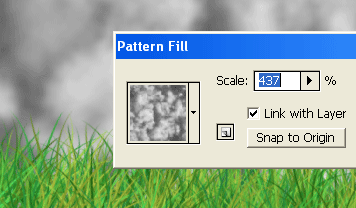
Simply adjust the 'Scale' integer and notice in the document window the size and position of the clouds, then hit 'OK' when satisfied. (I scaled at 437) Ultimately, you decide on the scale size and postion.
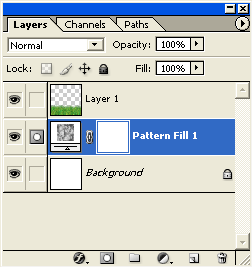
Here's how the 'Layers Palette' looks thus far.
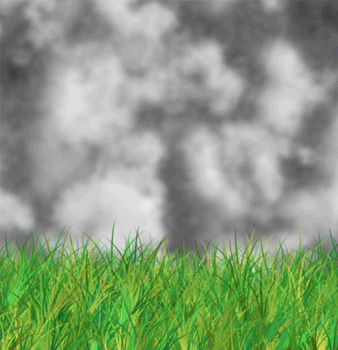
And the resulting image.
The final effect is to simply apply color to the clouds. There are plenty of ways to achieve this, I will apply color by using the 'Hue/Saturation' New Adjustment Layer settings below.
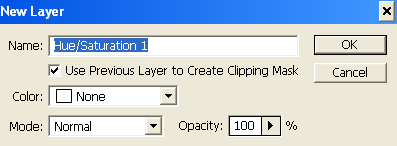
Select the 'Pattern Fill 1' Layer in the Layers Palette, then go to 'Layer/ New Adjustment Layer/Hue/Saturation' menu command, and at the next prompt, choose 'Group with Previous' option, then 'OK'...
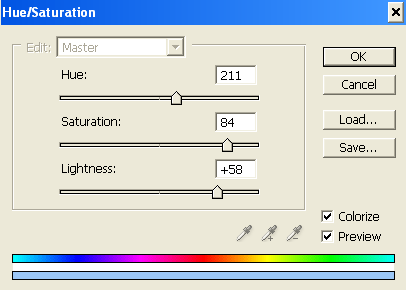
...and apply the 'Colorize' Master parameters below. Ultimately, achieving a blue color to overlay the cloud pattern.
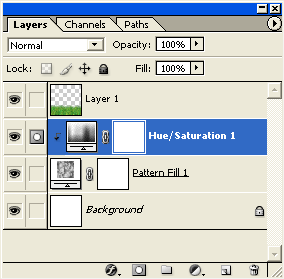
Here is the final Layers Palette configuration.
Note: The 'Group with Previous' option ticked earlier creates an indented layer.
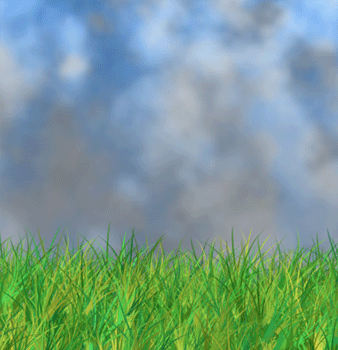
And here is the result.
Some variations.
|


 on the Toolbar and then hit the F5 key on your keyboard to toggle its visibility.
 button at the bottom of the pallette window to save as a Custom Brush for future use.

 and from the list choose the third option 'Pattern'.