Here is a few simple steps to create nice Bump Map Textures utilizing Blending Modes.
First create a Custom Preset document of your choice. I used 400x400.
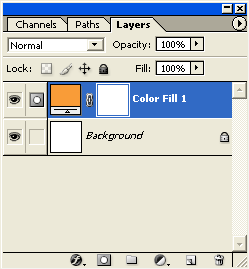
Then, create a new Fill Layer by selecting it's icon on the bottom of Layers Palette  , and from the context menu list, choose 'Solid Color'. At the prompt of the 'Color Picker', choose any color you please. I went for an earthen tone. (#F99C38) , and from the context menu list, choose 'Solid Color'. At the prompt of the 'Color Picker', choose any color you please. I went for an earthen tone. (#F99C38)
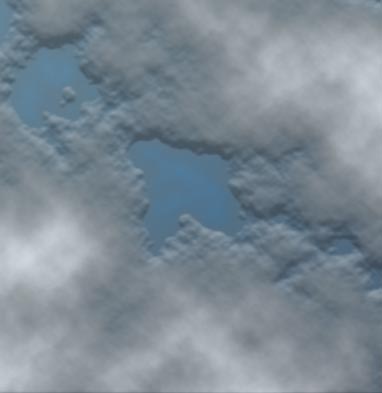
This will create a 'Color Fill' layer with a linked 'Layer Mask', like I have captured below.
Next, set the Foreground/Background Colors to Black/White if they are not already.
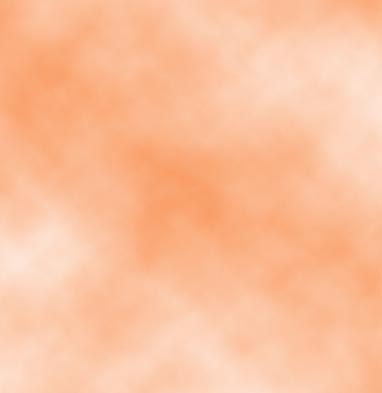
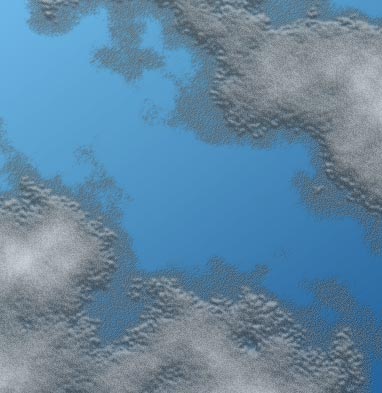
Then select the Color Fill Layer in the Layers Palette, then choose 'Filter/Render/Clouds'. This will add the render to the Layer Mask thats attached to the Color Fill Layer as I have captured below.
Here is the image thus far.
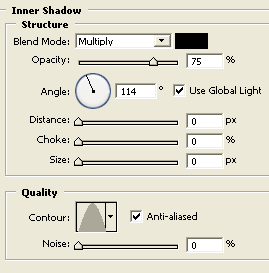
Next lets apply two Blending Options to create the bump map effects.
Right + click (Mac: Control + click) on the Color Fill 1 Layer and choose 'Blending Options'. Then apply the below layer style effects.
Inner Shadow Blend Mode Color: Black #000000, Contour Map: Cone
Note: Use various colors or contour maps for alternating effects.
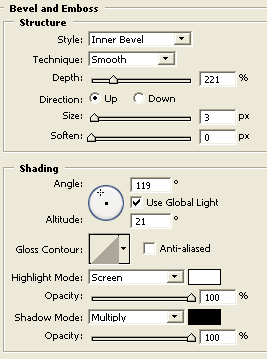
Bevel and Emboss
Note: Emboss and Pillow Emboss style work well with this also.
Contour: Cove - Deep. This is the style that gives the bump map height. Try various Range integers for variations.
Note: Other Contour maps work well with this also.
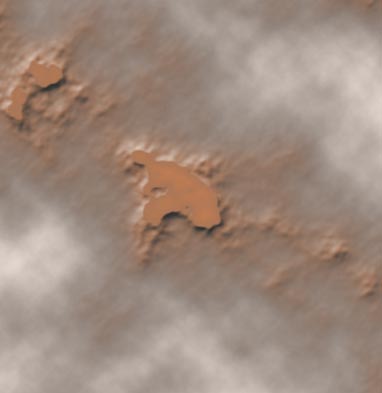
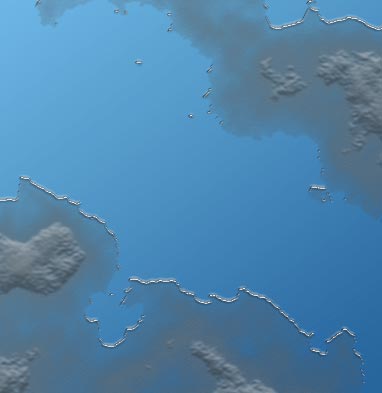
Click ok when you are satisfied with the final view. With the above settings, I produced the below image.
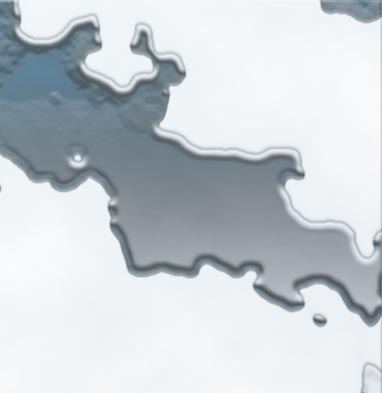
This one employs an additional Gradient Overlay and with the Bevel and Emboss style set to Emboss.
Tip: If your not content with the Clouds effect. Select the Layer Mask thumbnail and fill it with white. (but leave the Layer Styles intact). Then reapply the 'Filter/Render/Clouds' again.
Also for variations apply different Filters directly onto the Layer Mask, but be sure to go to 'Edit/Fade ' and lower the opacity of the last applied filter for seamless transitions or subtle blendings.
Example, I followed the above tutorial steps and then applied 'Filter/Artistic/Film Grain', then went to 'Edit/Fade Film Grain' and bumped down the 'Opacity' to 40% and switched 'Blending Mode' to 'Color Dodge' to get the following result.
Another example, using the same steps as above, except I applied 'Filter/Sketch/Plaster', then 'Edit/Fade Plater', kept the 'Opacity' at 100% but changed the 'Blending Mode' to 'Darken' to produce the following result.
And another variation
|