жӣҙж–°ж—¶й—ҙпј� 2006-08-01
еҪ•е…Ҙпј� й»„еҸ¶йЈһжү¬ пј�
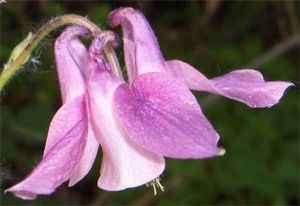
1. HereвҖҷs a macro flash photo of a Columbine. You can see chromatic aberrations around the edges of the petals, a thin red line along the left edges of the flower, a thin blue line to the right.
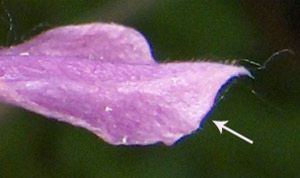
2. Closeup of the right petal, the blue line is a result of different wavelengths of light bending at slightly different angles when they pass through the lens.
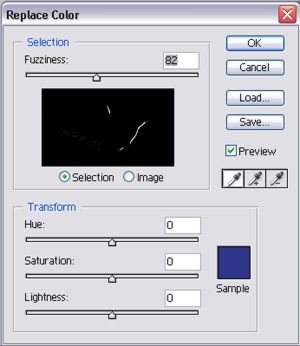
3. We can get rid of the blue using the Replace Color tool in Photoshop (Image > Adjustments > Replace Color). Use the eyedropper tool to select the blue line, then use the Fuzziness slider to try and get all the blue areas (which show up as white lines in the preview screen at right) without affecting the rest of the photo. By moving the slider to the right, a wider range of blues are selected. This works best for images that donвҖҷt have subjects that are also blue.The same procedure can be used to select red aberrations in the image.
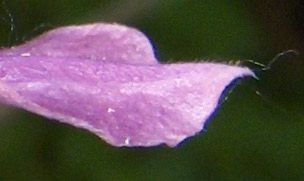
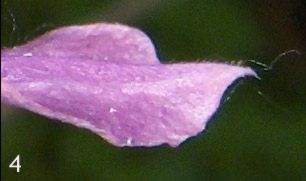
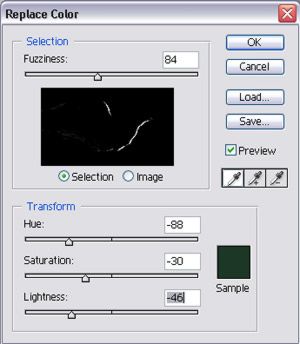
4. Once the blue is selected, use the bottom three sliders to modify the selected colour to match the background colour, here, a dark green. This is a quick way to correct aberrations in the entire image.
<!--adsense#banner-->
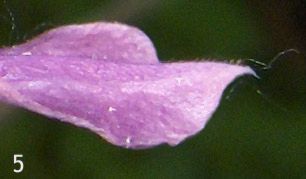
5. You may choose to stop here, however there may still be blue areas visible after step 4. You can use the Stamp tool to eliminate these by copying bits of the background close to the edges of the petal.
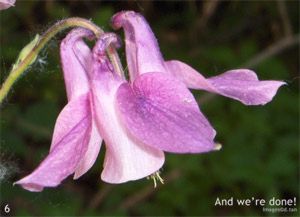
6. The finished photo. Areas of red still remain, as it was harder to select the red due to a similar red being present in the background. Still, a small amount of effort helps to achieve more professional results.