жӣҙж–°ж—¶й—ҙпј� 2006-08-01
еҪ•е…Ҙпј� й»„еҸ¶йЈһжү¬ пј�
Step 1
Open new 300x300 pixels document in Adobe Photoshop. Now with your Polygonal Lasso Tool draw the shape of a closed folder. Just like this.
<!--
ch_client = "sheic";
ch_width = 468;
ch_height = 180;
ch_non_contextual = 1;
var ch_queries = new Array( "design", "web design", "graphic design", "photoshop", "adobe photoshop", "design tutorials", "corel draw", "adobe illustrator", "macromedia flash", "templates", "camera", "Digital Camera", "powershot");
var ch_selected=Math.floor((Math.random()*ch_queries.length));
ch_query = ch_queries[ch_selected];
//-->
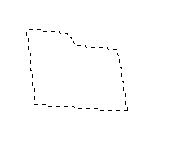
Fill it with #ecd283 color.This part of the folder has to be lighter.

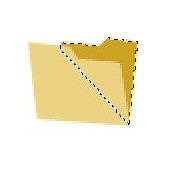
Step 2
Make a new layer Layer->New Layer and with your polygonal Lasso Tool draw the other side of the folder. This way the result will be an open folder. Fill it with the color #cba121.
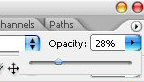
Step 3
Make a new layer. With your Elliptical Marquee Tool draw a circle in the upper part of the folder and fill it with white. Then set the opacity of the layer at 29%.

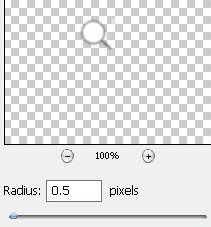
Step 4

Open this image in Photoshop and drag it next to the folder.

Make sure the last layer is selected and go to Filter->Blur->Gaussian Blur and set the Radius at 0.5 pixels.
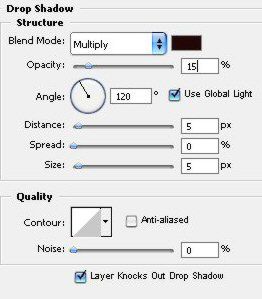
Now go to Layer->Layer Style->Drop Shadow. Set everything like in the image.
The icon is ready. It should look like this.