|
Windows have entered the world of beautiful and aesthetic interface graphics with windows XP. The icons styles have set a trend for designing front end elements. In this tutorial we'll try to create an iconic graphic in windows XP style.
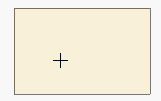
Start by creating a rectangle using rectangle tool. Use some pastel color like shown below. |
|
|
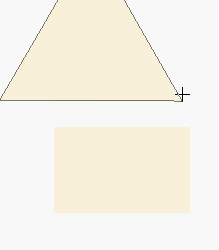
| Using polygon tool and setting sides to 3 at the top bar, create a triangle. Make it same color as rectangle. |
|
|
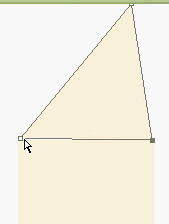
| Take direct selection tool, click on any side nodes of triangle and place it exactly on top of the rectangle. |
|
|
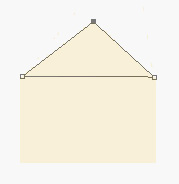
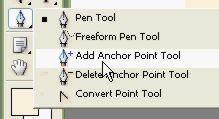
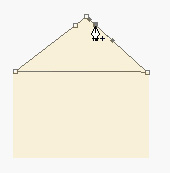
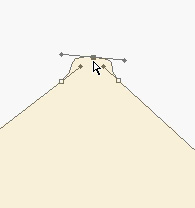
| Using "add anchor point tool" add two nodes near the top node of triangle. |
|
|
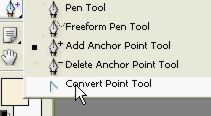
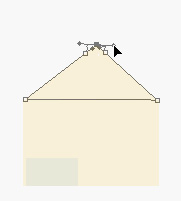
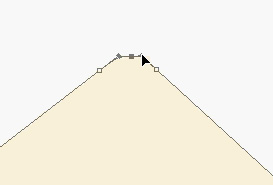
| Using "convert point tool" click n drag top node to make angular node to curve node. |
|
|
|
|
| Adjust the nodes with direct selection tool till you achieve a nice rounded corner. |
|
|
|
|
|
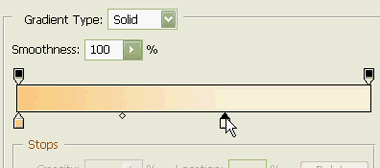
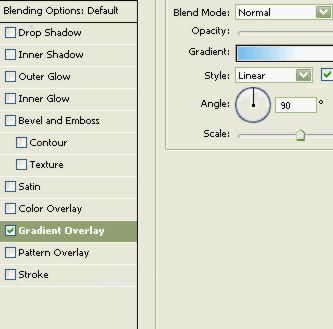
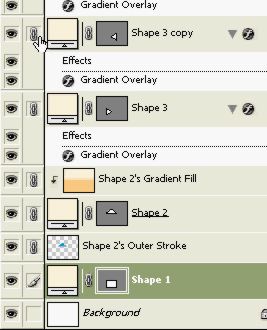
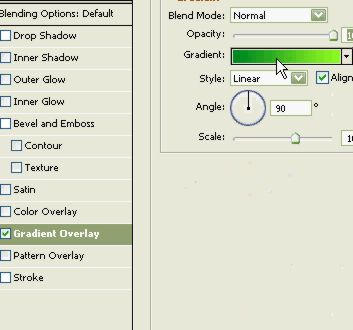
Double click triangle layer to open its layer style window. Apply gradient overlay and create gradient with two colors as shown. |
|
|
|
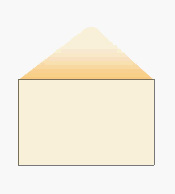
In a new layer create another triangle. |
|
|
| Similarly apply gradient overlay but this time use a sky blue to white gradient. |
|
|
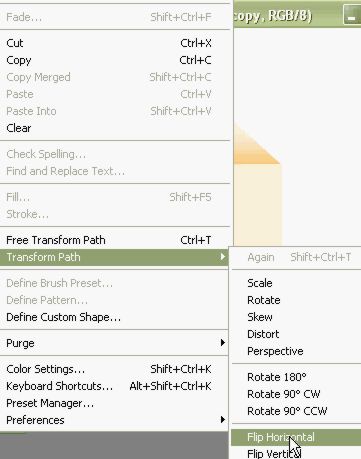
| Create a copy of this layer and from edit menu select transform path >> flip horizontal. |
 |
|
|
| Create duplicate of the first rectangle layer and place it above all layers. |
|
|
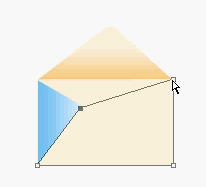
| Using direct selection tool adjust the position of its top two nodes and move them to positions shown below. |
|
|
|
|
| Apply gradient overlay of skyblue to white as explained above. |
|
|
|
|
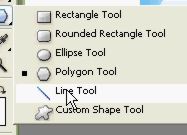
| Using line tool create outlines of our envelope with dark shade of skyblue. |
|
|
|
|
|
|
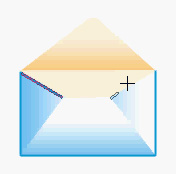
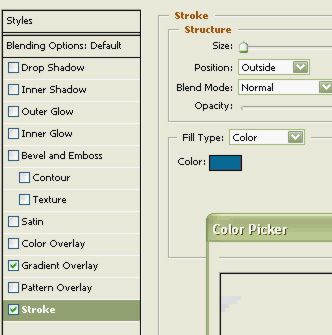
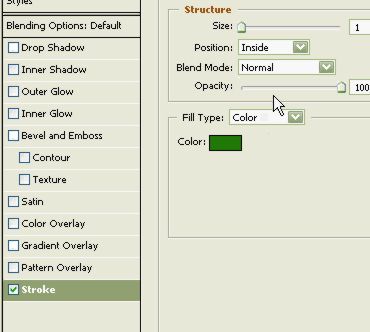
| To the triangle layer apply stroke of blue color with stroke width of 2. |
|
|
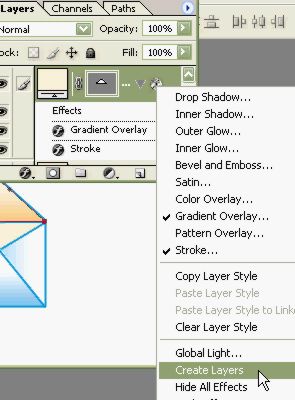
| After applying stroke to triangle right click on fx icon on triangle layer and select "create layers". |
|
|
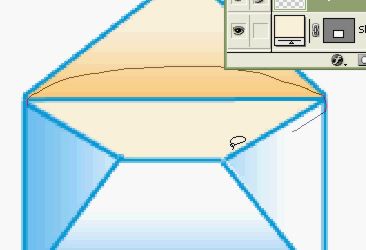
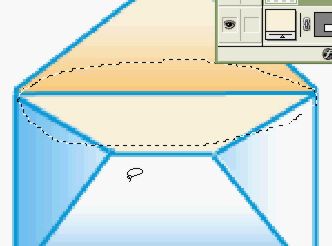
| This will create a seperate layer for stroke effect for triangle. Use lasso tool and select the stroke from the bottom of the triangle. |
|
|
| Press delete to remove bottom stroke of the triangle.. |
|
|
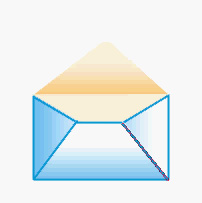
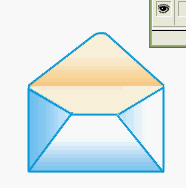
| Finally we have an envelope icon like this. |
|
|
|
Save your file as xpicon01.psd at this step.
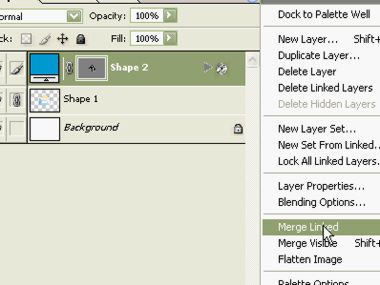
Now in layer window link all layers except white background and clcik Ctrl+E to merge all layers to one. |
|
|
|
Now we have only two layers; one white background and other with an envelope. |
|
|
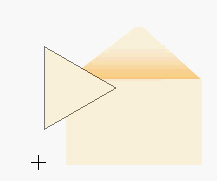
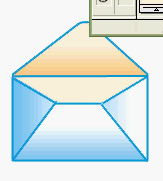
| Using custom shape tool create an arrow icon ina new layer. |
|
|
| Use Ctrl + T and rotate to adjust the position of arrow shape. |
|
|
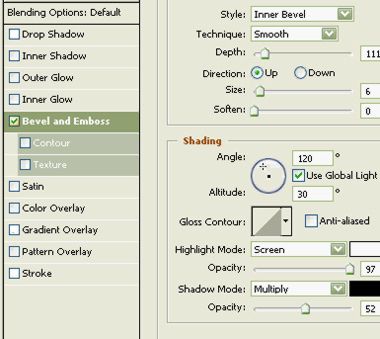
| Double click arrow layer and apply bevel & emboss, stroke, drop shadow and gradient overlay using settings shown. |
 |
|
|
|
|
|
|
| Link this arrow layer with envelope layer and press Ctrl+E to merge these layers. At this stage it would be wise to save as your file as xpicon02.psd |
 |
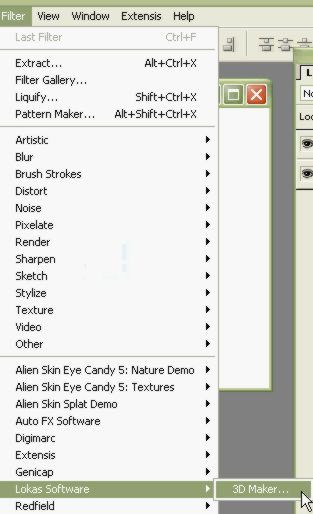
| From filter menu select lokas software >> 3D maker. Download plugin here. |
|
|
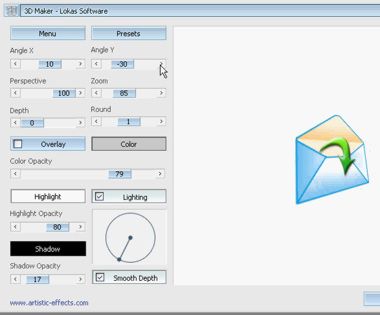
| Adjust settings for 3d Maker as shown. |
|
|
|
|
|
Using 3d make we added a perspective to the envelope design.
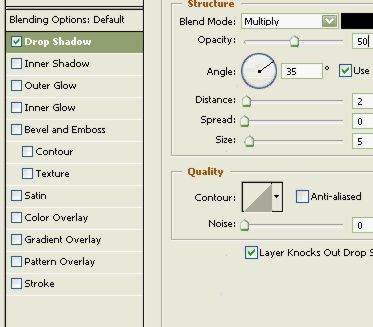
Double click this layer to open layer style window. Apply drop shadow as shown. Save your file as xpicon03.psd |
 |
| Our windows XP style iconic graphic is ready. |
|
|