Here I want to relate a few other ways of achieving the effect described in the Rectangled Picture tutorial.
The first method lies in using Vector mask instead of channels used in the previous tutorial.
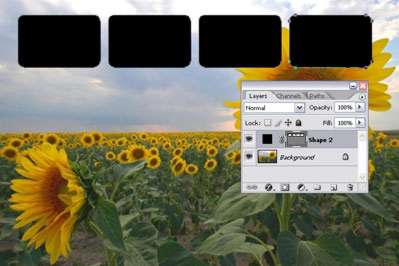
You can start from opening the original picture. Choose Rounded Rectangle tool with Shape Layers parameter and draw a rectangle in the top left-hand corner.
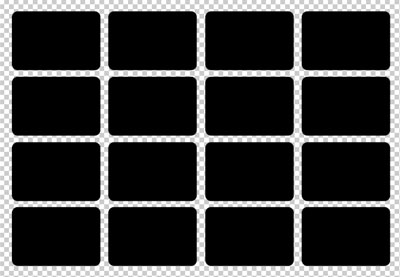
Holding down Ctrl+Alt+Shift, copy and move the rectangle to the right (I moved it 150px). Repeat this a few times until there is no more space left in the upper part of the picture. You should move the rectangles on the same distance as the first time. To monitor the accuracy of the shifts, open the info window.
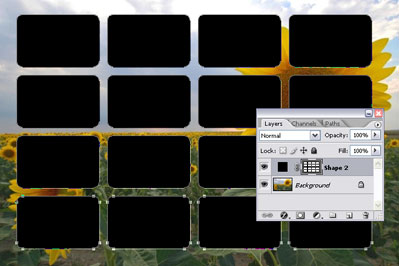
Select all the rectangles (holding down Ctrl+Shift, click on all the rectangles except the selected one). After that, pressing Ctrl+Alt+Shift copy those rectangles down the canvas until you fill up all of it (I shifted 100pxdown each time).
The rectangles are ready. Now click twice the Vector Mask thumbnail to select all the rectangles. Using the Free Transform tool, you can now change their size and shift them the way you want.
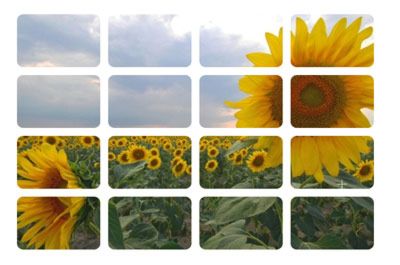
After that, holding down Ctrl, click on the Vector Mask thumbnail; inverse the selection. Select the background layer and hit Del (instead of deleting, you can desaturate the selection or make it very bright: Ctrl+U, then Lightness +80). Hide the layer with Vector Mask and you're done!
The second method is based on using Smart Objects.
Open your image and choose Rounded Rectangle tool with the Fill Pixels parameter. Draw a rectangle in the top left-had corner and convert in into a Smart Object.
Holding down Ctrl+Alt, copy and shift the rectangle to the right leaving 1 pixel between the two rectangles. Repeat this procedure until you fill up the row. Then do the same for each one downward until you fill up all the space.
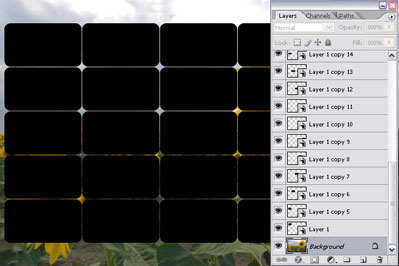
As a result, you'll get a multitude of rectangles with the same number of layers with smart objects corresponding to them. Now you can easily alter the distance between them, their roundness, or totally change their shape. To do this, select any of the smart objects and double-click on its thumbnail. Or, you can go to Layer>Smart Objects>Edit Content. You will get to the window for editing the smart object. Do anything you wish with the shape.
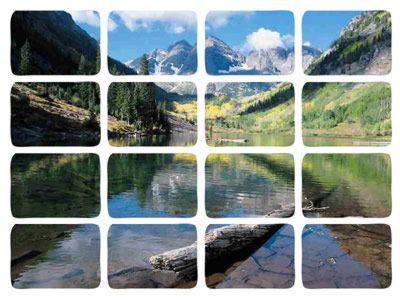
Save and get the following effect:

After that, select all layers with Smart Objects and merge them. Then, as in the previous example, Ctrl+click the thumbnail. Then inverse the selection. Select the layer with the background and hit Del. After that, hide the layer with the black objects and you're done.

Click to enlarge
The third method is based on Custom Shapes. You can create the pattern just once and then use it as many times as you need to.
Create a new, slightly larger, canvas - about 1000x700. Fill it with 16 shapes - the way you did in the first method.
After that, Ctrl+click the Vector Mask thumbnail and inverse the selection. Go to Paths and click Make work Path from Selection. After that, select Define Custom Shape.
Open the image that you are planning to apply the effect to. Choose Custom Shape tool and select the custom shape you've just created.
Apply it to the image and set your desired color.
Choose the method you like the most and enjoy!
---------------------------------------------------------------------------
<!-- ARTICLE CONTENT STOP --><!-- ABOUT AUTHOR START -->
About the Author:
Dustin Kein is an editor at Web Design Library. He's in charge of selecting materials for the PhotoShop and HTML sections of this site. From time to time Dustin contributes some of his tutorials to WDL in order to cover the most actual topics for WDL visitors. Besides this, he's an active forum member whose posts are always helpful, concise and timely.
read more about this author
<!-- ABOUT AUTHOR END -->


