Rectangled Picture (Exclusive Tutorial)
[ 作者来源:webdesign.org
编辑整理:
PhotoShop资源网
更新时间: 2006-08-01
录入: 黄叶飞扬 ]
One of these days while looking through TemplateMoster’s vast collection I came across one or two templates with a very curious effect. The effect I'm talking about is when a single picture is comprised of smaller rectangles. Without hesitation, I decided to copy the effect in Photoshop and relate my steps in this tutorial.
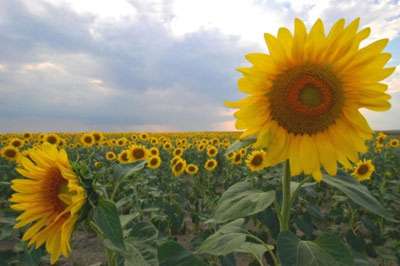
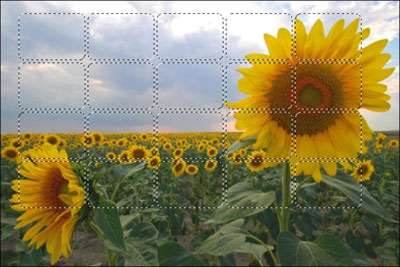
For starters, we'll need a picture, which will serve as a basis for the rectangles. I liked this sunflower one a lot.
Click to enlarge
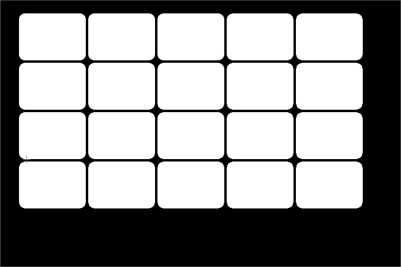
Open it in Photoshop, go to Channels Panel and create a new channel. Select Rounded Rectangle tool in the top left hand corner and draw a medium-sized rectangle.
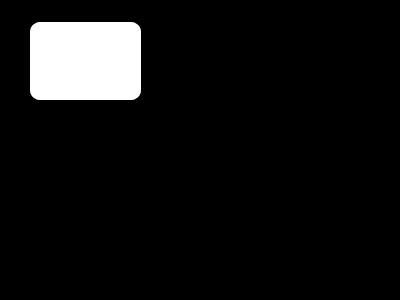
Holding down Ctrl, left click the thumbnail of channel Alpha1. After that select Move tool and holding down Ctrl+Alt+Shift use the left mouse button to move the rectangle to the right. You should get a thin black 4pixel line between the rectangles.
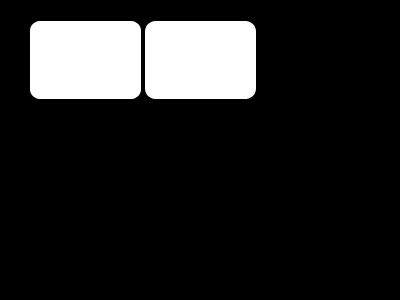
Repeat the procedure until you have the line filled with rectangles.
Holding down Ctrl, left click the thumbnail of channel Alpha1. After that, using the Move tool and holding down Ctrl+Alt+Shift move the rectangles with the left mouse button so that a 4pixel black line remains between the rows. Repeat this action until you fill up the whole space.
Select all the white rectangles. To do this, left-click the thumbnail of Alpha1 channel while holding down Ctrl. Go back to Layers Pallete and click the thumbnail of your picture. Select the Marquee tool and move the selected area the way you want. You can also use the Transform Selection to modify the selection in your own most suited way. I liked my original selection so I decided to keep it.
Click to enlarge
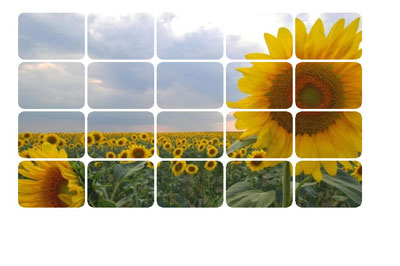
After that, duplicate the selection and hide the layer containing the full picture. Here's what you should get:
Click to enlarge
Basically, the tutorial is over. From this point on, you have no restrictions to follow you fancy. You can delete a few cells of substitute some texts/inscriptions for them, or outline them in a certain way creating menu buttons.

Click to enlarge
≡★ 免 责 声 明 ★≡
除本站原创外,本站所提供的所有教程均收集整理自网络,其版权归该教程直原始作者或原始出处所有!
除特别声明外,您可以在保持教程的完整和注明来源的前提下免费复制、转贴本站所提供的所有教程;但是,不可以盗链本站的图片!
除特别声明外,在未经许可的情况下您不得将本站所提供的任何教程(包括资源)用于商业用途;
如果确有需要,请自行与该教程的原始所有权者(即:原始作者或出处)联系,本站不提供相关服务;否则,由此而引发的一切后果由您自负!


