Hue/Saturation Without Losing Exposure
[ 作者来源:picturecorrect
编辑整理:
PhotoShop资源网
更新时间: 2006-08-01
录入: 黄叶飞扬 ]
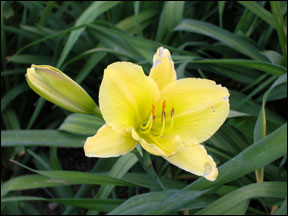
This tutorial is to help you learn how to adjust the Hue and Saturation of a photo without burning out colors. This tutorial uses a different technique that will prevent you from losing your exposure settings. This tutorial was made with the help of Dan Buxton.
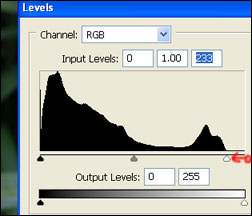
1. Adjust the Levels, (Image>Adjustments>Levels).
2. Make sure the levels range is set to fit the range of color, for this photo I had to move the right end of the levels range in to fit the colors.
3. Change the Image Mode to Lab Color, (Image>Mode>Lab Color).

4. Create a New Curves Adjustment Layer, (Layer>New Adjustment Layer>Curves).
5. Change to Channel a
6. Move the corner adjusters in approximately one square, you may wish to adjust them more or less depending on the photo.
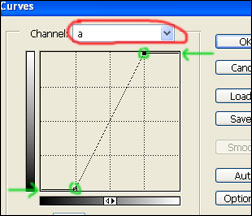
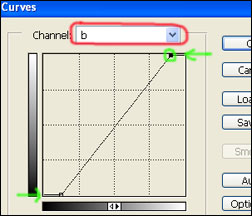
7. Change to Channel b
8. Move the corner adjusters in approximately half a square, you may wish to adjust them more or less depending on the photo.
==OK==
≡★ 免 责 声 明 ★≡
除本站原创外,本站所提供的所有教程均收集整理自网络,其版权归该教程直原始作者或原始出处所有!
除特别声明外,您可以在保持教程的完整和注明来源的前提下免费复制、转贴本站所提供的所有教程;但是,不可以盗链本站的图片!
除特别声明外,在未经许可的情况下您不得将本站所提供的任何教程(包括资源)用于商业用途;
如果确有需要,请自行与该教程的原始所有权者(即:原始作者或出处)联系,本站不提供相关服务;否则,由此而引发的一切后果由您自负!


