| The following tutorial is courtesy of Photoshop User magazine |
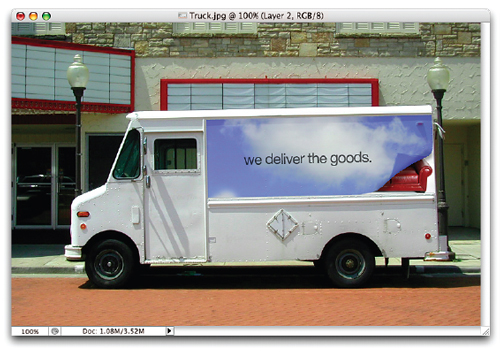
 I saw this effect used on the graphic on the side of a delivery truck. The truck was from a service that delivered just about anything, and the graphic made it look like the corner of the truck was being peeled or curled back so that you could see the boxes stacked up inside―pretty clever. It got me thinking about how you’d do that in Photoshop CS2 now that it has an image warp feature.
|
|
| STEP 1 |
|
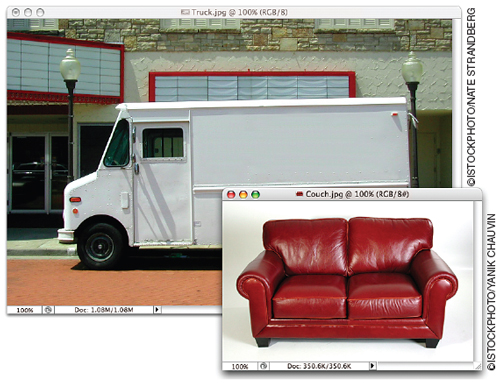
| First open the photo to which you want to apply the effect. We used a royalty-free stock photo of a panel truck, courtesy of our friends at iStockphoto. Now open the photo that will appear under the peeled-back corner (in our example, a couch). Once the couch image is opened, press Command-A (PC: Control-A) to select the entire photo, then press Command-C (PC: Control- C) to copy it into memory. Close the couch image as we won’t need it again. |
|
|
| STEP 2 |
|
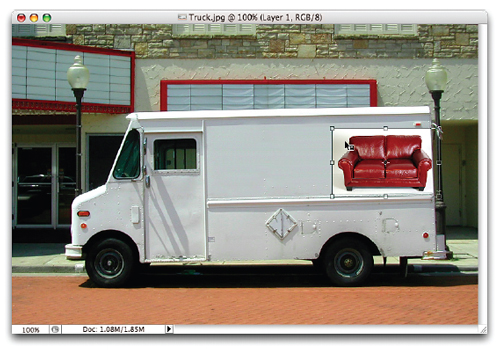
| Get the Polygonal Lasso tool (the one that makes straight line selections) and draw a selection around the large rectangular side of the truck. Once your selection is in place, go under the Edit menu and choose Paste Into, to paste the couch image into your selection. The couch will be too large, so press Command-T (PC: Control-T) to bring up Free Transform. Hold the Shift key, then grab a corner point and drag inward to scale the photo down to size. Position it near the back of the side panel, as shown, then press Return (PC: Enter) to lock in your transformation. |
|
|
| STEP 3 |
|
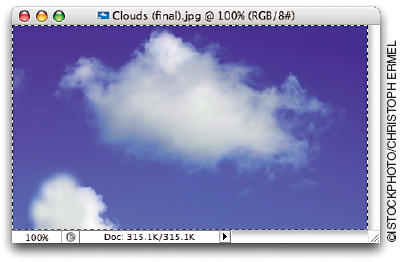
| Now open the image that will go on top (we used this cloud image). This is the image that will have its corner curled back. Select All and copy it into memory, just as we did with the couch image in Step One. Close the clouds image. |
|
|
| STEP 4 |
|
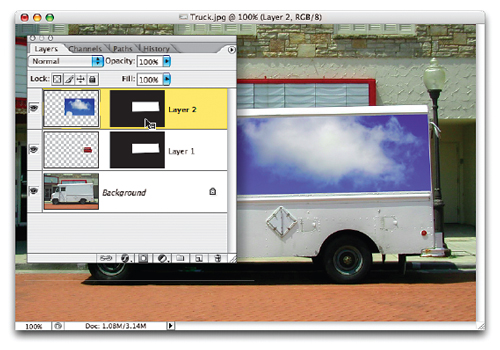
| Now return to the Truck image. Hold the Command key (PC: Control key) and click once directly on the black mask thumbnail that appears to the right of Layer 1 in the Layers palette. This brings back your original selection of the side of the truck. Now go under the Edit menu and choose Paste Into to paste the clouds into your selected area (you can see them pasted in here). This creates Layer 2 with its own mask. But you no longer need this mask so in the Layers palette, click directly on the mask for Layer 2 (as shown here) and drag it to the Trash icon at the bottom of the Layers palette. A dialog will appear asking what you want to do with this mask. Click on Apply to permanently trim your sky image down to size. |
|
|
| STEP 5 |
|
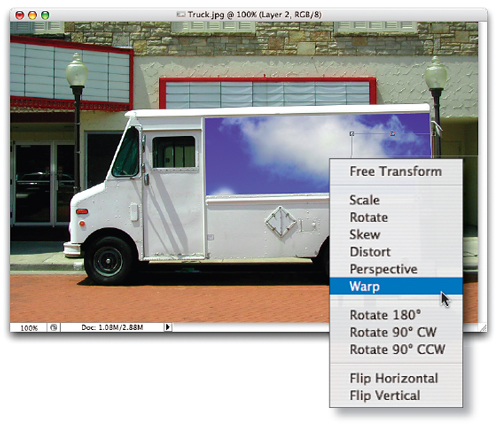
| Get the Rectangular Marquee tool (M) and drag a small rectangular selection around the bottom-right corner of your clouds layer. Then press Command-T (PC: Control-T) to bring up Free Transform (you can see the Free Transform handles appear around the area you selected). Now Controlclick (PC: Right-click) inside the Free Transform bounding box and a pop-up menu of transformations will appear. Choose Warp. |
|
|
| STEP 6 |
|
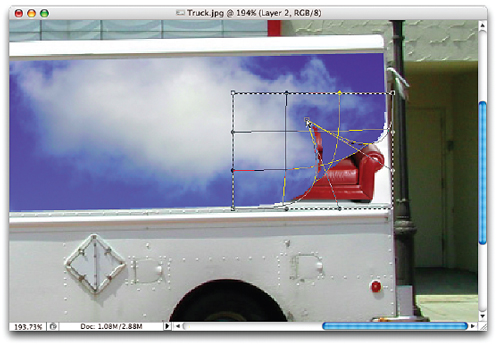
| This brings up a nine-square grid around your selected area (seen here). To peel back the corner, grab the bottom right-hand corner point on the grid and drag diagonally up and to the left (as shown) to curl the corner back. The point of the curl is too, well...pointy, but you’re going to fix that in the next step by using the two adjustment handles that extend downward and to the right from your corner point (you can see them here―they kind of form a V). |
|
|
| STEP 7 |
|
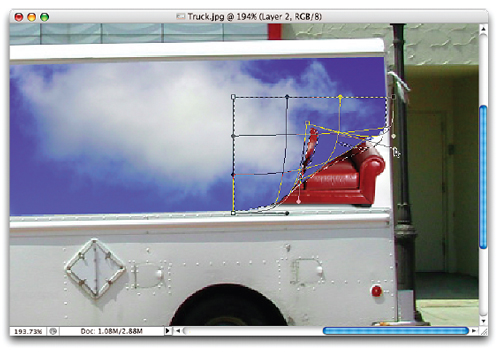
| Now take the left V handle point and drag upward to smooth out that corner. Do the same for the right V handle point―dragging upward until the curl doesn’t look so pointy. Once you try this, you’ll see that it’s pretty intuitive, and as you move these control handles, you’ll get instant feedback so you’ll be able to see what’s going on as you drag. Once it looks about right, press Return (PC: Enter) to commit your Warp. Press Command-D (PC: Control-D) to deselect. Now add a layer beneath the clouds layer (but above your couch layer). Set black as your Foreground color, then select the Brush tool (B). Use a softedged brush, lower the Brush’s Opacity (up in the Options Bar) to 40%, and paint a stroke right along the edge of the bend, so it casts a shadow onto the couch (you can see this better in the next step). |
|
|
| STEP 8 |
|
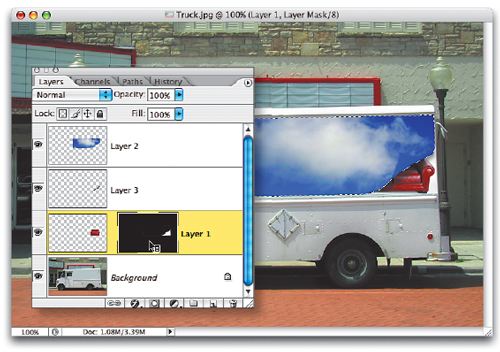
| Our clouds graphic covered up all the rivets on the truck and the top-right corner tail light. Normally, we’d just lower the Opacity of the clouds layer so you could see them a little, but if we did that now, you’ll also see the rest of the couch, so this will take an extra step. Hold the Command key (PC: Control key) and in the Layers palette, click directly on the thumbnail for the clouds layer. This puts a selection around the clouds (corner curl and all). Now click directly on the black layer mask thumbnail that appears to the right of Layer 1 (the couch layer). Make sure your Foreground color is set to black, then press Option-Delete (PC: Alt-Backspace) to fill everything but the corner of the sofa with a black mask. Deselect by pressing Command-D (PC: Control-D). |
|
|
| STEP 9 |
|
| Just a couple of things to finish up. First add some type with the Type tool (T). We used the font Helvetica Regular at 24 points, with the tracking set to -25 in the Character palette and the Opacity of the Type layer lowered to 65%. (The Type layer needs to be at the top of the layer stack.) Then in the Layers palette, switch to the clouds layer and lower the Opacity to 65%, so that the rivets and the shadows at the top side of the truck begin to show through. Lastly, get the Lasso tool and put a selection around just the little page curl, then press Command-L (PC: Control-L) to bring up the Levels dialog. Drag the top-left Shadow slider to the right to darken your selected corner curl and click OK. Then deselect to give you the final image shown here. |