|
In this tutorial you're going to learn how to make your own grunge brushes.
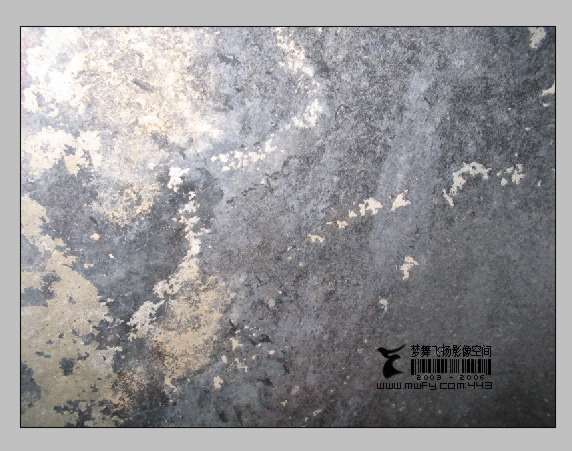
First you start with a rusty/grungy texture. You can find textures at deviantart.
or you can take some pictures on your own of course.
I found this one at deviantart, just for this tutorial. So start a new file and paste the texture into it.
Example: |
|
|
If it's not sharp enough in your opinion do this:
Go to filter - sharpen - unsharp mask...
And add these options : Amount: 500% | Radius: 0.2 px | Treshold : 0px
Now you select the lasso tool and set the feather to 30 px ( you can also try 10-50px that depends on what you want).
So you should have your options like this:

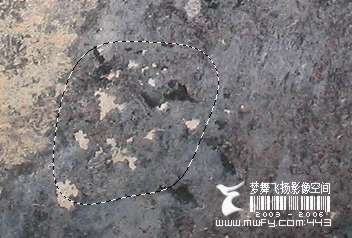
Now are going to select a part we want to make a brush of .
Example: |
|
|
|
Now we open a new file (500x500) with a transparent background. And dragyour selection into your new file.
Now we're going to modify the selection until we like it as a brush.
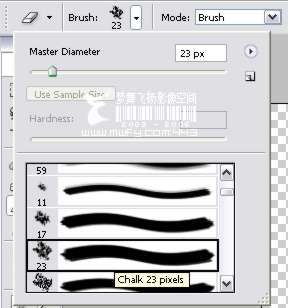
We start with the erase tool. And select a default brush.I also changed the size of the brush from 23 to 50px.
Example: |
|
|
|
Now we're going to edit some settings before we're going to erase our picture.
While the erase tool still is selected you go to the brush section (on the palette well, right above at top) where you can change some brush options
Watch the image under, where you can see the section with the options. |
|
|
|
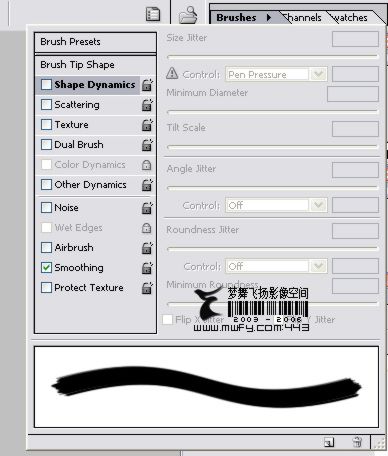
Now we start with changing the shap dynamics. Look at the example.
Example: |
|
|
|
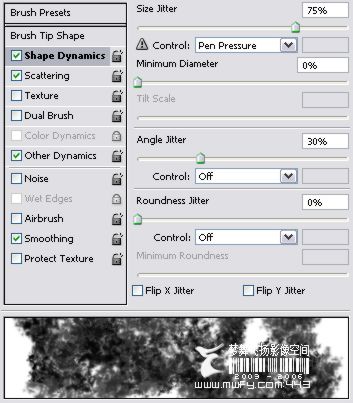
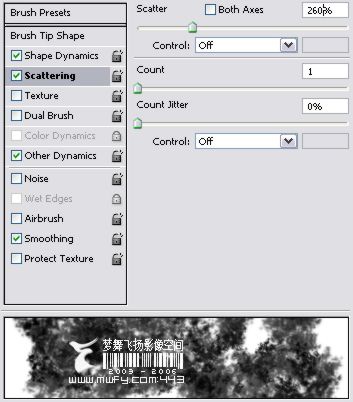
Now we start editing "Scattering". Look at the example.
Example: |
|
|
|
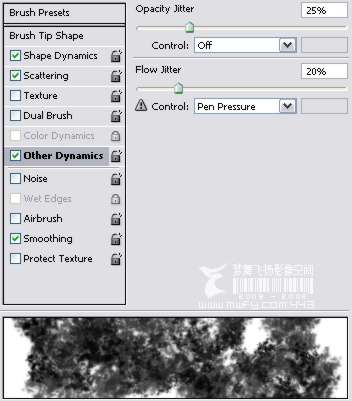
next "other dynamics". Look at dynamics again. You can also try other options of course, just mess around until you get something you like in the preview.
Example: |
|
|
|
Now we're finished with changing some brushing options in my opinion. You can still go o, like I said before.
Just don't be scared to mess around.
Now we're going to start with erasing until we like it.
But don't forget to set the erasing opacity to 50-80% . In my opinion it will look much better.
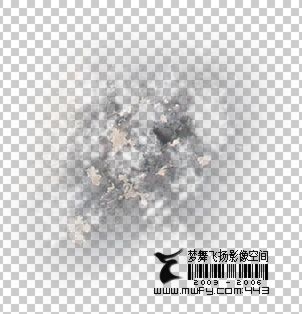
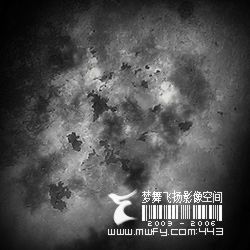
Now I did this and I came up with this.
Example: |
|
|
|
Now it's time to give it some touch ups ! I always like to sharpen it and add a blury overlay effect.
So go to "filter - sharpen - unsharp mask ..."
And add these options : Amount: 500% | Radius: 0.2 px | Treshold : 0px
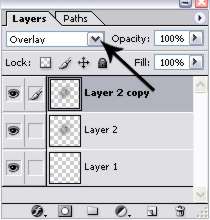
Now duplicate that layer. And go to " filter - blur - gaussian blur".
And add these options: radius: 4px. Now set this blury layer to "overlay"
Watch the image how to add the overlay to that layer!!!
|
|
|
|
Now we're almost finished.
Go to " Edit - Define brush preset".
Now a frame should pop up and you will have to give your brush a name.
Press "OK" and your brush will be at the end of your brushes list.
Now I did this and I came up with this brush. (watch example)
Example: |
|
|
|
|
Good luck !!!
|