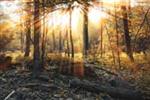
Understanding the Photoshop Technique The Ray of Light
Photoshop technique identifies the light source and blurs it to create a ray of light. Once the ray of light has been created, it is blended into the photo.
Light areas are identified |
Light source is blurred |
Ray of light blended into photo |
 Photoshop Action If you want to apply the effect without following the tutorial, download and run the Photoshop action instead.
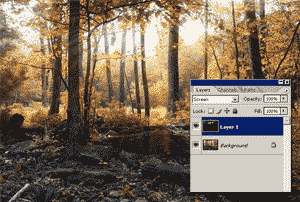
Step One Before we begin,
duplicate the current layer (Ctrl/Cmd+J) so that we have a backup layer with the original image. The first step is to separate the light source from the photo. This can easily be done by using the
Levels tool (Image> Adjustments> Levels or Ctrl/Cmd+l). Using the
Levels tool, drag the
gray input slider right so that it is overlapping the
white input slider and click
OK.

Dragging the gray input slider to the very right will make only the light areas in the photo visible.
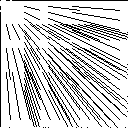
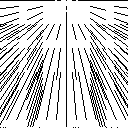
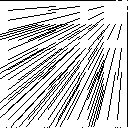
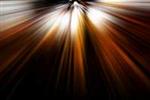
Step Two Now that we have our light source separated, we can blur it to create a ray of light. The Radial Blur filter will give us the right type of blur. Open the Radial Blur tool (Filter> Blur> Radial Blur). Set the Amount to 100, the Blur Method to Zoom and the Quality to Best.
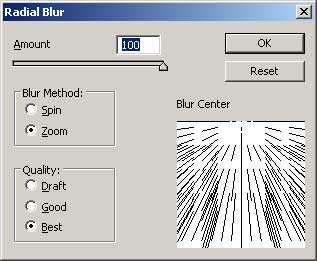
The Radial Blur filter
In the Blur Center area, click and drag the center point to where you want the blur to start. The lines from the Blur Center area will give an idea about how the light will be distorted. Here are a few examples of different settings:
For longer streaks,
apply the filter again (Ctrl/Cmd+f) until the desired effect is achieved.
Step Three Now we can blend the ray of light into the image. Because we want the dark areas transparent, we'll change the blending mode of the current layer to Screen.
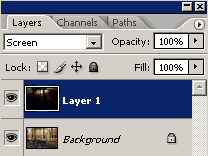
The Screen blending mode lightens areas in the layers below according to the brightness of the current layer.
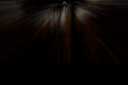
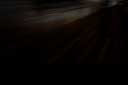
Step Four You'll notice that the ray of light is very weak and not really visible. To increase the visiblity of the ray of light, we can apply an Auto Levels to increase the contrast of the light.
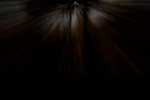
Ray of Light Layer Before |
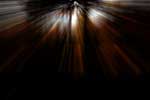
Ray of Light Layer After |
Step Five Duplicate the current layer (Layer> Duplicate Layer or Ctrl/Cmd+J) several times to increase the effect and merge the layers. For
Photoshop CS2 users, select all the layers (Ctrl/Cmd+click) except for the background layer and press Ctrl/Cmd+e to merge. Users using Photshop CS or lower may merge the layers by selecting the top layer and pressing
Ctrl/Cmd+e several times until only two layers are left.
Duplicating the layers will increase the effect.
Step Six If the ray of light appears grainy, use the Dust and Scratches filter (Filter> Noise> Dust and Scratches) with a small radius such as 1 or 2 pixels to remove the grain.
Ray of Light Layer Before |
Ray of Light Layer After |
Step SevenTo adjust the color of the light, adjust the saturation of the top layer with the Hue/Saturation tool (Image> Adjustments> Hue/Saturation or Ctrl/Cmd+U).
Saturation at -100 |

Original |
Saturation at +75 |
Step Eight Add a lens flare using the Lens Flare filter (Filter> Render> Lens Flare). Position the Flare Center to the center of the ray of light.
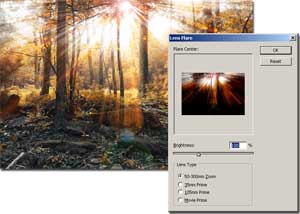
Althought subtle, the lens flare will add realism to the ray of light.
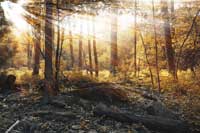
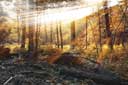
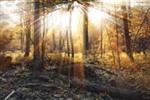
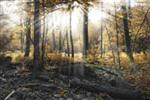
Final Results
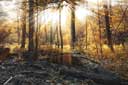
Final Results
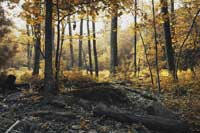
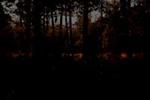
Before |
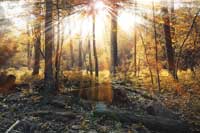
After |