|
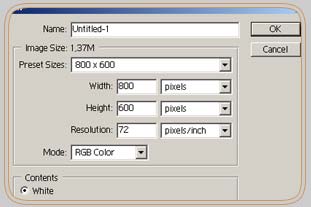
) First you have to make a new Flashpattern. For this case open a new document (File-New). 800 to 600 pixel.
|
 |
Description:
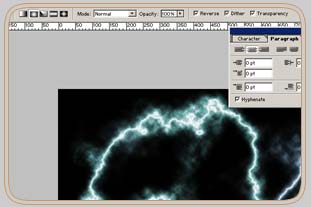
2) Now use my Lightning Tut to create a lightning. Take this link. |
 |
|
Description:
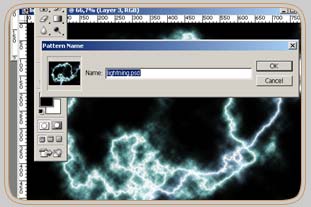
3) After generating the Lightning go to Edit-Define Pattern and click OK. If you are not willing to spend time for generating the Lightning you can use my pic ¡°lightning.jpg¡± which I put in the zip File you just downloaded.
4) Just open it and go to Edit-Define Pattern and click OK! That¡¯s it. Now the Tut starts.
|
 |
|
Description:
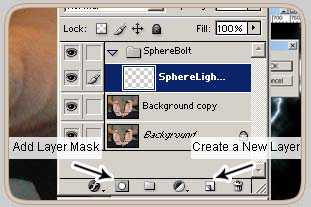
5) Open the file „handsspherebolt.jpg¡°. Copy this layer and name it ¡°Background copy¡±. Create a new Set (name it ¡°SphereBolt¡±) above the Layer ¡°Background copy¡±. Click on this Set and create a new Layer (name it ¡°SphereLighten¡±) inside the Set. |
 |
Description:
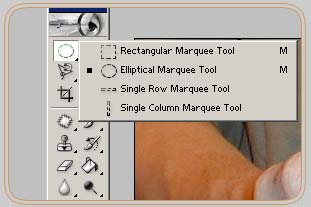
6) Take the Elliptical Marquee Tool (Press M on PC). |
 |
Description:
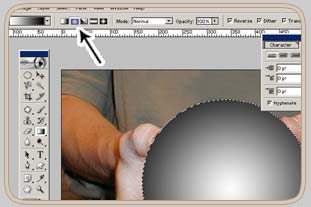
7) While holding down the Shift Button make a sphere like selction. Fill this Selection with the Radial Gradient Tool.
8) Maybe edit the Brightness and Contrast of the Sphere (Edit - Adjustments - Brightness/Contrast) in order to get it lighter. |
 |
|
Description:
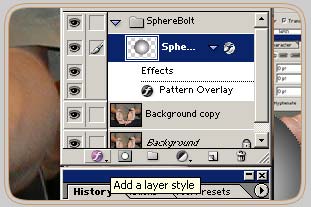
9) Now go to Add Layer Style and apply ¡°Pattern Overlay¡±. |
 |
|
Description:
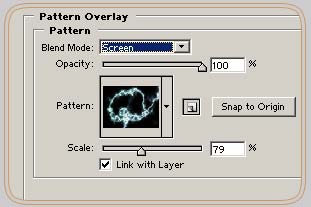
10) Chose your Lightning Pattern and play with the settings till you are satisfied with your result. Click OK.
11) Go to Filter-Blur and Gaussian Blur your pic with radius 3. |
 |
Description:
12) Set the Blending Options to Lighten. Fill to 44%. |
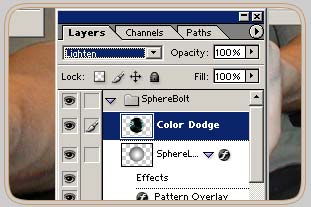 |
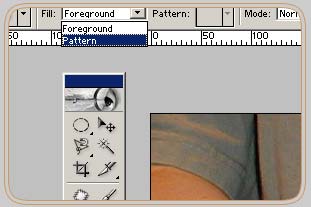
Description:
13) Create a new Layer above the SphereLighten Layer and name this layer ¡°Color Dodge¡±. Take the Paint Bucket Tool and switch the Fill Settings to Pattern. Choose your Lightning Pattern and Fill the image. |
 |
|
Description:
14) Press M to get the Selection Tool. Now click on your ¡°SphereLighten¡± Layer while holding down the CTRL Button in order to get the Elliptical Selection. Right click on that selection and choose Select Inverse and delete the stuff outside the selection. |
 |
|
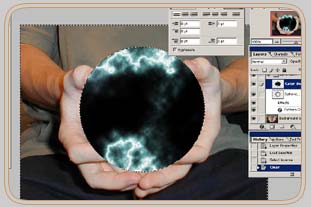
Description:
15) Set the Blending Option to Lighten. Go to Filter-Blur and Gaussian Blur your pic with radius 3. Maybe add some more details like the bright thing I added in the center of the Sphere and also set the Blending Option to Lighten. Be creative and don¡¯t try to add exactly the same things that like I've done. |
 |
|
Description:
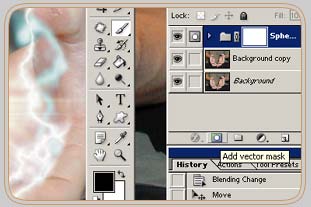
16) Now here comes the tricky part. Your intention has to be, blending the fingertips over the Sphere so that it looks smooth and real. So click on the Button shown on the right and Add a Vector Mask to the Set ¡°SphereBolt¡±. Take the Brush Tool (color black) and paint over the fingertips that lie over the Sphere. |
 |
|
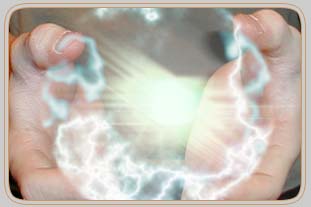
Description:
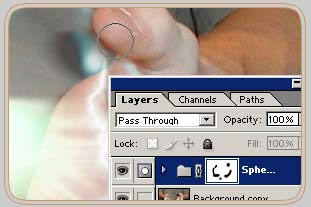
17) Repeat this step with all the elements that intersect each other. You¡¯re done! Here are two of my results. |
 |


