plastic button effect
[ 作者来源:voidix
编辑整理:
PhotoShop资源网
更新时间: 2006-08-01
录入: 黄叶飞扬 ]
In this tutorial I will show you how to make an easy but effective plastic style navigation bar like the image below:

The first step is to make a new image, about 200x200 ppx depending on how big you want your nav to be. Use the square selection tool to make a rectangular selection like the one below.
Now make a new layer.

Change your forground color to a very light gray. Now get out your gradient tool. Change the gradient setting to "Fore-ground to transparent"
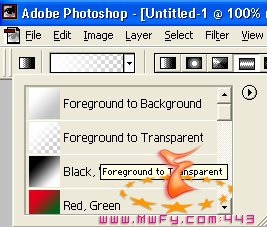
Now use your gradient tool to make a grey gradient making sure that the grey starts from the top and fades out to the bottum. Now make a new layer and use the same method to make a small white gradient starting from the dop and fading out in about the middle section of the button.
Now that we have our gradients all done we are going to give our button a nice border. So, keeping the same selection go to edit>stroke.
Make the size 1px
the color a medium grey
the layer style normal
and make it stroke on the inside
Your image should look like mine.

Now, merge your layers except for your bg layer. Duplicated your layer by selecting "duplicate layer" on the layer drop down menue. Keep duplicating your layer and positioning your buttons until you have enough to satisfy you.
Your image should look similar to mine:

Now I added a nice grey rectangle behind my buttons to help seporate it from the rest of my page.

And just to make it a little more interesting I add a slightly lighter rectangle behind the last one.

The nest step is to add a small medium gray box at the top for a title bar.

And latly, to add your text.

Now you are all done. You have learned a simple and effective way to make a nice professional navigation bar.
≡★ 免 责 声 明 ★≡
除本站原创外,本站所提供的所有教程均收集整理自网络,其版权归该教程直原始作者或原始出处所有!
除特别声明外,您可以在保持教程的完整和注明来源的前提下免费复制、转贴本站所提供的所有教程;但是,不可以盗链本站的图片!
除特别声明外,在未经许可的情况下您不得将本站所提供的任何教程(包括资源)用于商业用途;
如果确有需要,请自行与该教程的原始所有权者(即:原始作者或出处)联系,本站不提供相关服务;否则,由此而引发的一切后果由您自负!


