| |
 |
|
1.
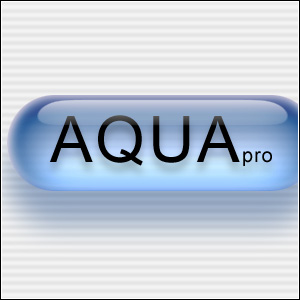
This tutorial is a very close replica of the famous Aqua button. It's not recommended for novice Photoshop users because it doesn't explain how to make each and every single detail. |
| |
 |
|
2.
On a new layer create a pattern as show in the picture. Use 10-15% layer Opacity.
|
| |
 |
|
3.
On a new channel create a pill-shaped button. In order to complete this tutorial, the pill must be 311x96 pixels in size.
|
| |
 |
|
4.
Load selection² from the pill channel. Create a new layer and fill the selection with R: 65; G: 113; B: 166; HEX: 4171A6; using the Paint Bucket¹ tool.
|
| |
 |
|
5.
Apply Inner Shadow (Layer > Effects > Inner Shadow) layer effect to the pill layer as shown in the picture.
|
| |
 |
|
6.
Apply Inner Glow (Layer > Effects > Inner Glow) layer effect to the pill layer as shown in the picture.
|
| |
 |
|
7.
Select Layer > Effects > Create Layer to separate the layer effects to a new layer.
|
| |
 |
|
8.
Apply Bevel & Emboss (Layer > Effects > Bevel and Emboss) layer effect to the pill layer as shown in the picture.
|
| |
 |
|
9.
Apply Inner Shadow (Layer > Effects > Inner Shadow) layer effect to the pill layer as shown in the picture. Use the color R: 240; G: 208; B: 224; HEX: F0D0E0;
|
| |
 |
|
10.
In the Layers palette make the layer called "Layer 1's Inner Glow" active. Using the Rectangular Marquee¹ make a rectangular selection all around the pill as shown in the picture.
|
| |
 |
|
11.
Select Edit > Transform > Scale. Stretch the selection 125% vertically. Press Enter to apply changes.
|
| |
 |
|
12.
Load selection² from the pill channel again. Contract selection (Select > Modify > Contract) by 10 pixels twice. Feather selection (Select > Feather) by 10 pixles.
|
| |
 |
|
13.
Create a new layer. Fill the selection with white using the Paint Bucket¹ tool. Set Blending Mode to Color Dodge and its Opacity to 35%. Shift it down as shown in the picture.
|
| |
 |
|
14.
Load selection² from the pill channel. Having the new layer with Color Dodge active, press the "Add Layer Mask" button located at the bottom of the Layers palette.
|
| |
 |
|
15.
Apply the Gaussian Blur filter (Filters > Blur > Gaussian Blur) to the layer with Color Dodge. Use a value of 10.
|
| |
 |
|
16.
Make the blue pill layer active and Add mask² to it. Repeat step number 12. Having the pill's mask active, fill the selection with R: 166; G: 166; B: 166; HEX: A6A6A6; using the Paint Bucket¹ tool.
|
| |
 |
|
17.
Having the pill's mask active apply the Gaussian Blur filter (Filters > Blur > Gaussian Blur). Set the Radius value to 20 and press OK. Set Opacity of the pill layer to 95%.
|
| |
 |
|
18.
Load selection² from the pill channel. Contract it by 5 (Select > Modify > Contract).
|
| |
 |
|
19.
Usingthe Rectangular Marquee¹ tool subtract² the bottom part as shown in the picture.
|
| |
 |
|
20.
Create a new channel² and fill the selection with white using the Paint Bucket¹ tool. Apply the Gaussian Blur filter (Filters > Blur > Gaussian Blur). Set the Radius value to 10 and press OK.
|
| |
 |
|
21.
With the new channel active, in the main menu select Image > Adjust > Levels. Set the Input levels values to 120, 1, 132 and press OK. Load selection² from the result channel.
|
| |
 |
|
22.
Create a new layer. Reset colors to black and white (press 'D'). Using the Linear Gradient¹ tool, make a gradient from the bottom of the selection to the top. Set Blending Mode to Screen and Opacity to 65%.
|
| |
 |
|
23.
Select Edit > Transform > Scale to scale the layer down horizontally to 95% of its original width. Press Enter to apply changes.
|
| |
 |
|
24.
Using the Type¹ tool, enter "AQUA". Use Arial regular, 65 pixels size. Apply the Drop Shadow layer effect (Layer > Effects > Drop Shadow) as shown in the picture.
|
| |
 |
|
25.
For the shadow use R: 72; G: 111; B: 166; HEX: 486FA6; color, Multiply Blending Mode and 50% Opacity.
|


