Segmented and Curved Pipes
[ 作者来源:purephotoshop
编辑整理:
PhotoShop资源网
更新时间: 2006-07-18
录入: 黄叶飞扬 ]
By request, I've put together this tutorial on how to create some pretty nice looking
segmented pipes that bend and intertwine. Its pretty simple so lets get started.
1.
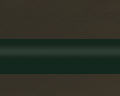
Create a new RGB document about 640X480 pixels or if you want to go ahead and make it a wallpaper size, feel free. Now lets go ahead and make a pretty decent background for it. Set #323232 as your foreground and #A49B75 as your background color. Now go to filter>Render>Clouds, after that go to
Filter>Blur>Gaussin Blur and blur it a bit to smooth it out.. Now duplicate this layer and then go to Edit>Transform>Flip Horizontal and lastly, set its blend mode to 'Multiply'. These steps aren't to important, they just give us a basic canvas to work on. Keep playing around with it if you want a different color background or a different texture. I got something like below:

2. Now lets move on to the pipe,
Create a new layer above all the rest and name this layer 'PIPE_base' ... Now grab your rectangle marquee tool and draw out a rectangle selection as if you were creating a horizontal pipe. Ok, a few tips..When working with colors I like to start off with a real deep, half saturated color. These type of colors tend to turn out best for me, but by all means experiment. Ok, I chose #06180E and then press alt+backspace to fill the selection with that color. Now, some more advice.. When working with colors I use the dodge tool paired with Linear Dodge, Color Dodge, Linear Burn and Color burn Brushes. They each have a different effect on the color. For this we will start off with the dodge tool. I set my Range: Shadows and Exposure to 25% , brush tip to a 13 pixel soft brush, and made 1 swipe across it. We are done with the dodge tool for now. All we wanted to do with it was bring out a tad bit of lightness so our other brushes could be more
effective.
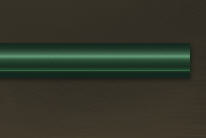
3. Now ctrl Click your 'Pipe_base' layer and then grab a 21 pixel soft brush and up at the top set the Mode: Linear Dodge, Opacity: 46%, Flow: 43% (feel free to experiment). Now run across it a few times with the linear dodge brush, you will see that the green color is
starting to get richer and come out more. Now swap your brushes mode over to color dodge, then set your foreground color to a light green shade, I chose #E3F9ED, same settings and swipe it a few times until you get something you like. Then grab a smaller brush and create a finer highlight closer to the bottom of your pipe. Keep alternating your brushes, there is no set method here, just whatever works best for you.
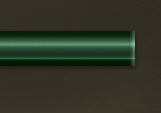
4. Now we want to add some shadows and an edge effect to it. Set your brush to about a 13 pixels soft brush and set its mode to 'Color Burn', now set the opacity to about 11% or so and swap your color back to a real dark green, I chose #0D1912.. Now you might be saying, How does he know what colors to pick? I'll say, I don't , I just pick one that I think is around what I need, hence experimenting. Now around the top and bottom edges, start to darken that up a bit with your Color Burn Brush. Then swap back to your color dodge brush and a light green and dodge the left and right edges a bit. Here's what I got:
5. Now lets add the segments to it.
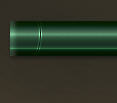
Create a new layer above your PIPE_base layer and then grab your circular marquee tool. Hold shift and draw out a decent sized circle and then go to Edit>Stroke and apply a 1 pixel black stroke to it.. Now duplicate this layer and press Ctrl+I to invert it. Now duplicate your white ring again and move it back 2 pixels and you should have a White|Black|White combination for your ring.. Its not as confusing as it sounds, basically 2 white lines and one black line in the center. Now link these layers together in your layers pallete by putting the little 'Chain Link' icon in there box and then click the little arrow in the top right corner of your layers pallete and select 'Merge Linked, Now set there blend mode to overlay and then move the circle all the way to the left where one side is hanging off the pipe. Now ctrl+click your pipe layer and then press Ctrl+shift+I to invert your selection and then press delete on the layer with your rings. Name this layer 'PIPE_inset'.. I know that was a lot of small steps, but the result is
pretty simple:
5. Now all we want to do is just keep duplicating this layer to create more segments.
First lets put it in a layer set so we can merge them pretty easy later.
Create a new layer set above all your layers and then move your 'PIPE_inset' layer into this layer set, now just keep dupicating and moving the inset to create more segments along your pipe. Here's what I got:

Now click the little arrow up in the top right of your layers pallete and select, 'Merge
Layer Set'.. Now you might have to reset your blend mode back to overlay and you should be ok. Now we want to merge the insets with the pipe so they bend with it when we bend our pipe. Link the 'PIPE_base' layer and your newley created layer with yoru segments on it and then select 'Merge Linked' from the
menu (you know where the
menu is by now). Now we got our pipe, lets duplicate it a couple of times and hide those layers so we can make different variation of our intertwined pipes. I created a couple copies and named them PIPE1, PIPE2, and PIPE? you guessed it, 3...
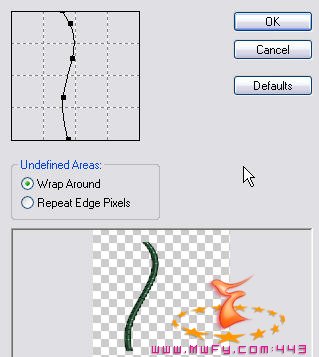
6. Now select one of your pipe layers, they should all be the same and then go to
Edit>Transform>Rotate 90% CW. Then go to
Filter>Distort>Shear.. Don't over shear it or your pipe will look all distorted and ugly. Here are my settings:
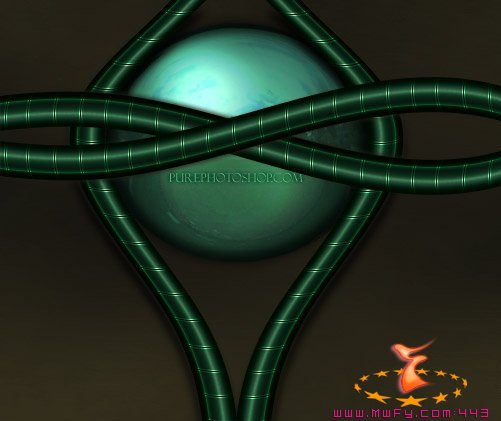
Now just keep duplicating your pipe's and shearing them and cluster them together. I added a trendy sphere object to mine and used my pipes to countour around it.
Now do your self a favor and forget what mine looks like and try to use the methods
to create something of your own... Good luck!


